
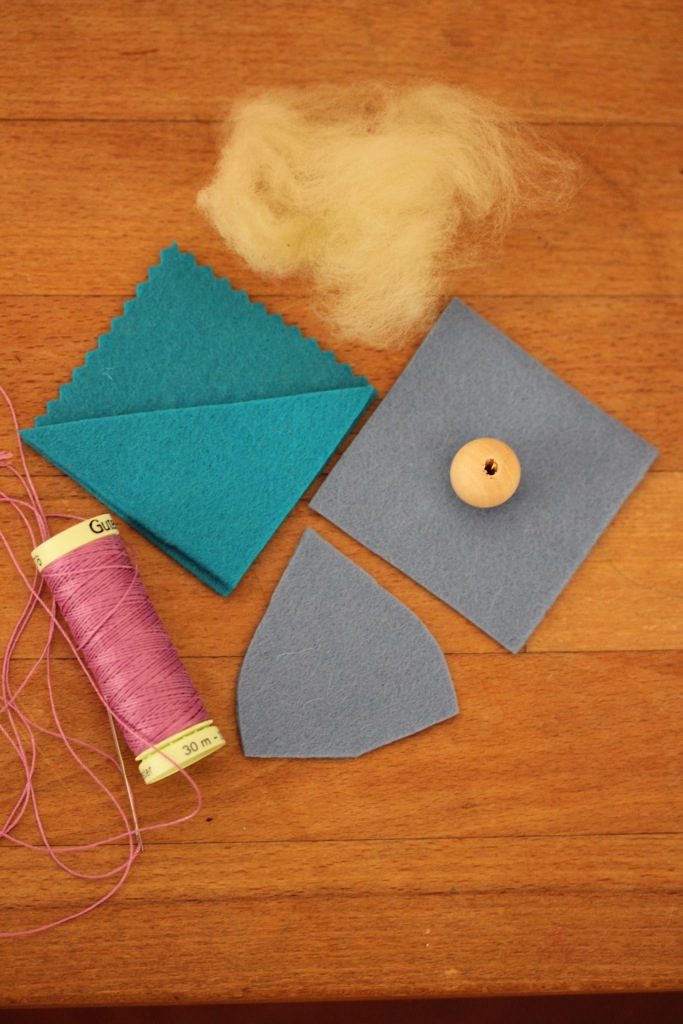
assemble materials
- cut yourself a pattern of the square body {6cm} and cap {5×2.5cm} has come curvature to it
- two colors wool felt fabric
- a wooden bead for the head 12mm or so
- thread and needle {if child is making it, be kind and use bigger needle and thread/embroidery floss}
- scissors
- fluff to stuff {wool or cotton wool}
- craft glue

cut pattern pieces
1x square for body
1x cap in matching color
1x square for pocket
1x triangle for pocket front
mark centre of doll’s body and firmly attach wooden bead head upright
use a dab of non toxic craft glue to secure the thread in the position of the ear line

stitch seam of the cap {i prefer blanket stitch, but over stitch is equally good and easier for children who are at the beginning of their crafting life}
insert a finger into the cap to open it out in readiness for the head bead
use a dab of glue to secure the cap on gnomes head ensuring you cover the strings


begin at one hand and stitch around the body two thirds of the way to the other hand
stuff your gnomes body with fluff

continue to stitch to other hand and bind off
tie off hands at the wrist with a little string
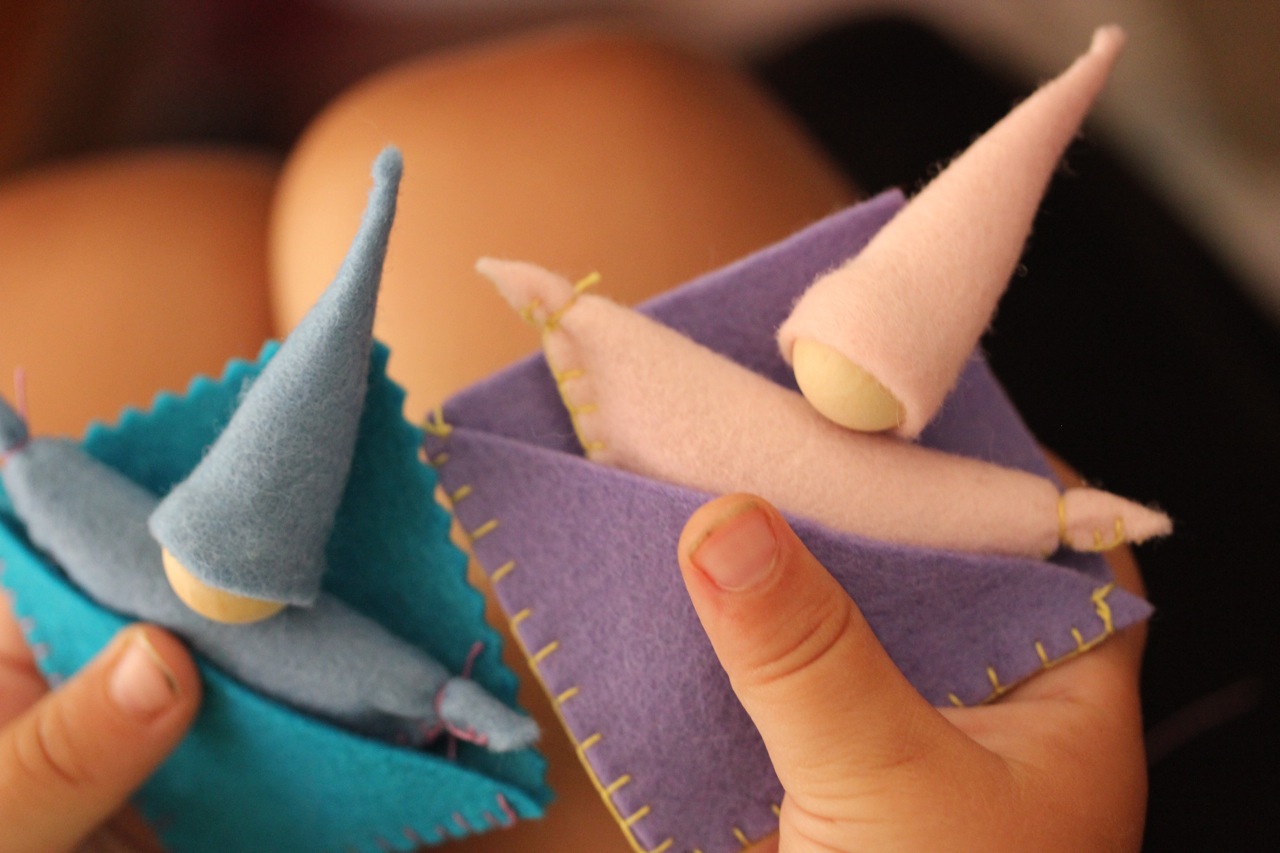
your gnome is complete, Yay for you!!
decorate if you wish

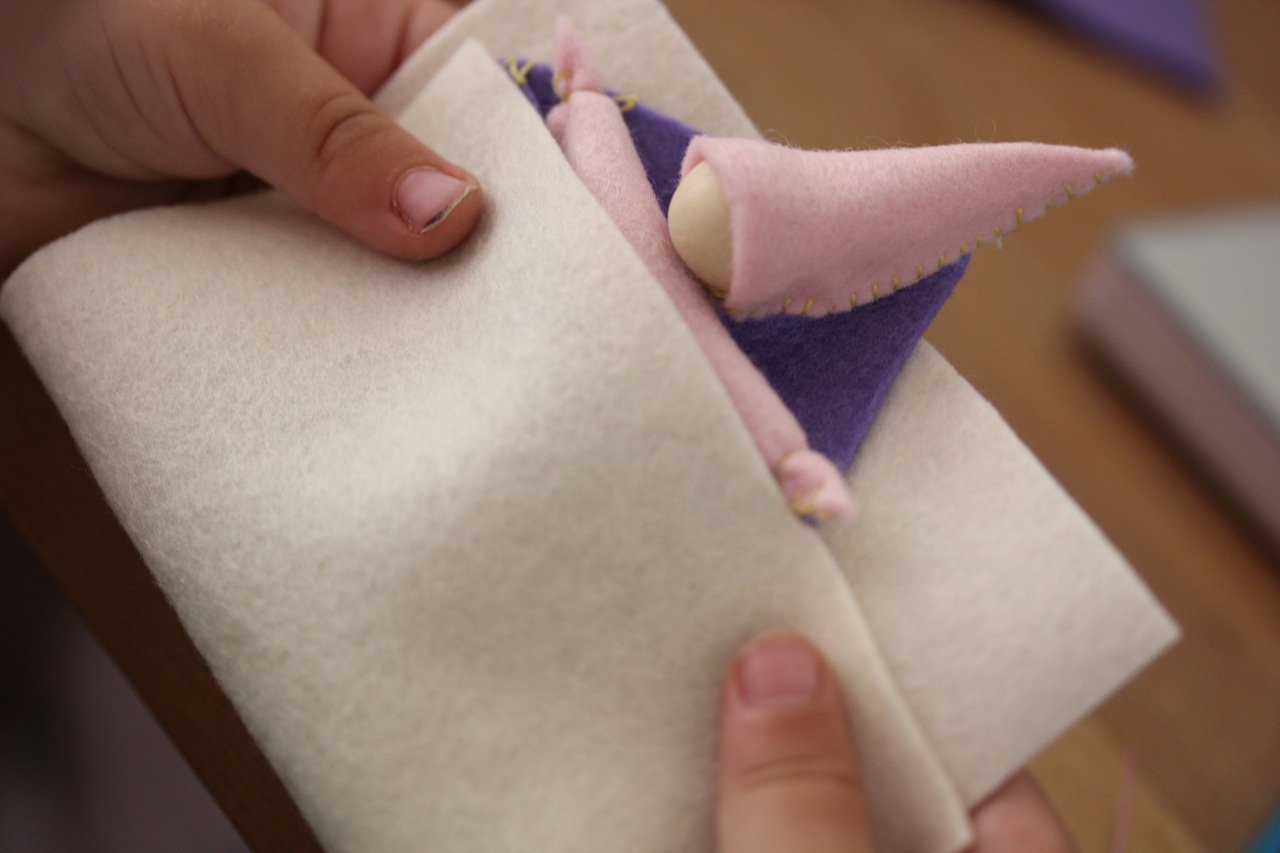
to make the pocket lay your triangle piece over the diamond piece and stitch the two outer sides
decorate with fancy stitchin if you wish {stars, flowers, colorful lines, beautiful embroidery etc}
{children can do ‘dolphin stitch’ simple in and out stitch in a line, like a dolphin diving up and down for decoration}

then pop your little gnome into bed!
too cute!
very sweet gifts, children’s activity, stocking fillers and a friend for special times
in a childs {inner children too} life when they need a comfort in their pocket


The visual of each step really helps. Love the pocket gnome tea party! Thanks Rosie.
thanks for the feedback Tali
i hope everyone goes alright with the project!
the table will be brimming with sweetness!
That is super cute and looks easy enough that I think I could manage it! 🙂
that’s great! my aim is to bring simple sweet things to share. i’d love to see if you give it a go!
happy crafting
Roselinde
Very well done tutorial, these are really cute.
thankyou, i am really keen to develop this tutorial/craft sharing side of my blog!
Roselinde