


Category Archives: makings
Makings in Advent/Cinnamon star recipe
Makings in advent.
Air dried clay ornaments,( in between arguing over who had more clay)the children had a great time making me guess what implements had made what impressions. We used cookie cutters to cut them out and they took 2 days to dry thoroughly. 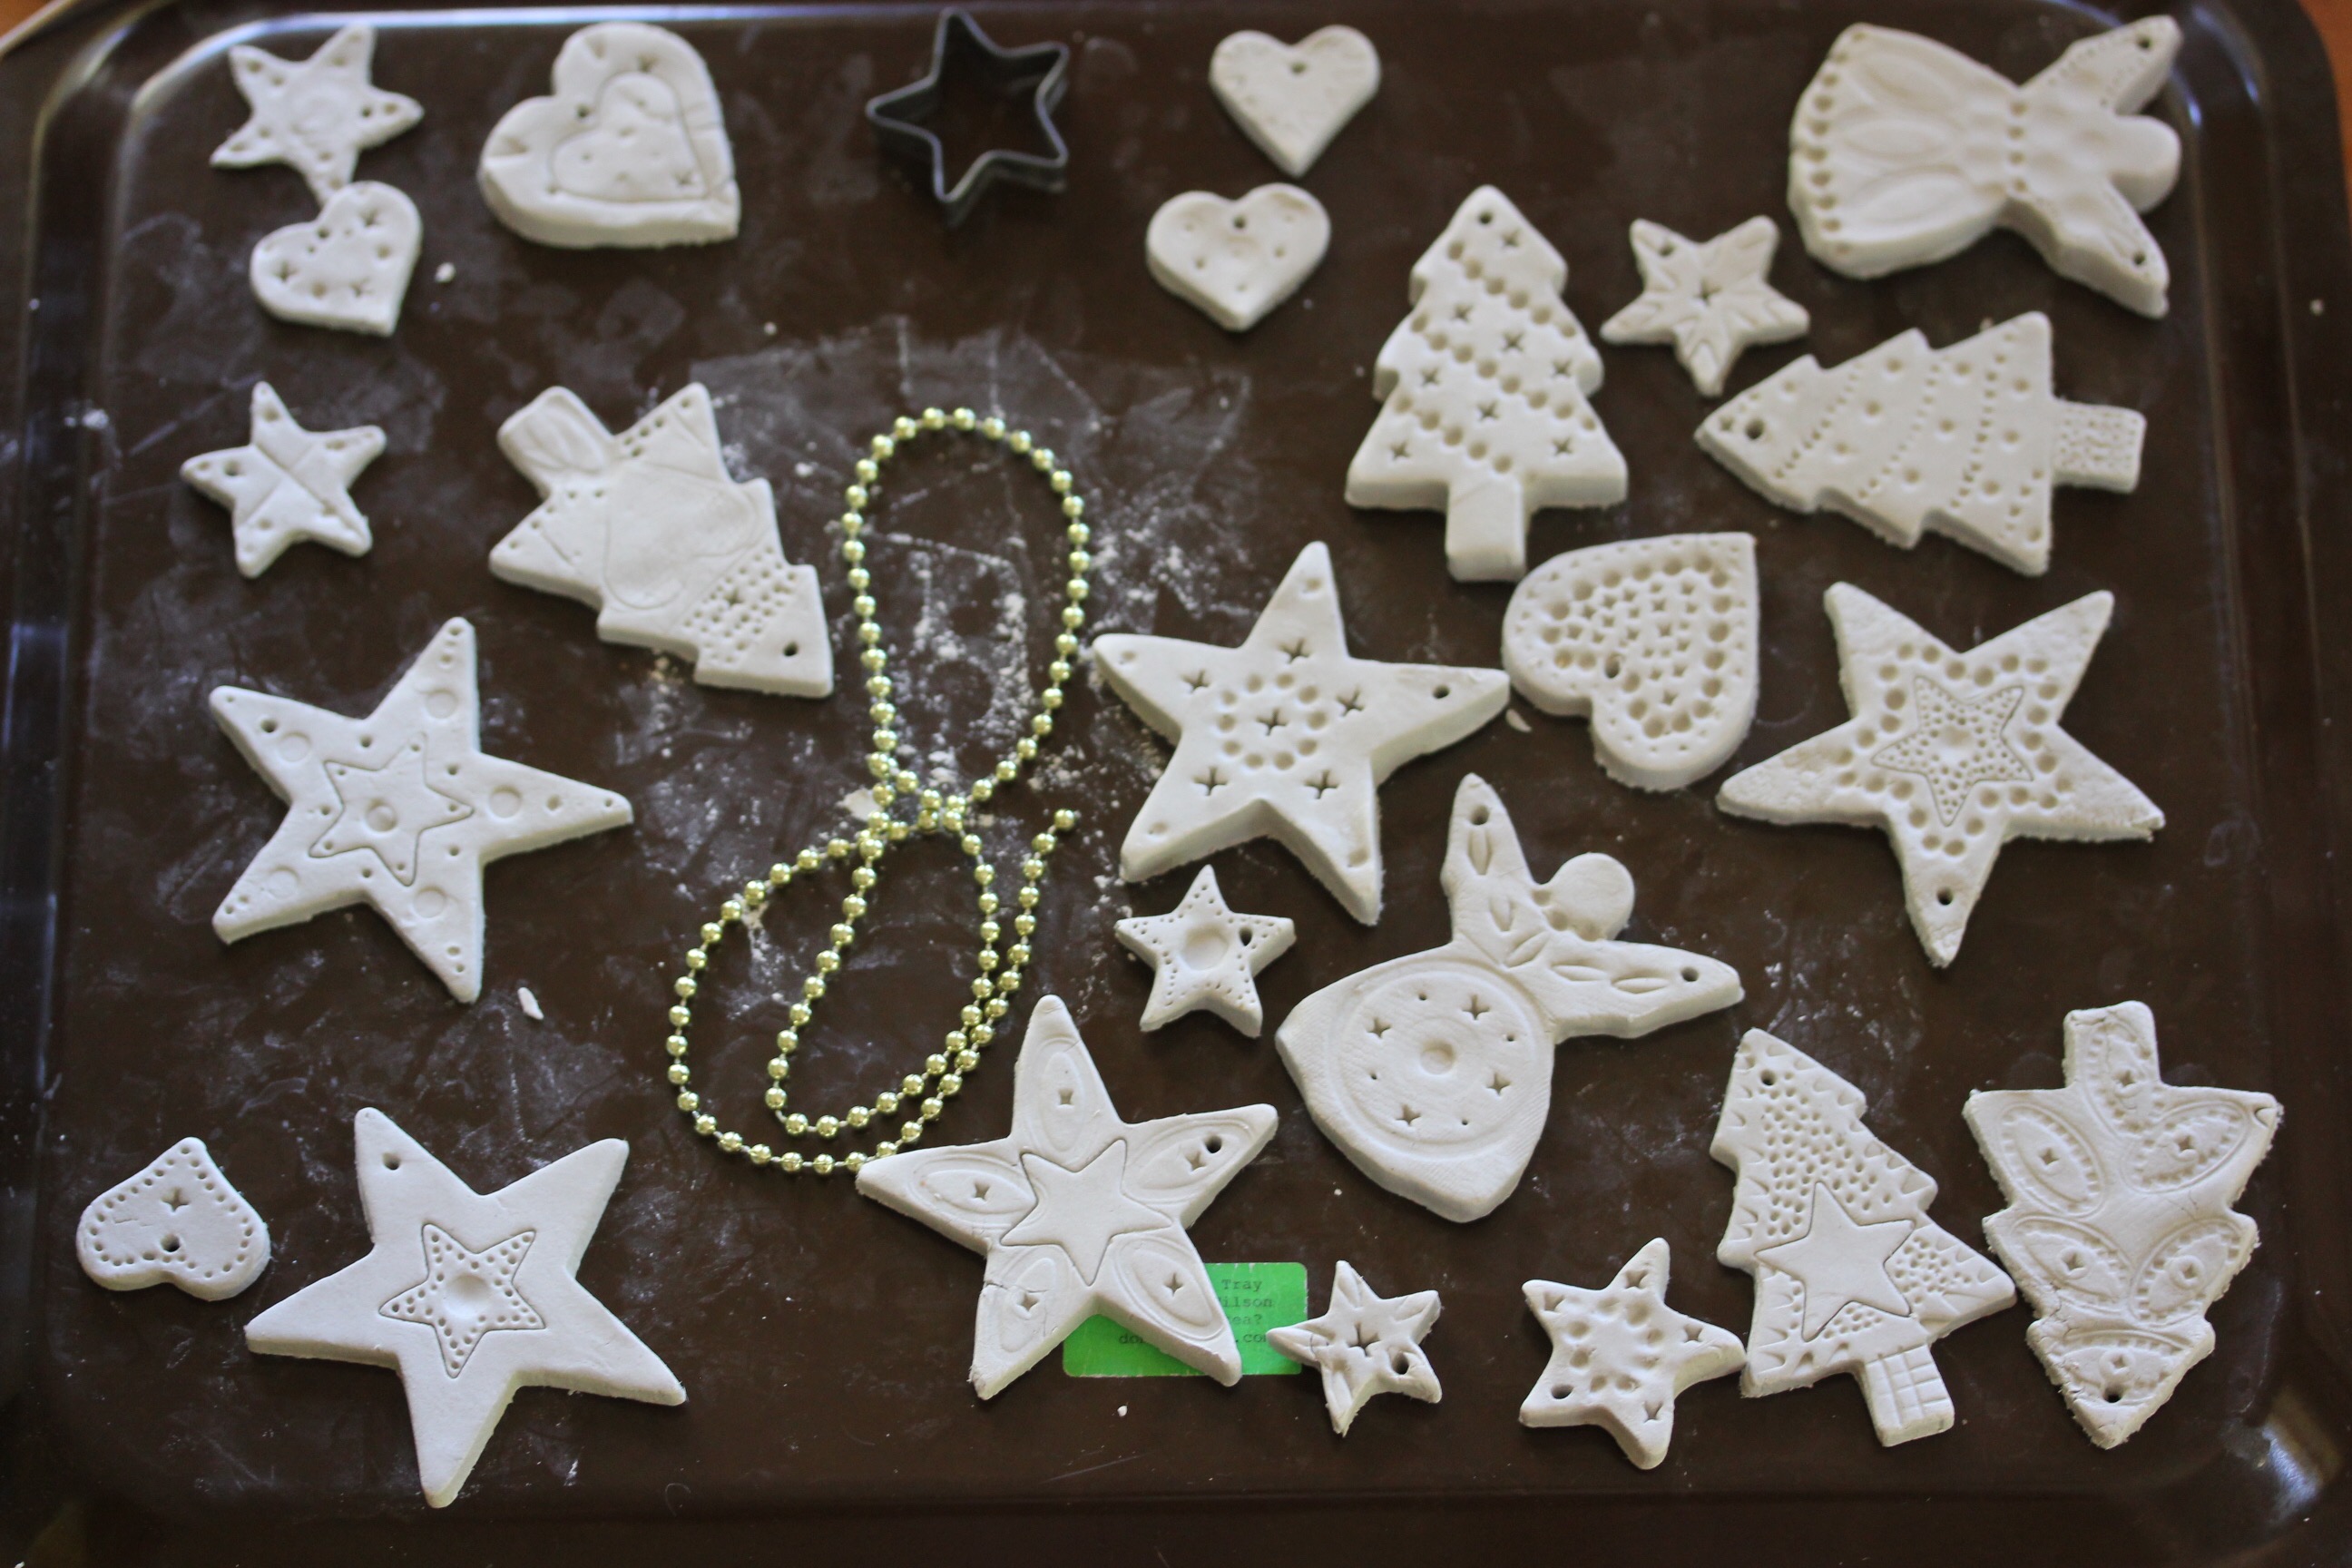
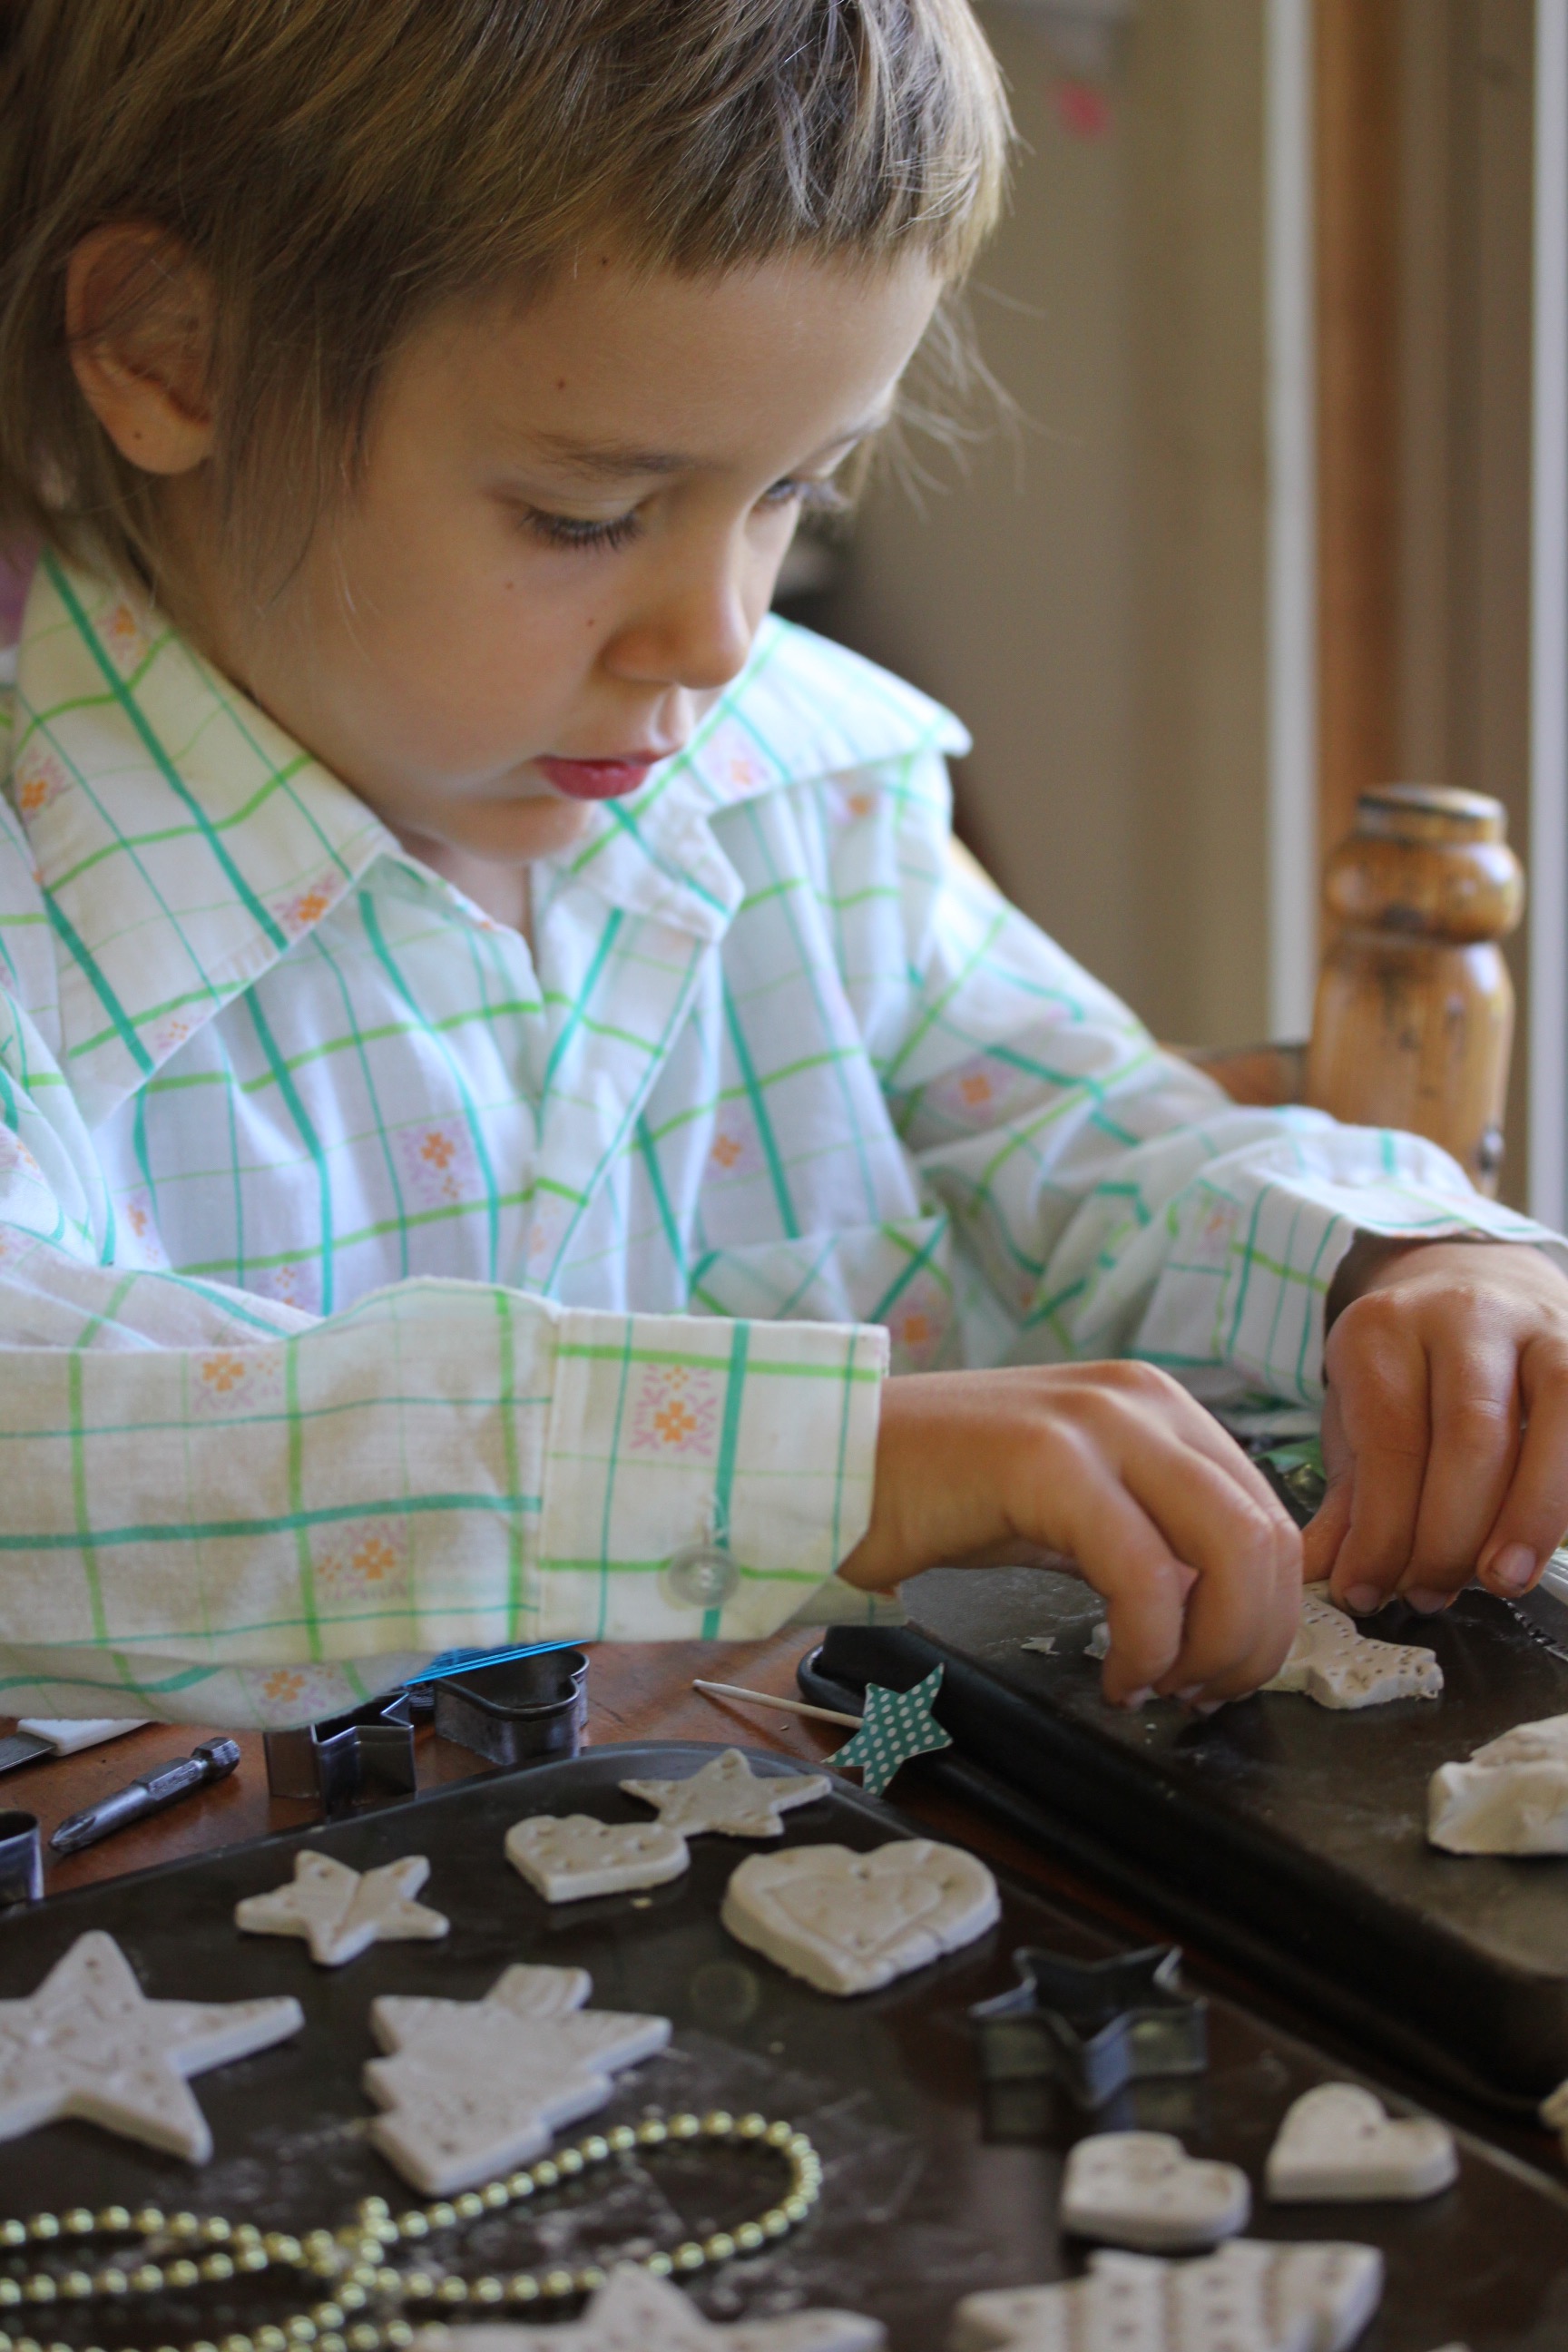
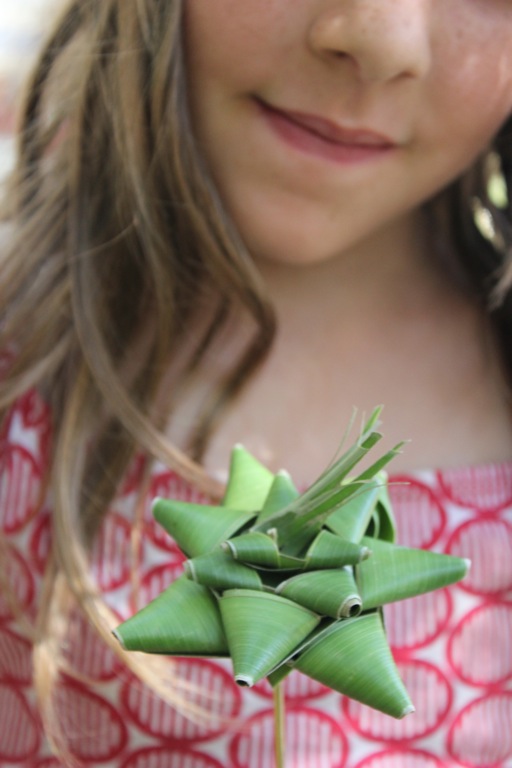
 So many stars…
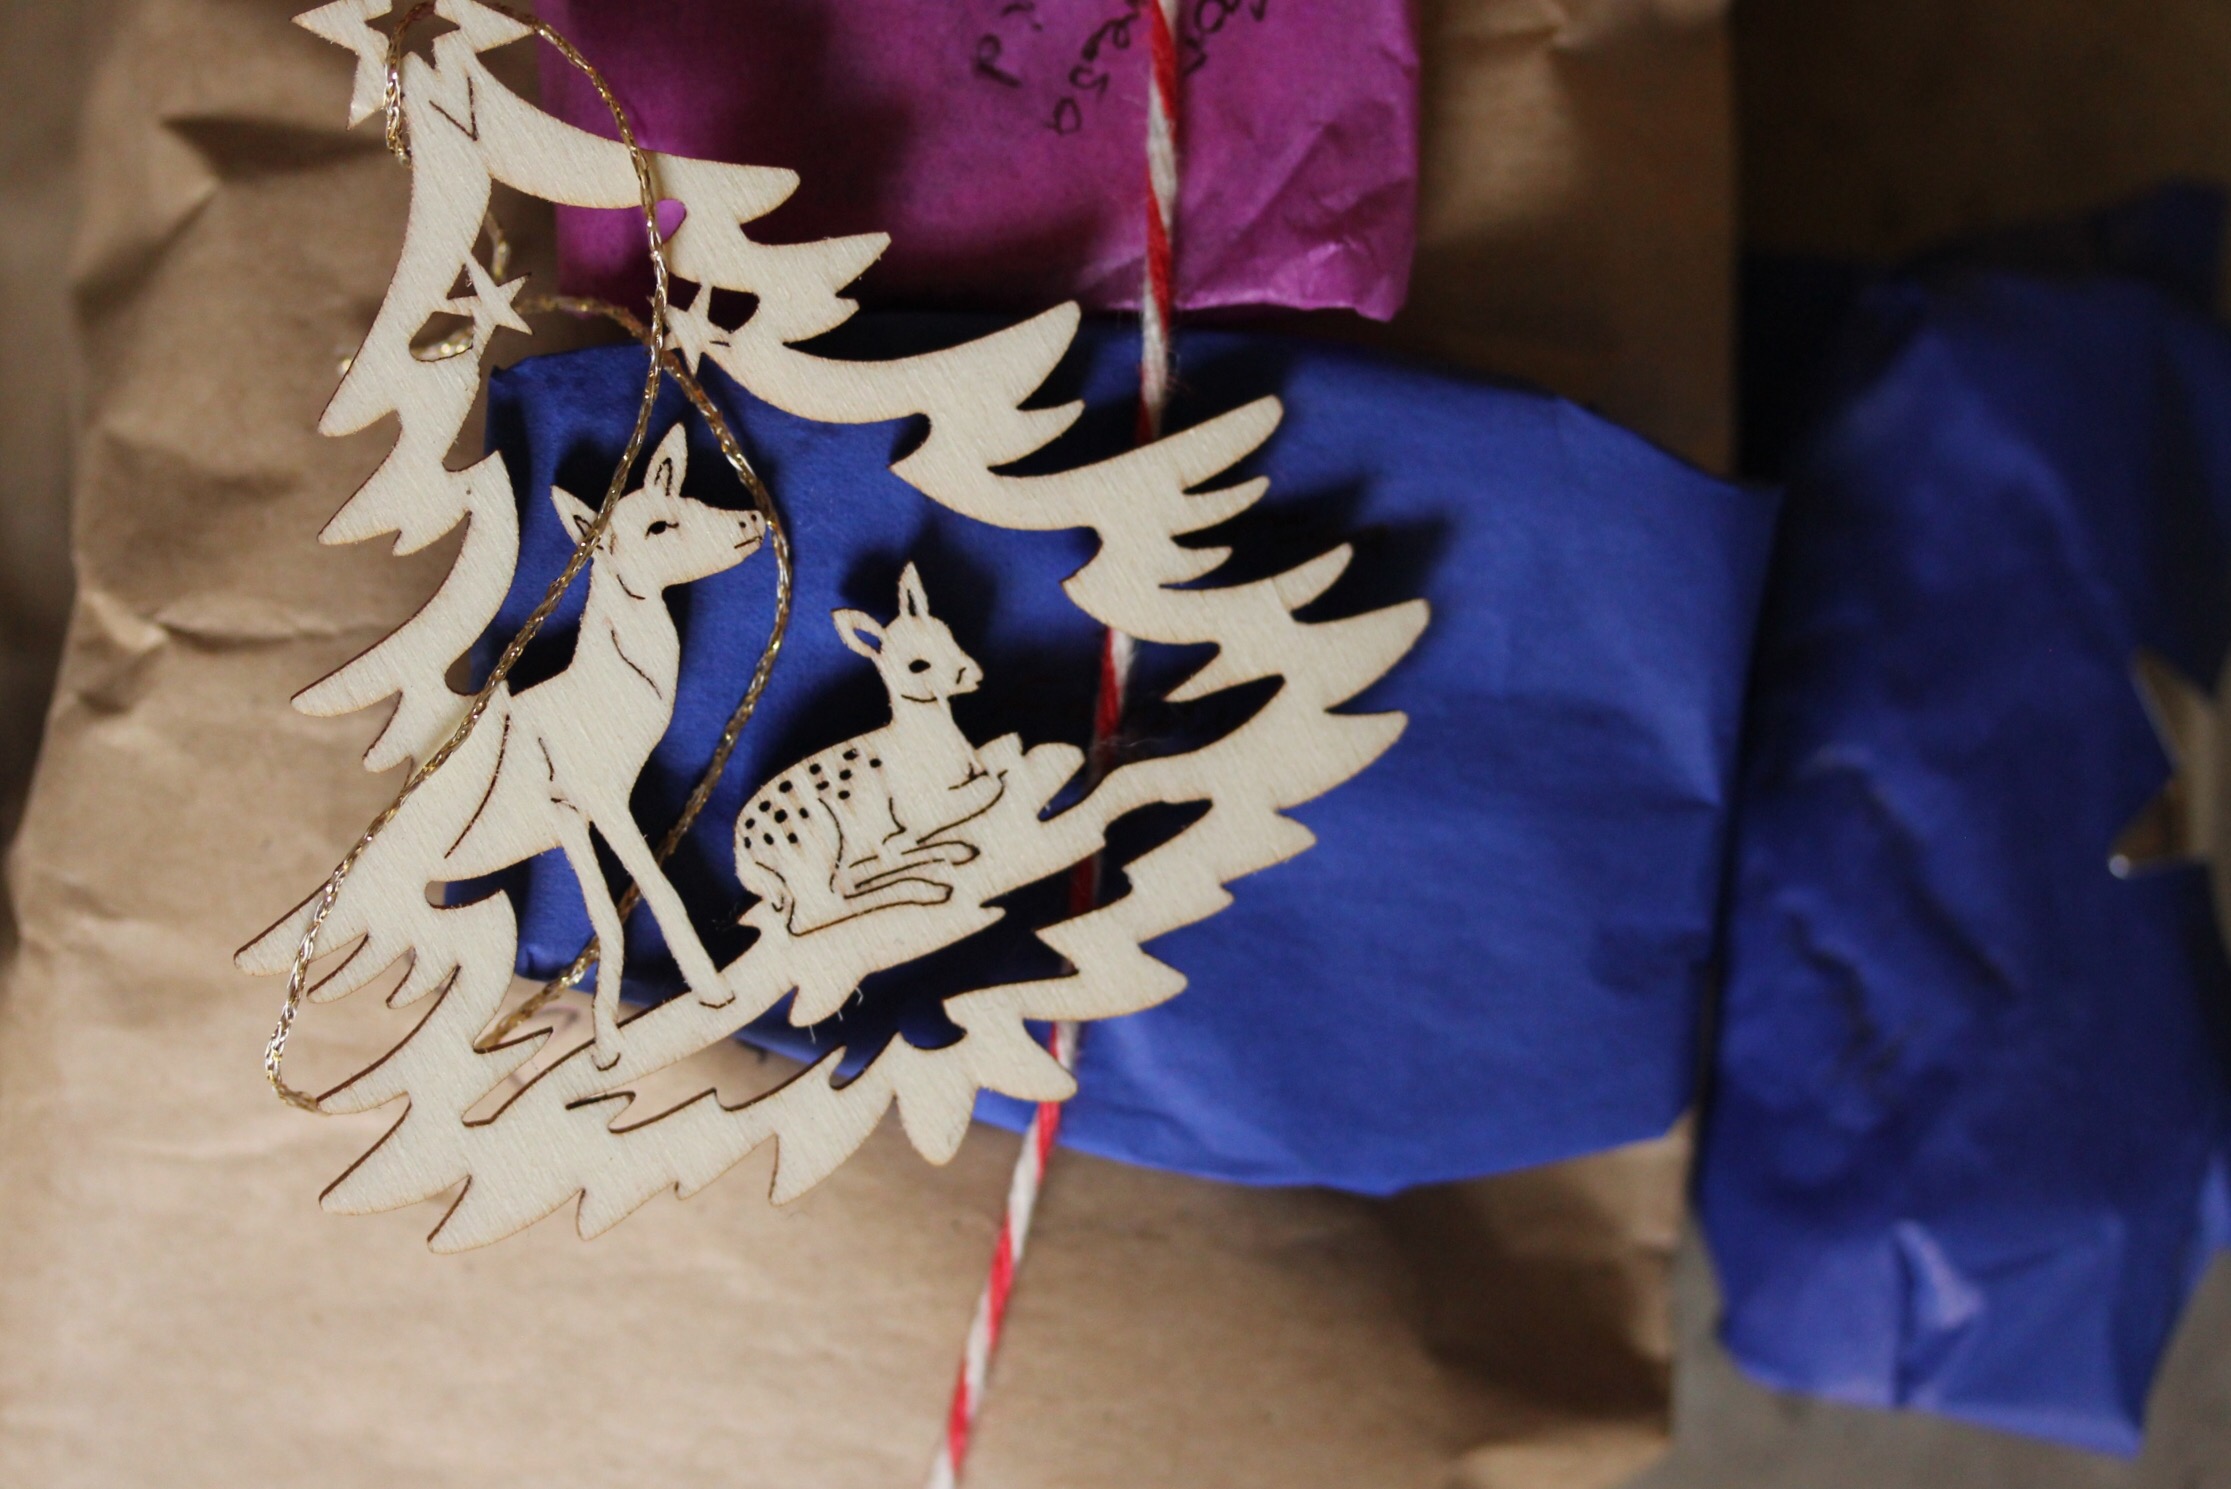
Sweet Swiss wood cut decorations from our time in the Interlaken region this year.
lily made her own cosy house transparency one morning. 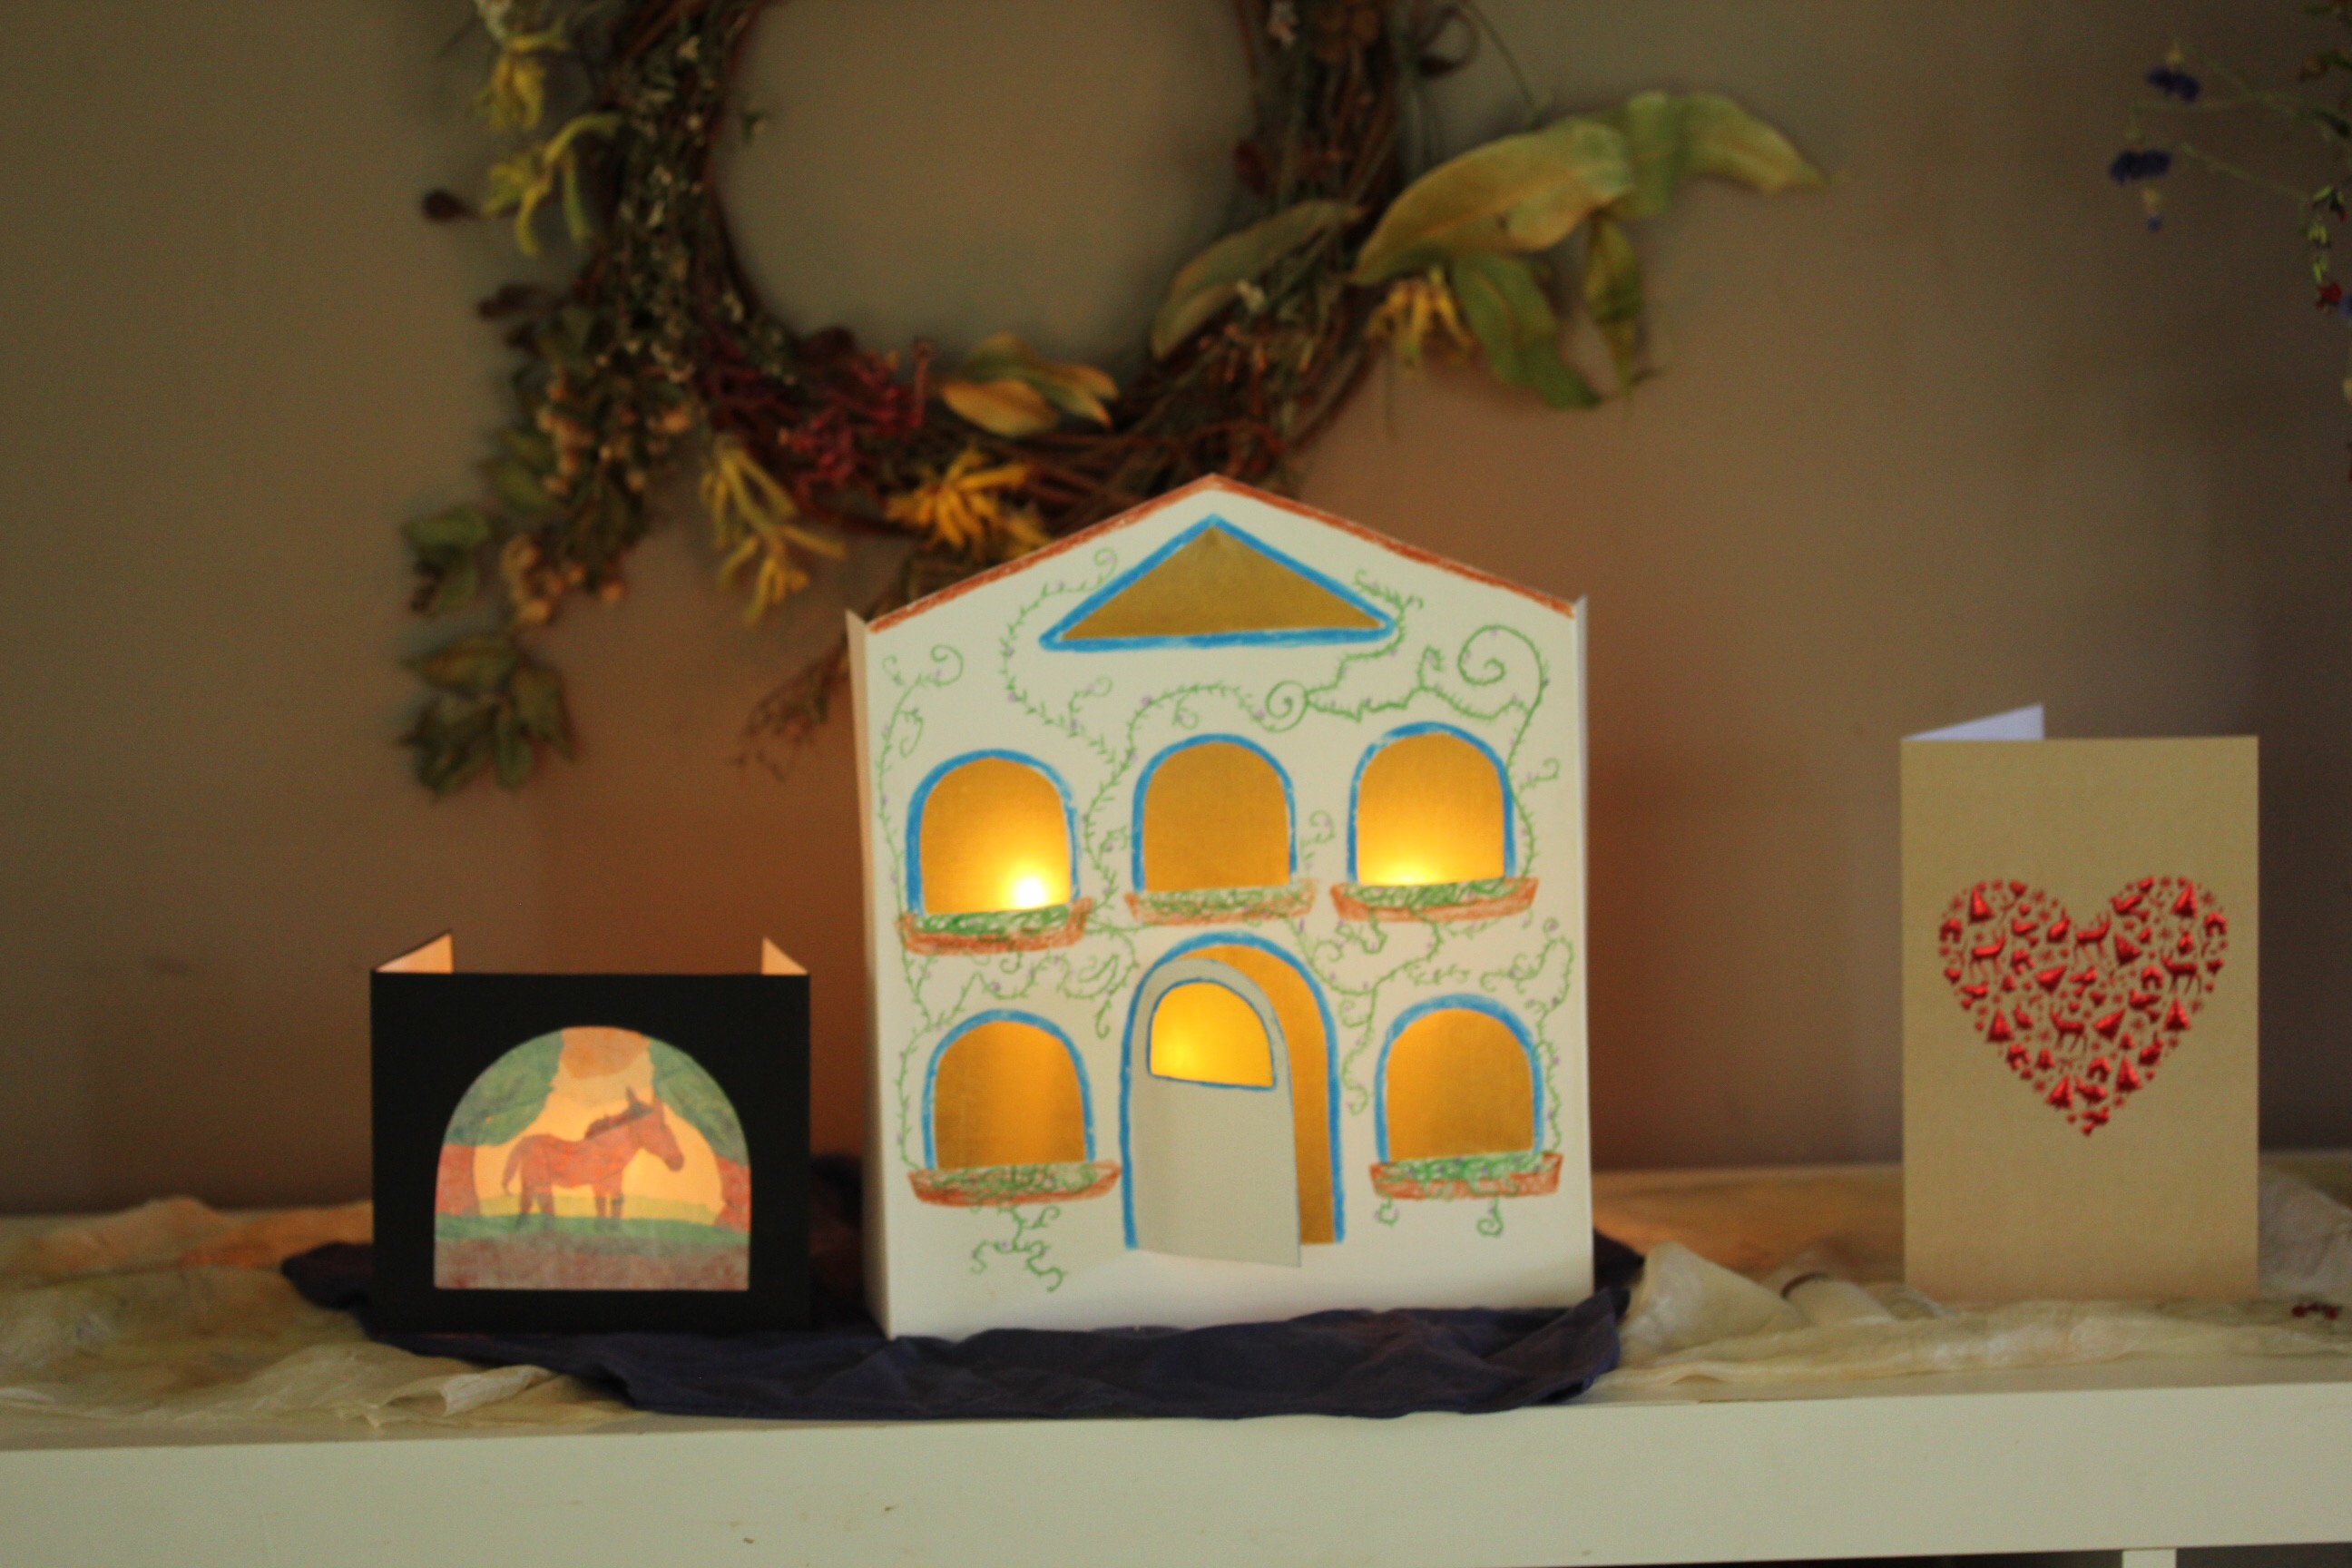
As we love our Swiss Christmas biscuit tradition so much, I will share
I have a new favourite Zimpt Sterne Rezept / cinnamon star recipe this year
This one is gluten free also.
(sorry S for giving you the sticky old one…)
I can’t remember if it’s a copy from somewhere or if I adapted something else. It’s written on a scrap of torn paper with a swimming lesson note on the back….
Zimpt Sterne/Cinnamon Stars
250g almond meal for the biscuits
150g almond meal Extra for sticky dough or dusting while you roll out
1 cup rapadura sugar
2tsp ground cinnamon or more to taste
A small pinch of clove powder
2 egg whites beaten stiff
Mix 250g almond meal, sugar, spices and egg white to a pliable dough. Add more almond meal if it’s too sticky. You will know! It really shouldn’t be a painful messy experience! I knead the dough quite vigorously in the bowl.
Dust with almond meal and roll out on/or between baking paper to about 5 mm thick.
Refrigerate overnight or at least three hours.
Cut out your stars, rinse your cutters if they’re getting too sticky, dust everything with almond meal as you go if needed.
Bake at 180’c for about 8 minutes. Pull them out of the oven when the bottoms are going slightly brown as I like them when they’re more chewy than dry and crisp! Oops many a black star has come outta my kitchen.
Cool them on a rack and invite me around for a cuppa and a biscuit.
I mean share them with your friends and family….
As an option you can mix beaten egg white with icing sugar and decorate them pre baking. More sticky messy fun! I bought a piping bag especially. Then you have snow capped biscuits. So appropriate for Advent in summer Australia, don’t you agree?
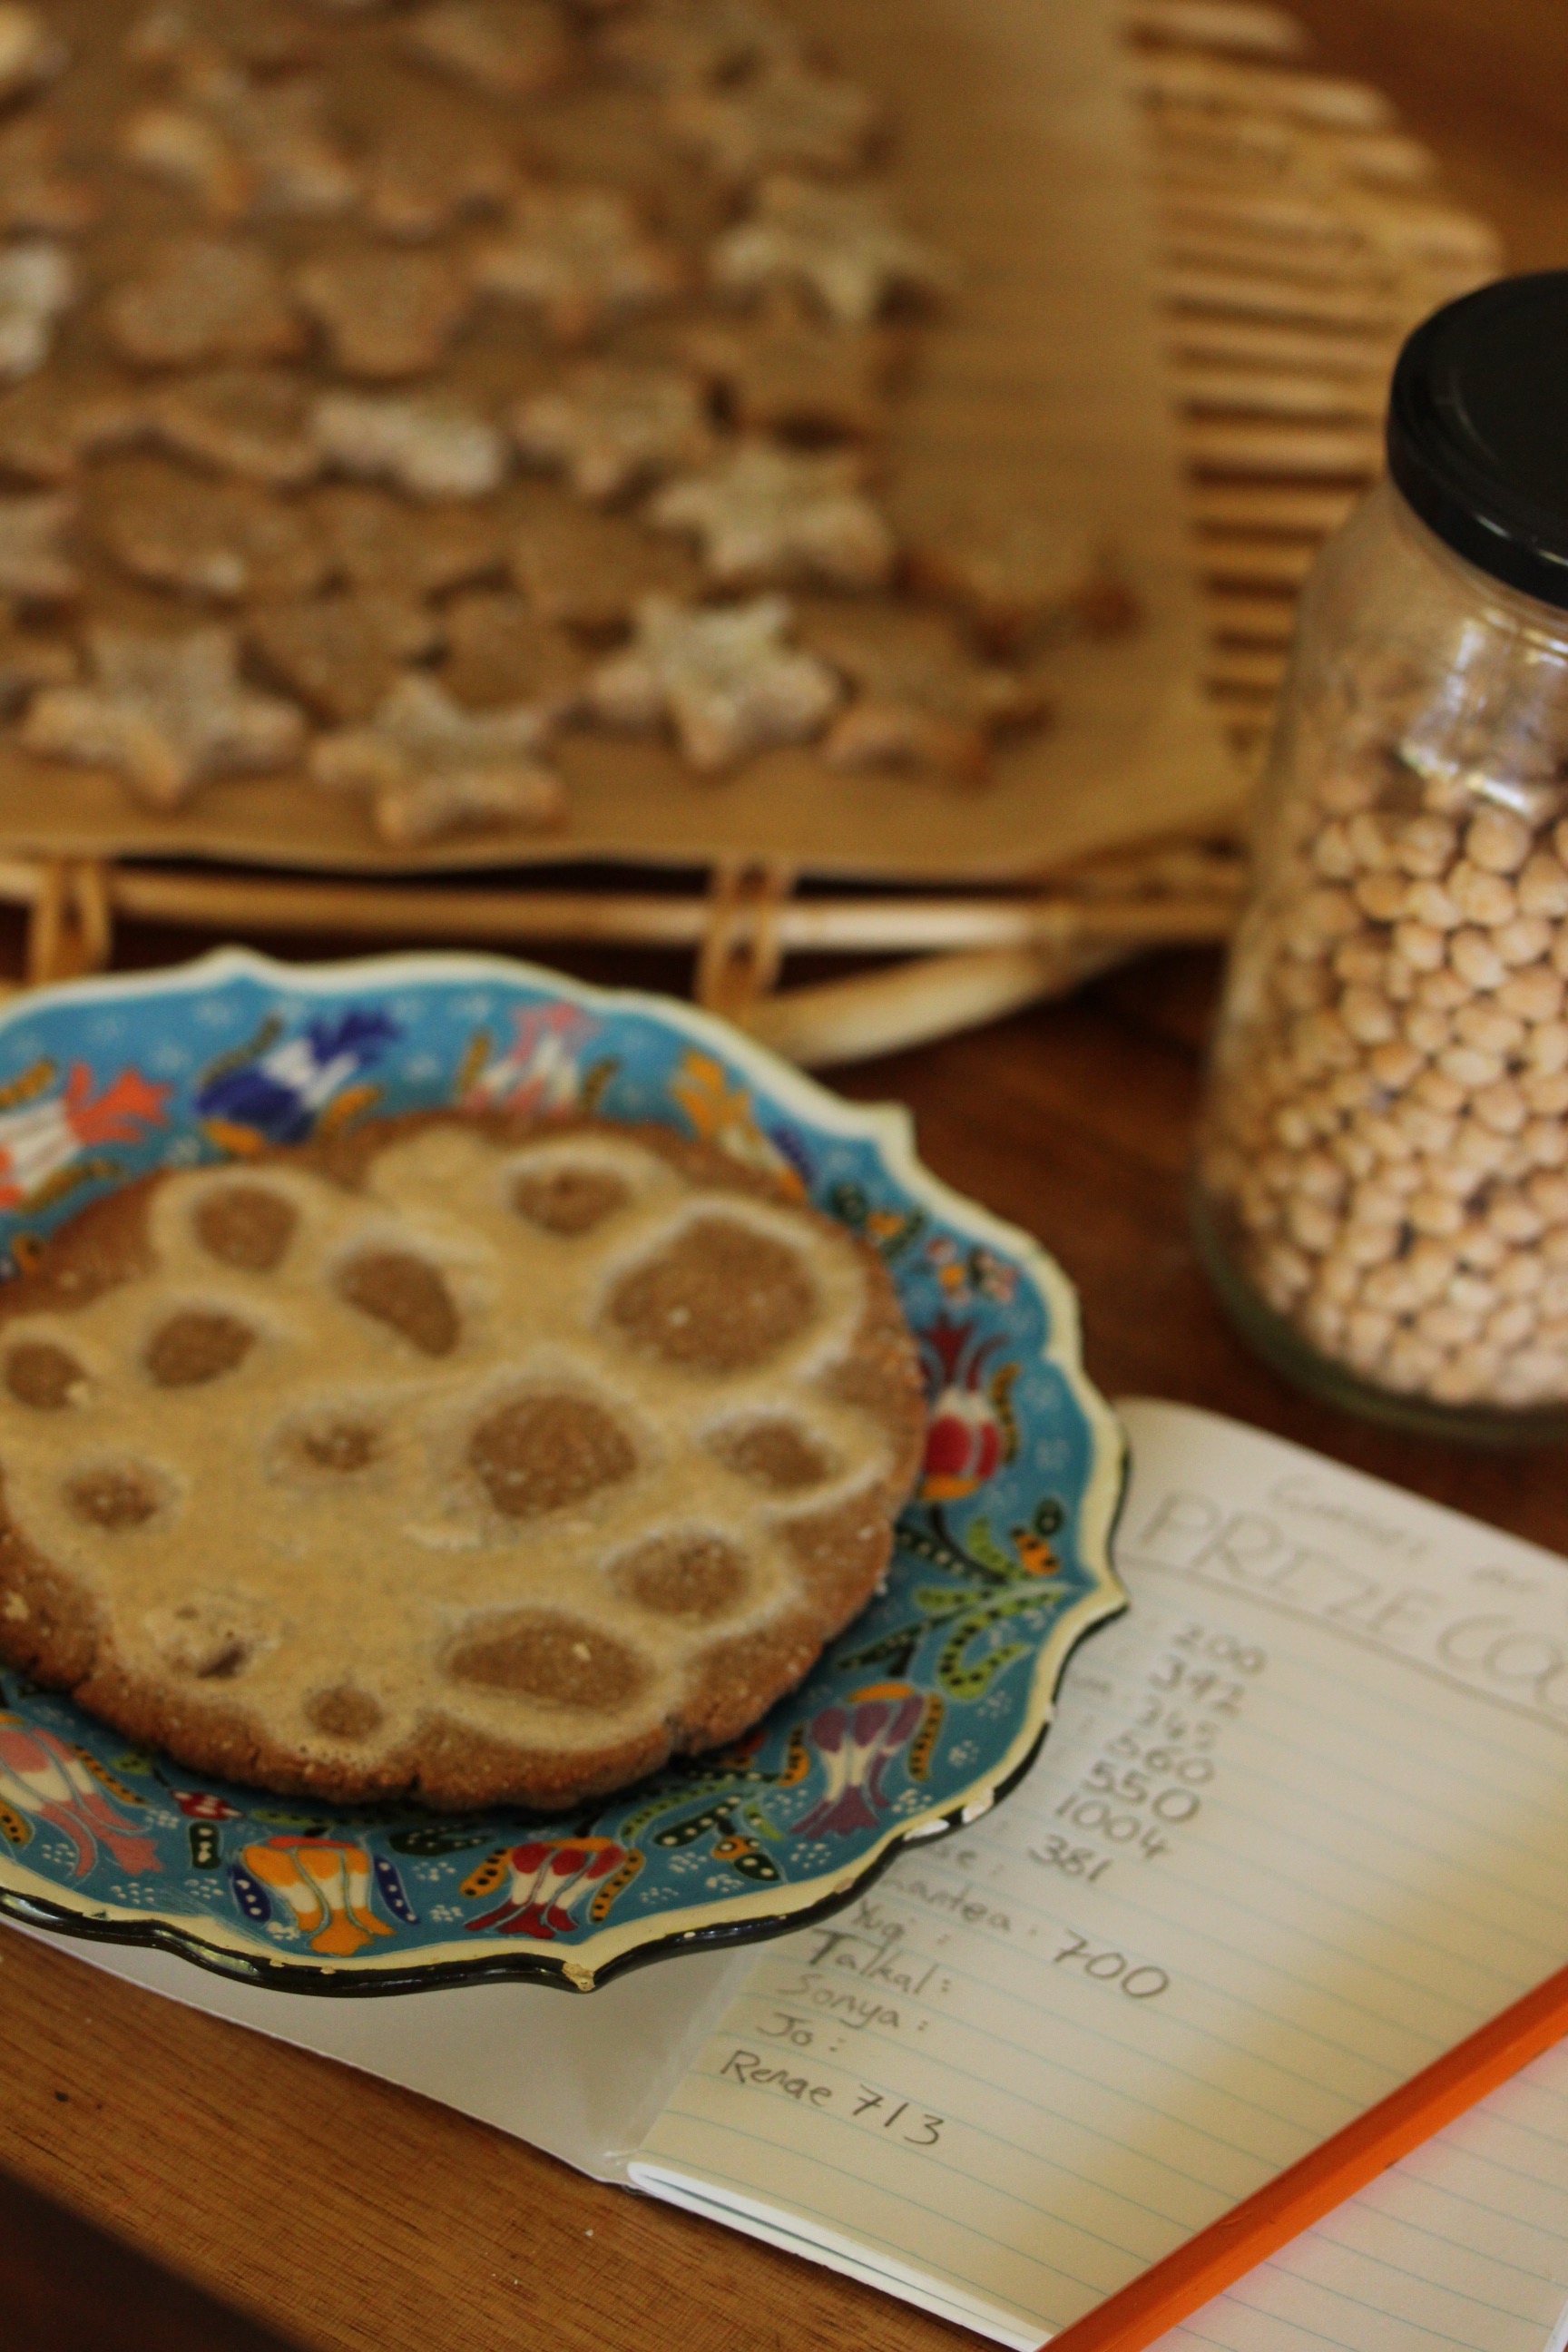
Inspired by The Children Of Noisy Village(Astrid Lindgren) Cedar suggested we have a bean guessing game and make a prize cookie from all the scraps of dough. They got a jar of chickpeas and a notebook to record all the guesses from our home and neighbours. The children ran around giving biscuit samples and collecting guesses, displaying the prize cookie!
Well done J for guessing 1004, hard to believe this little jar held 1163 chickpeas! mm enjoy that cookie! I was sure there where only 381…..
Peace
X Roselinde
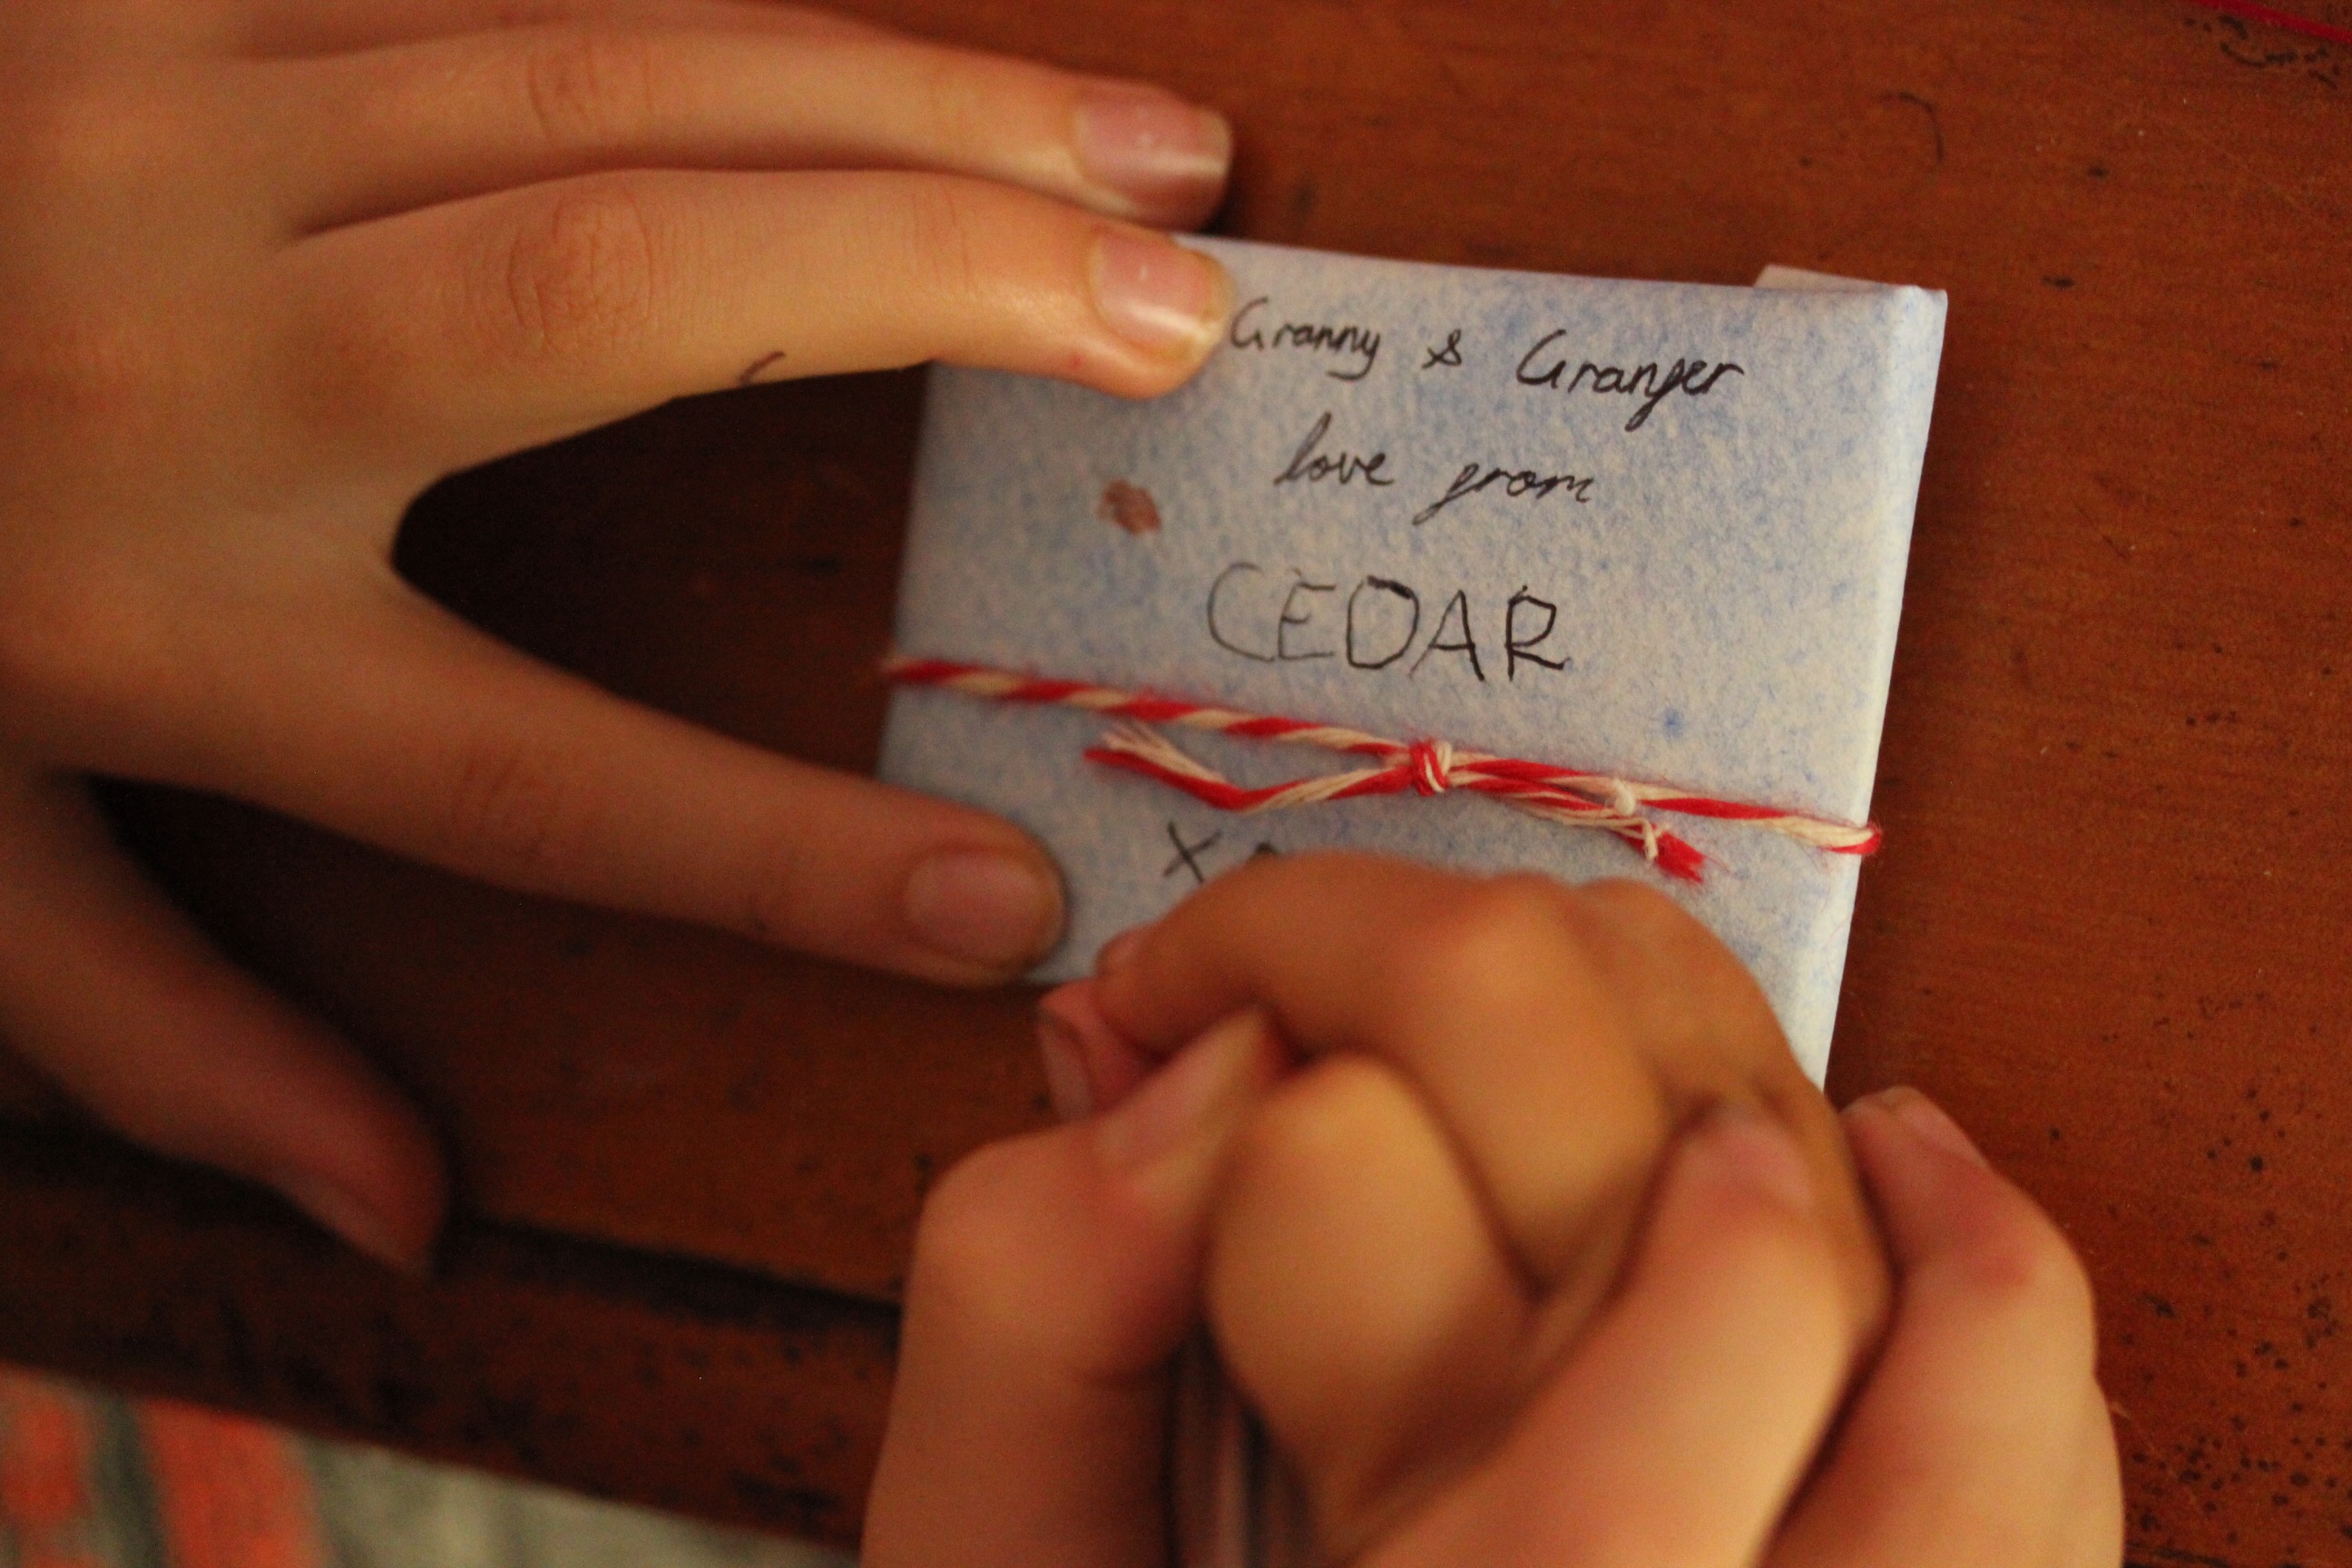
Mary’s little Donkey
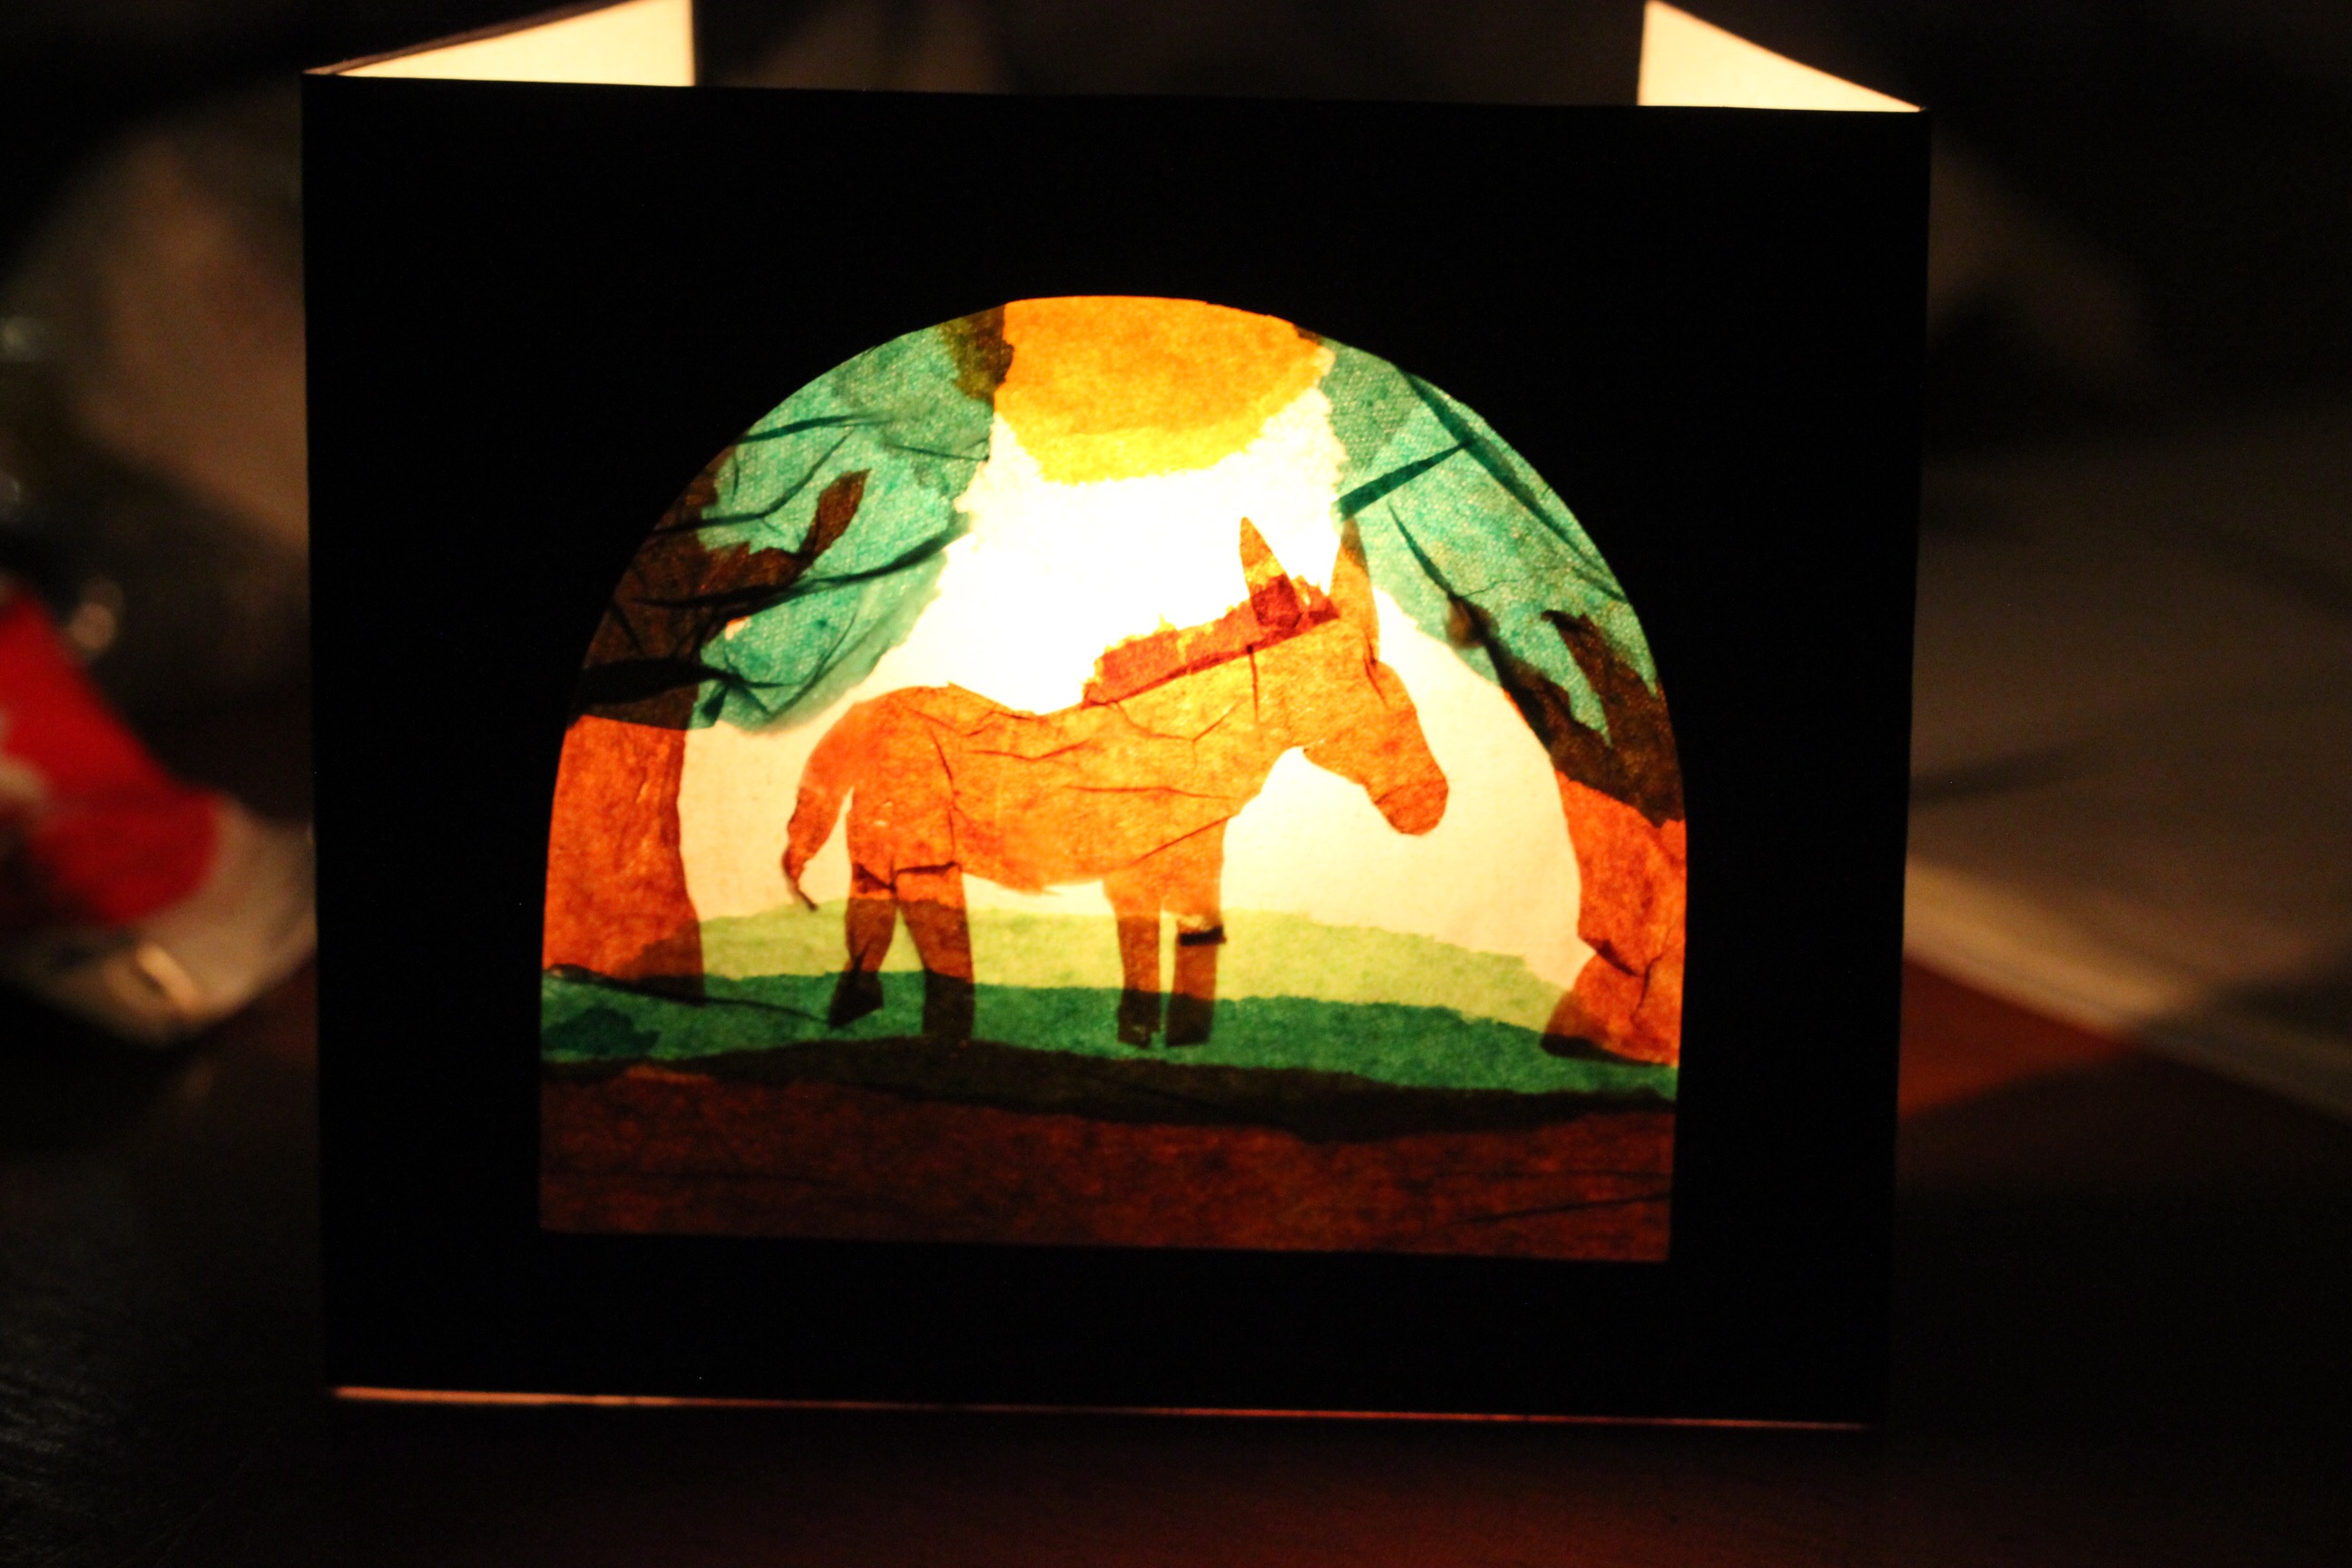
I have been reading Mary’s Little Donkey again this advent to the children. I am living into the characters and their gifts in a new way this time around. It’s very beautiful to have a deeper experience while reading a children’s story.
Today Cedar was adamant we made some window pictures (I had planned tomorrow) however, this very quiet space together, without Lily or Jesse here blossomed into beautiful creating and connecting, and this little donkey transparency was born from my hands. Cedar worked alongside me on his own window picture and proclaimed it finished until he saw mine had a ‘main character’ and then he needed a main character also. His hare will be wonderful for Easter next year too!
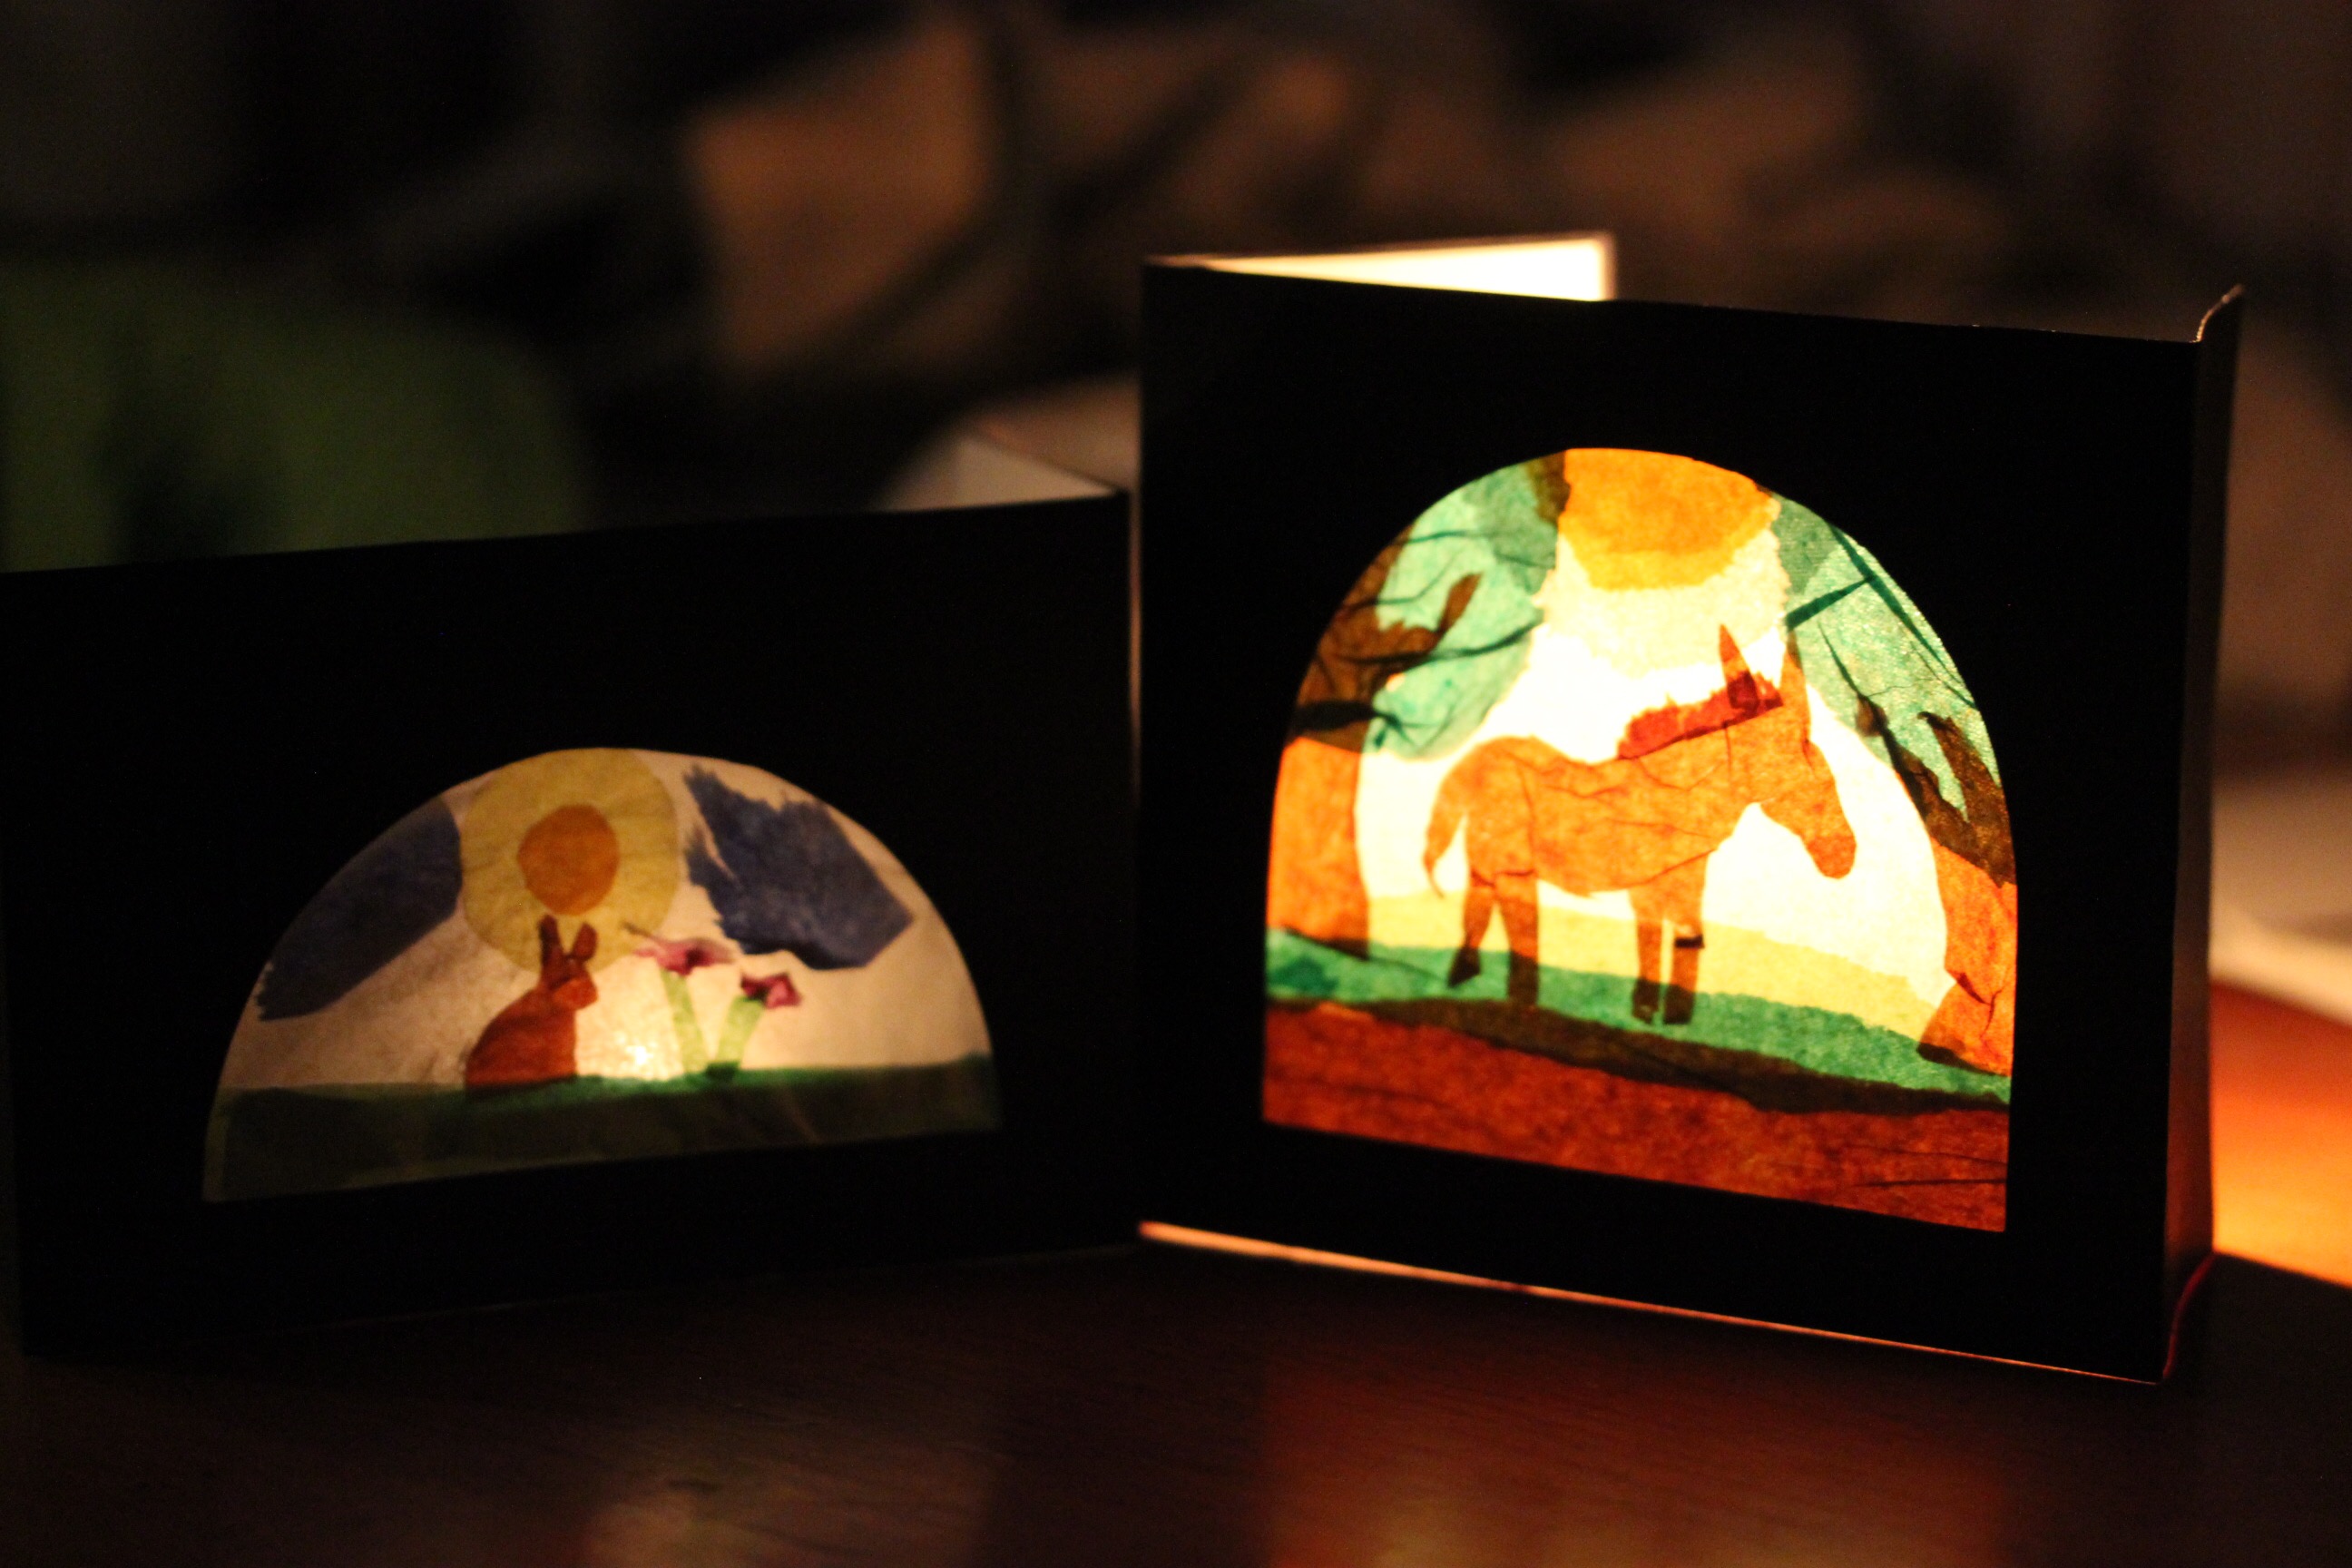
I just LOVE it when I make something I really love.
Xx
Roselinde
PS materials
Black card
Tissue paper
Scissors
Stanley knife to cut out the window neatly
Glue stick
Patience
Fiddly fingers, the larger you cut the window the easier it is to manage
Tip# 1
Have a layer of white or softest cream tissue paper as your frontest layer and glue your picture layers onto the inside of this. Then a fix the whole lot as one piece into your card.
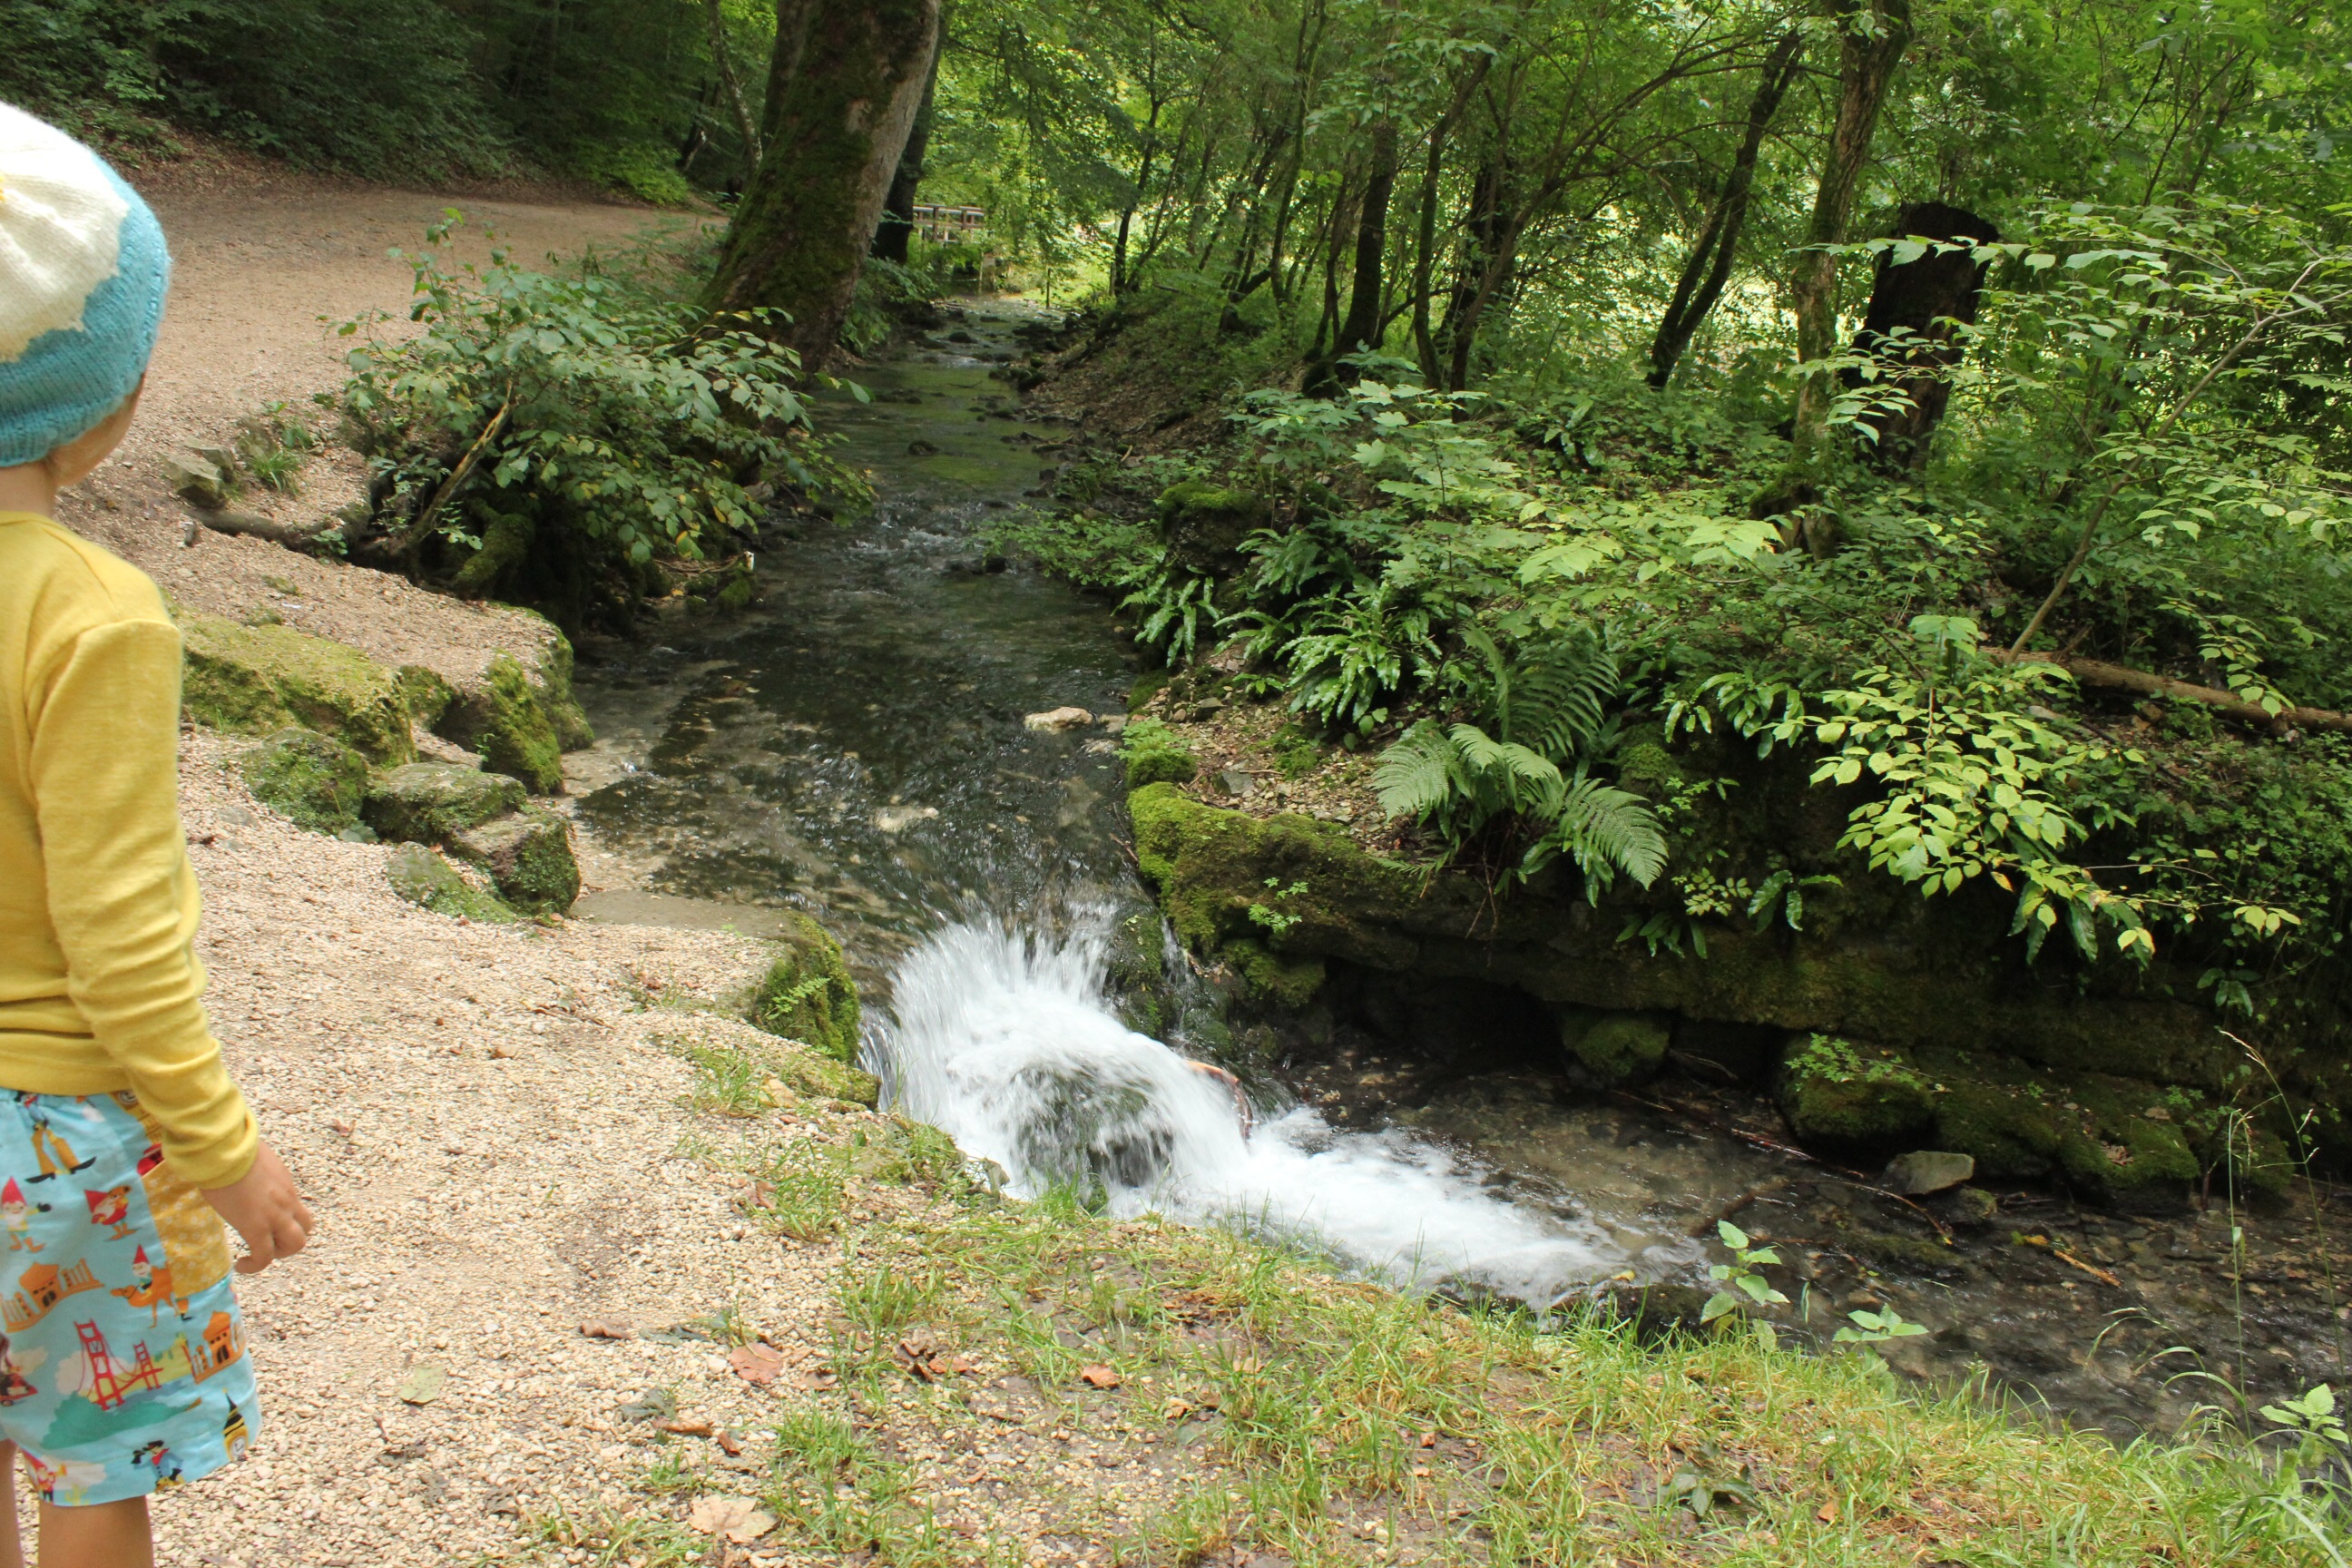
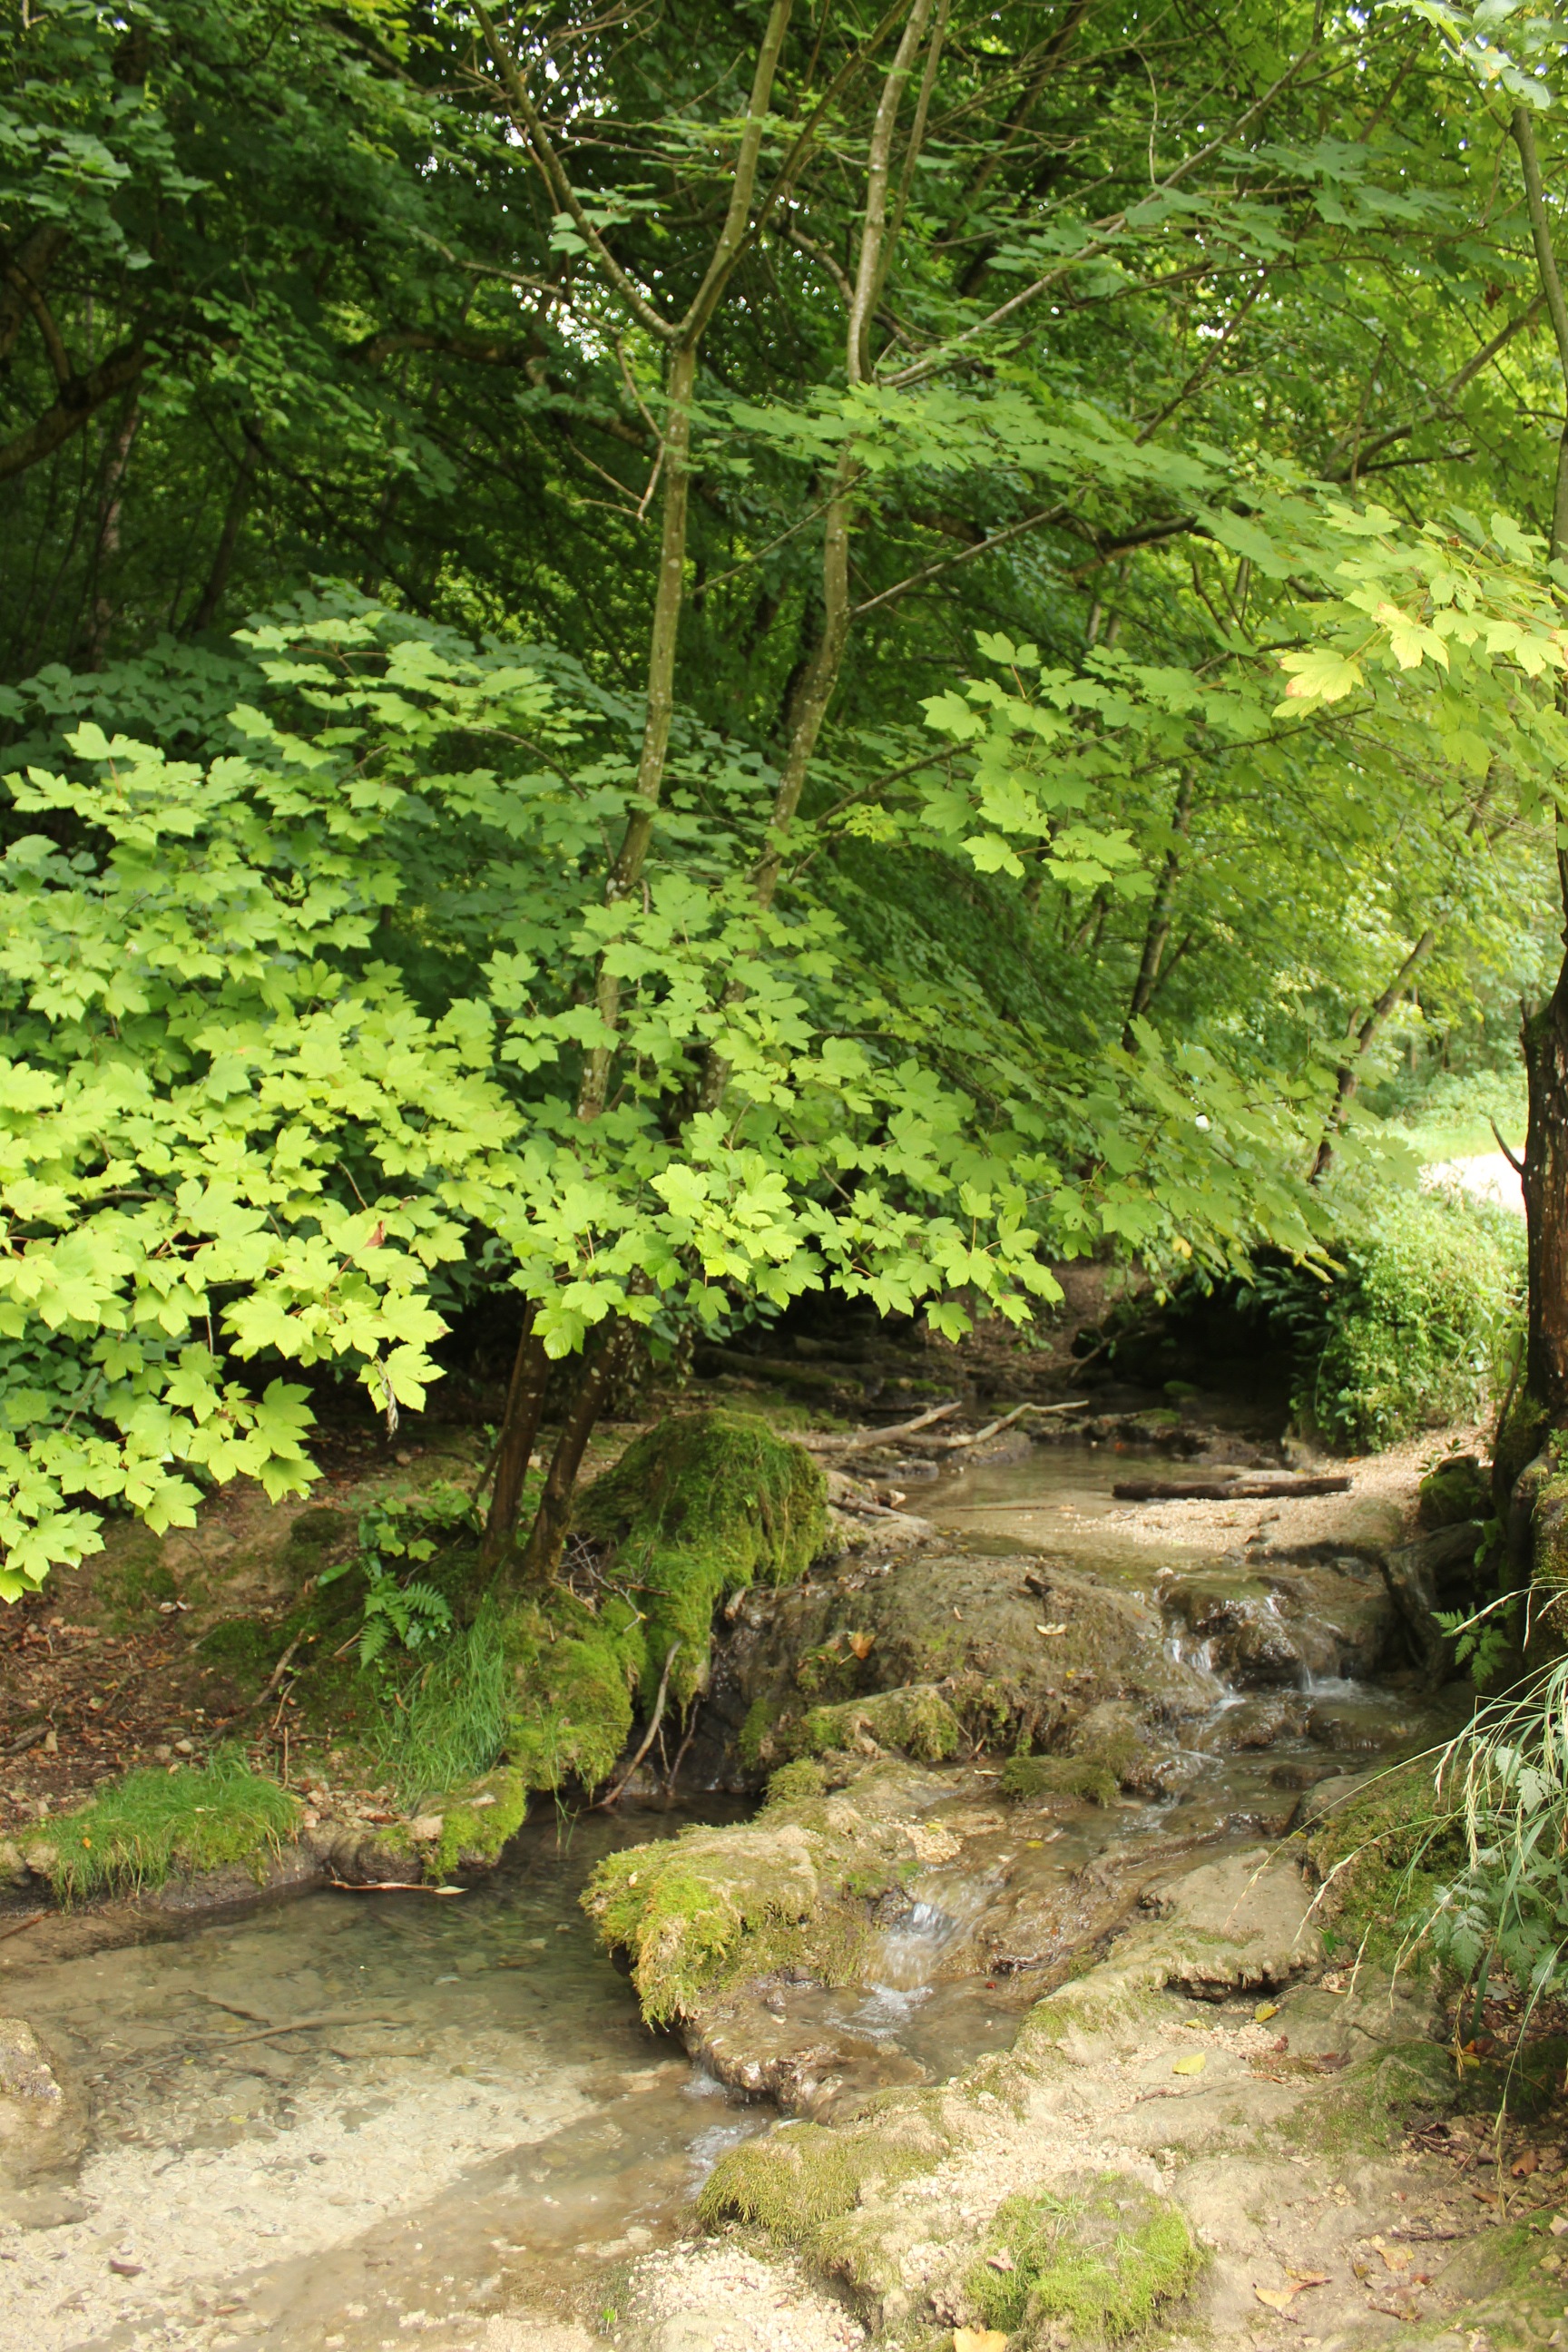
Uracher wasserfall
So, just like that, not once but twice, a beautiful post vanishes! Gahhhh!
Just some photos then.
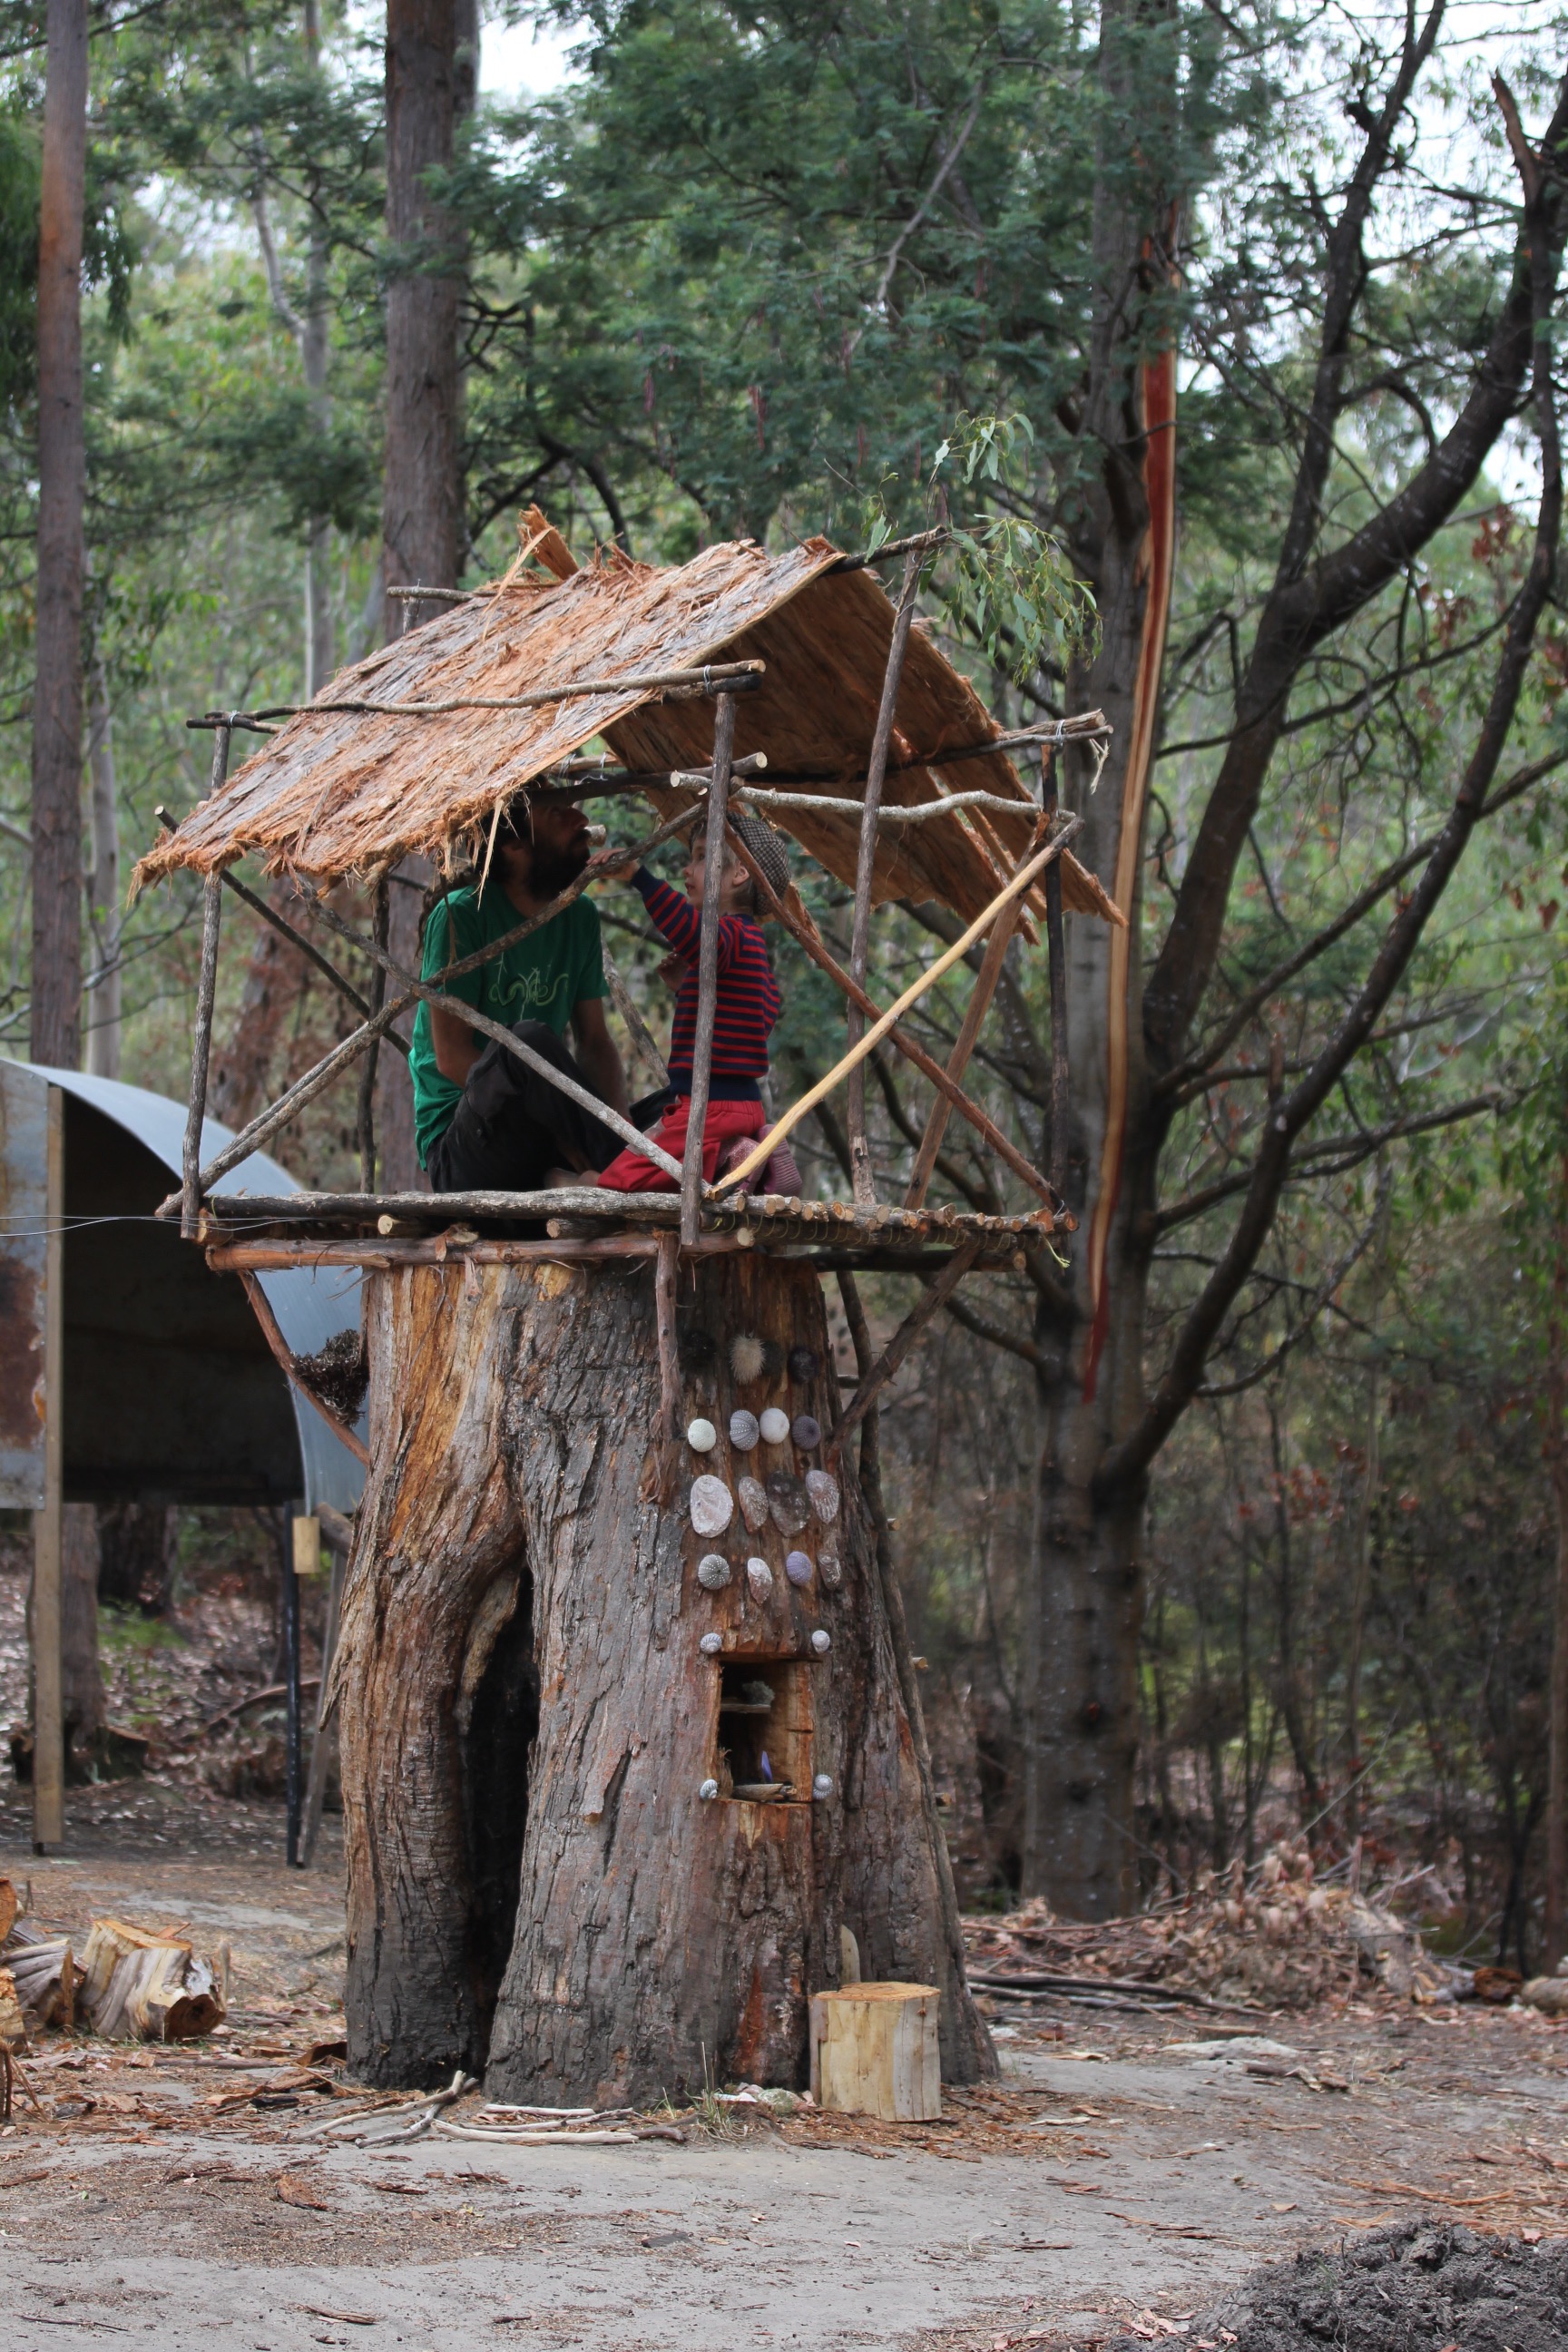
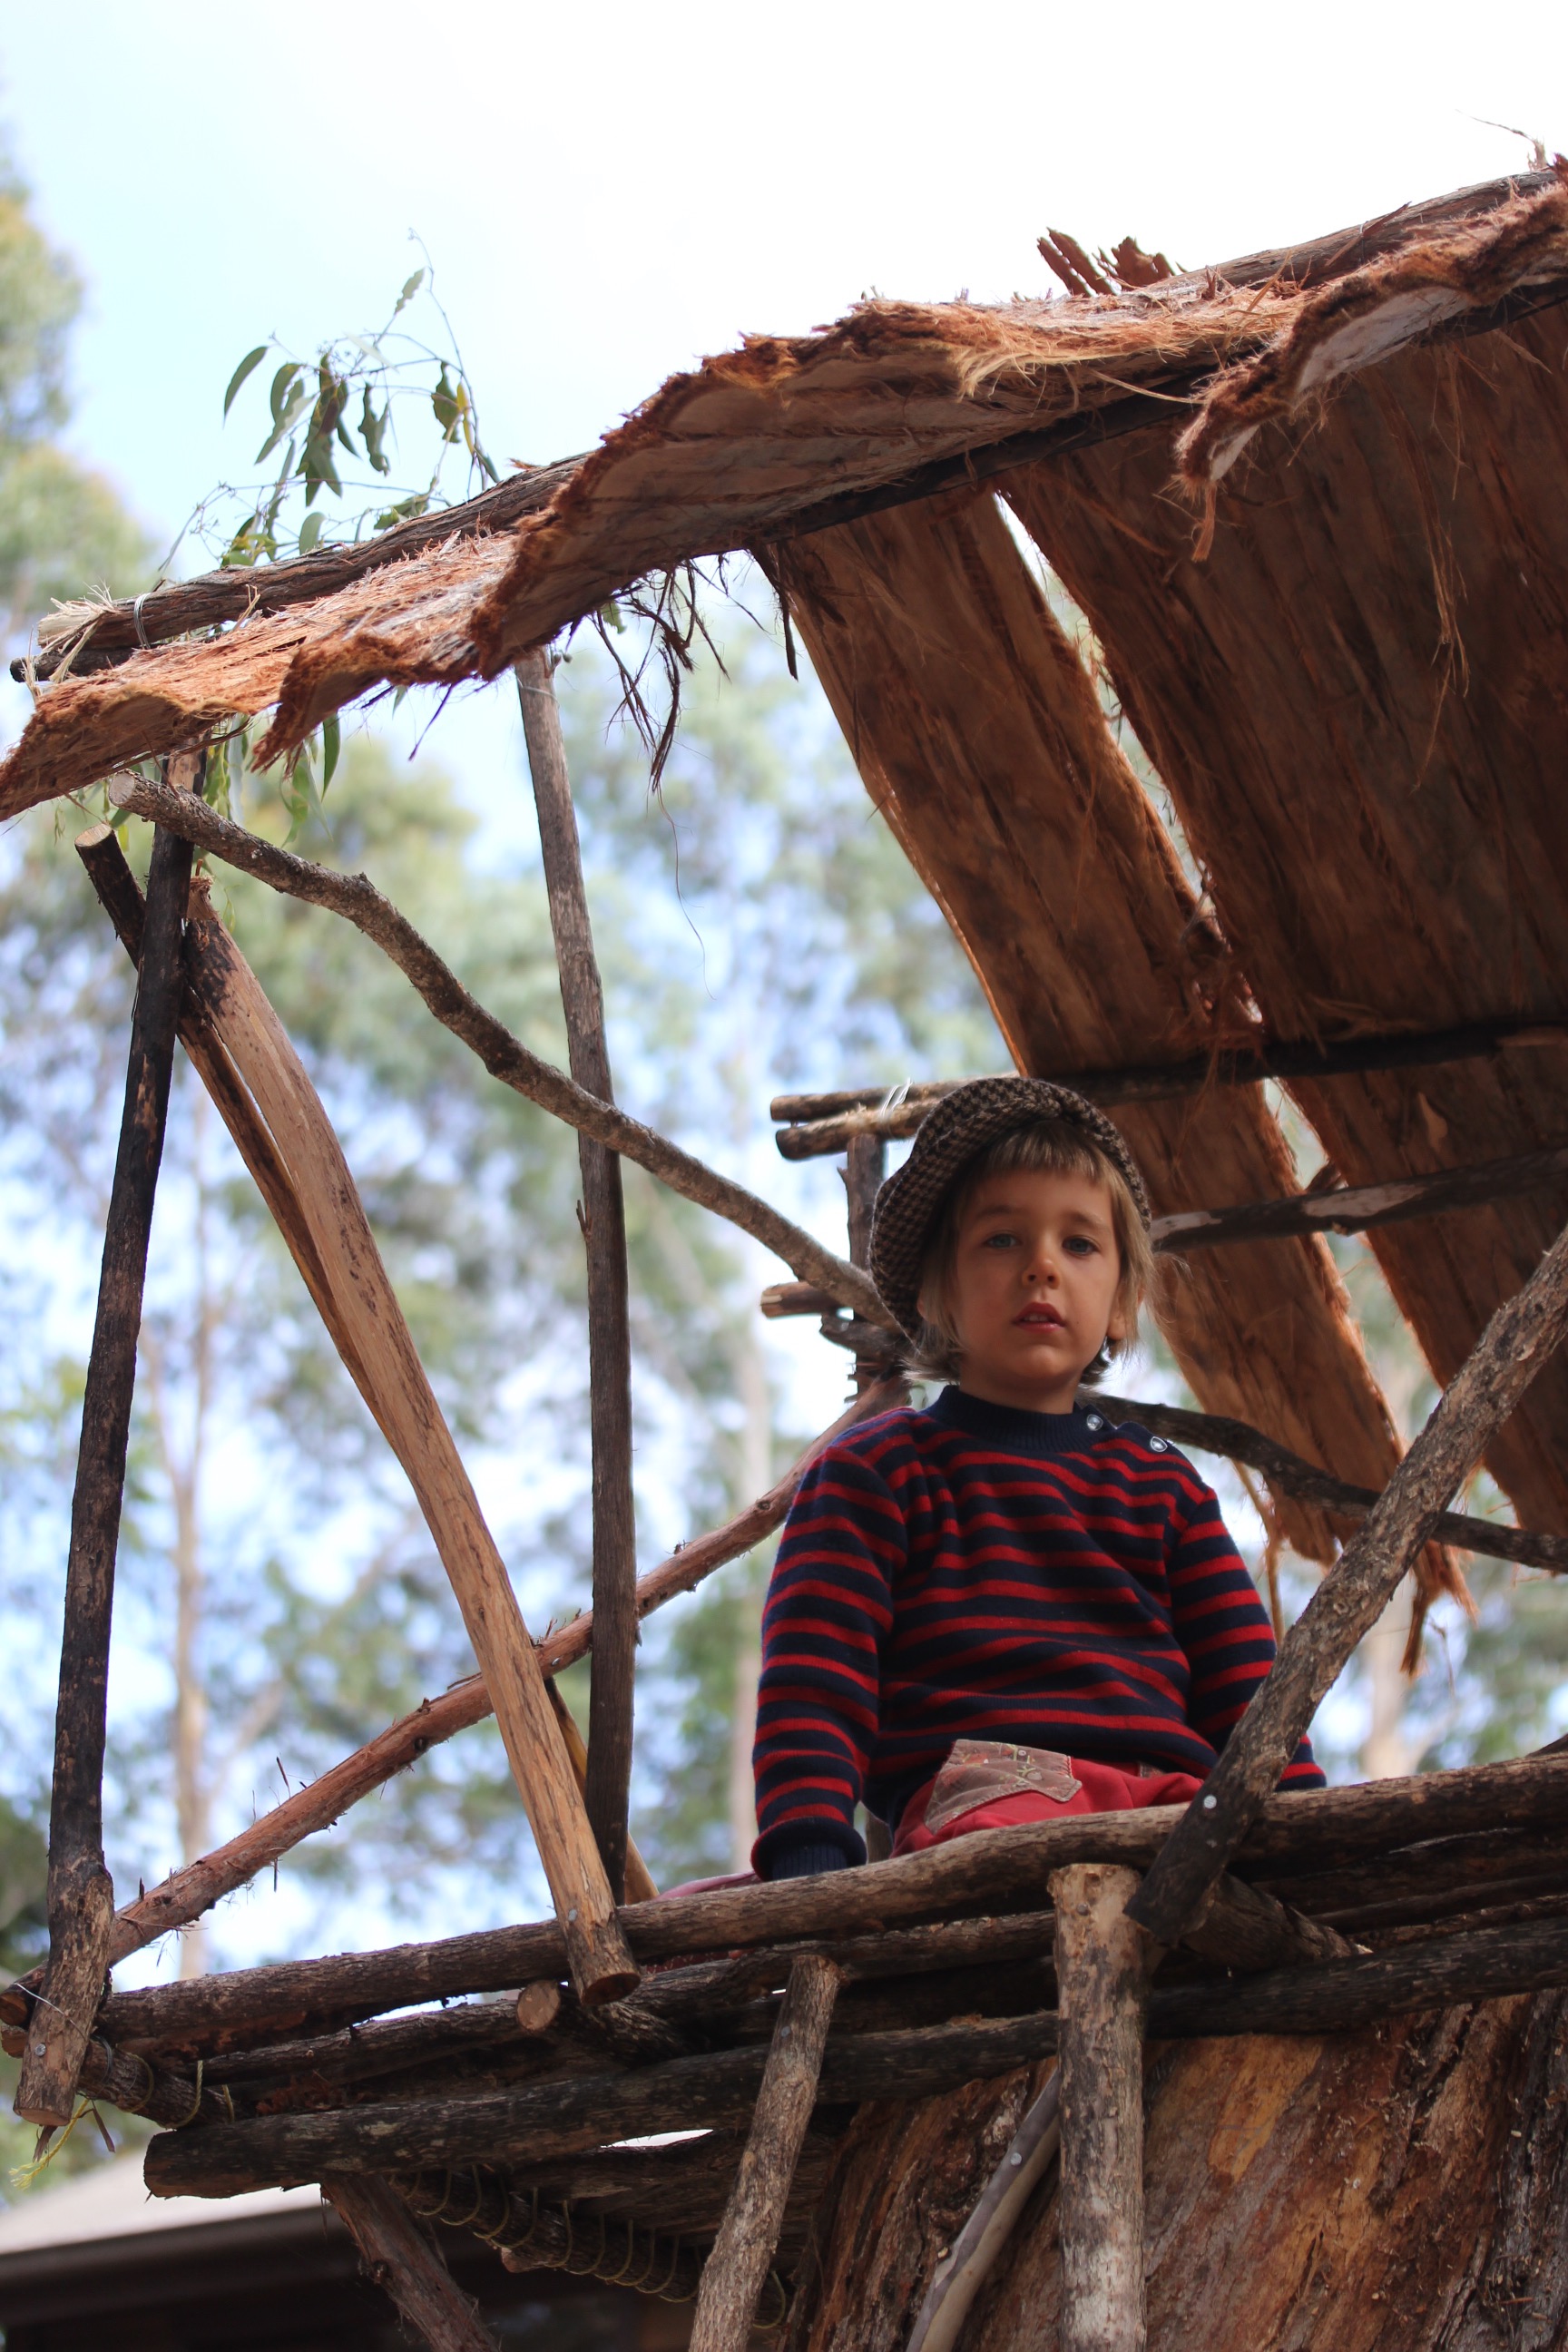
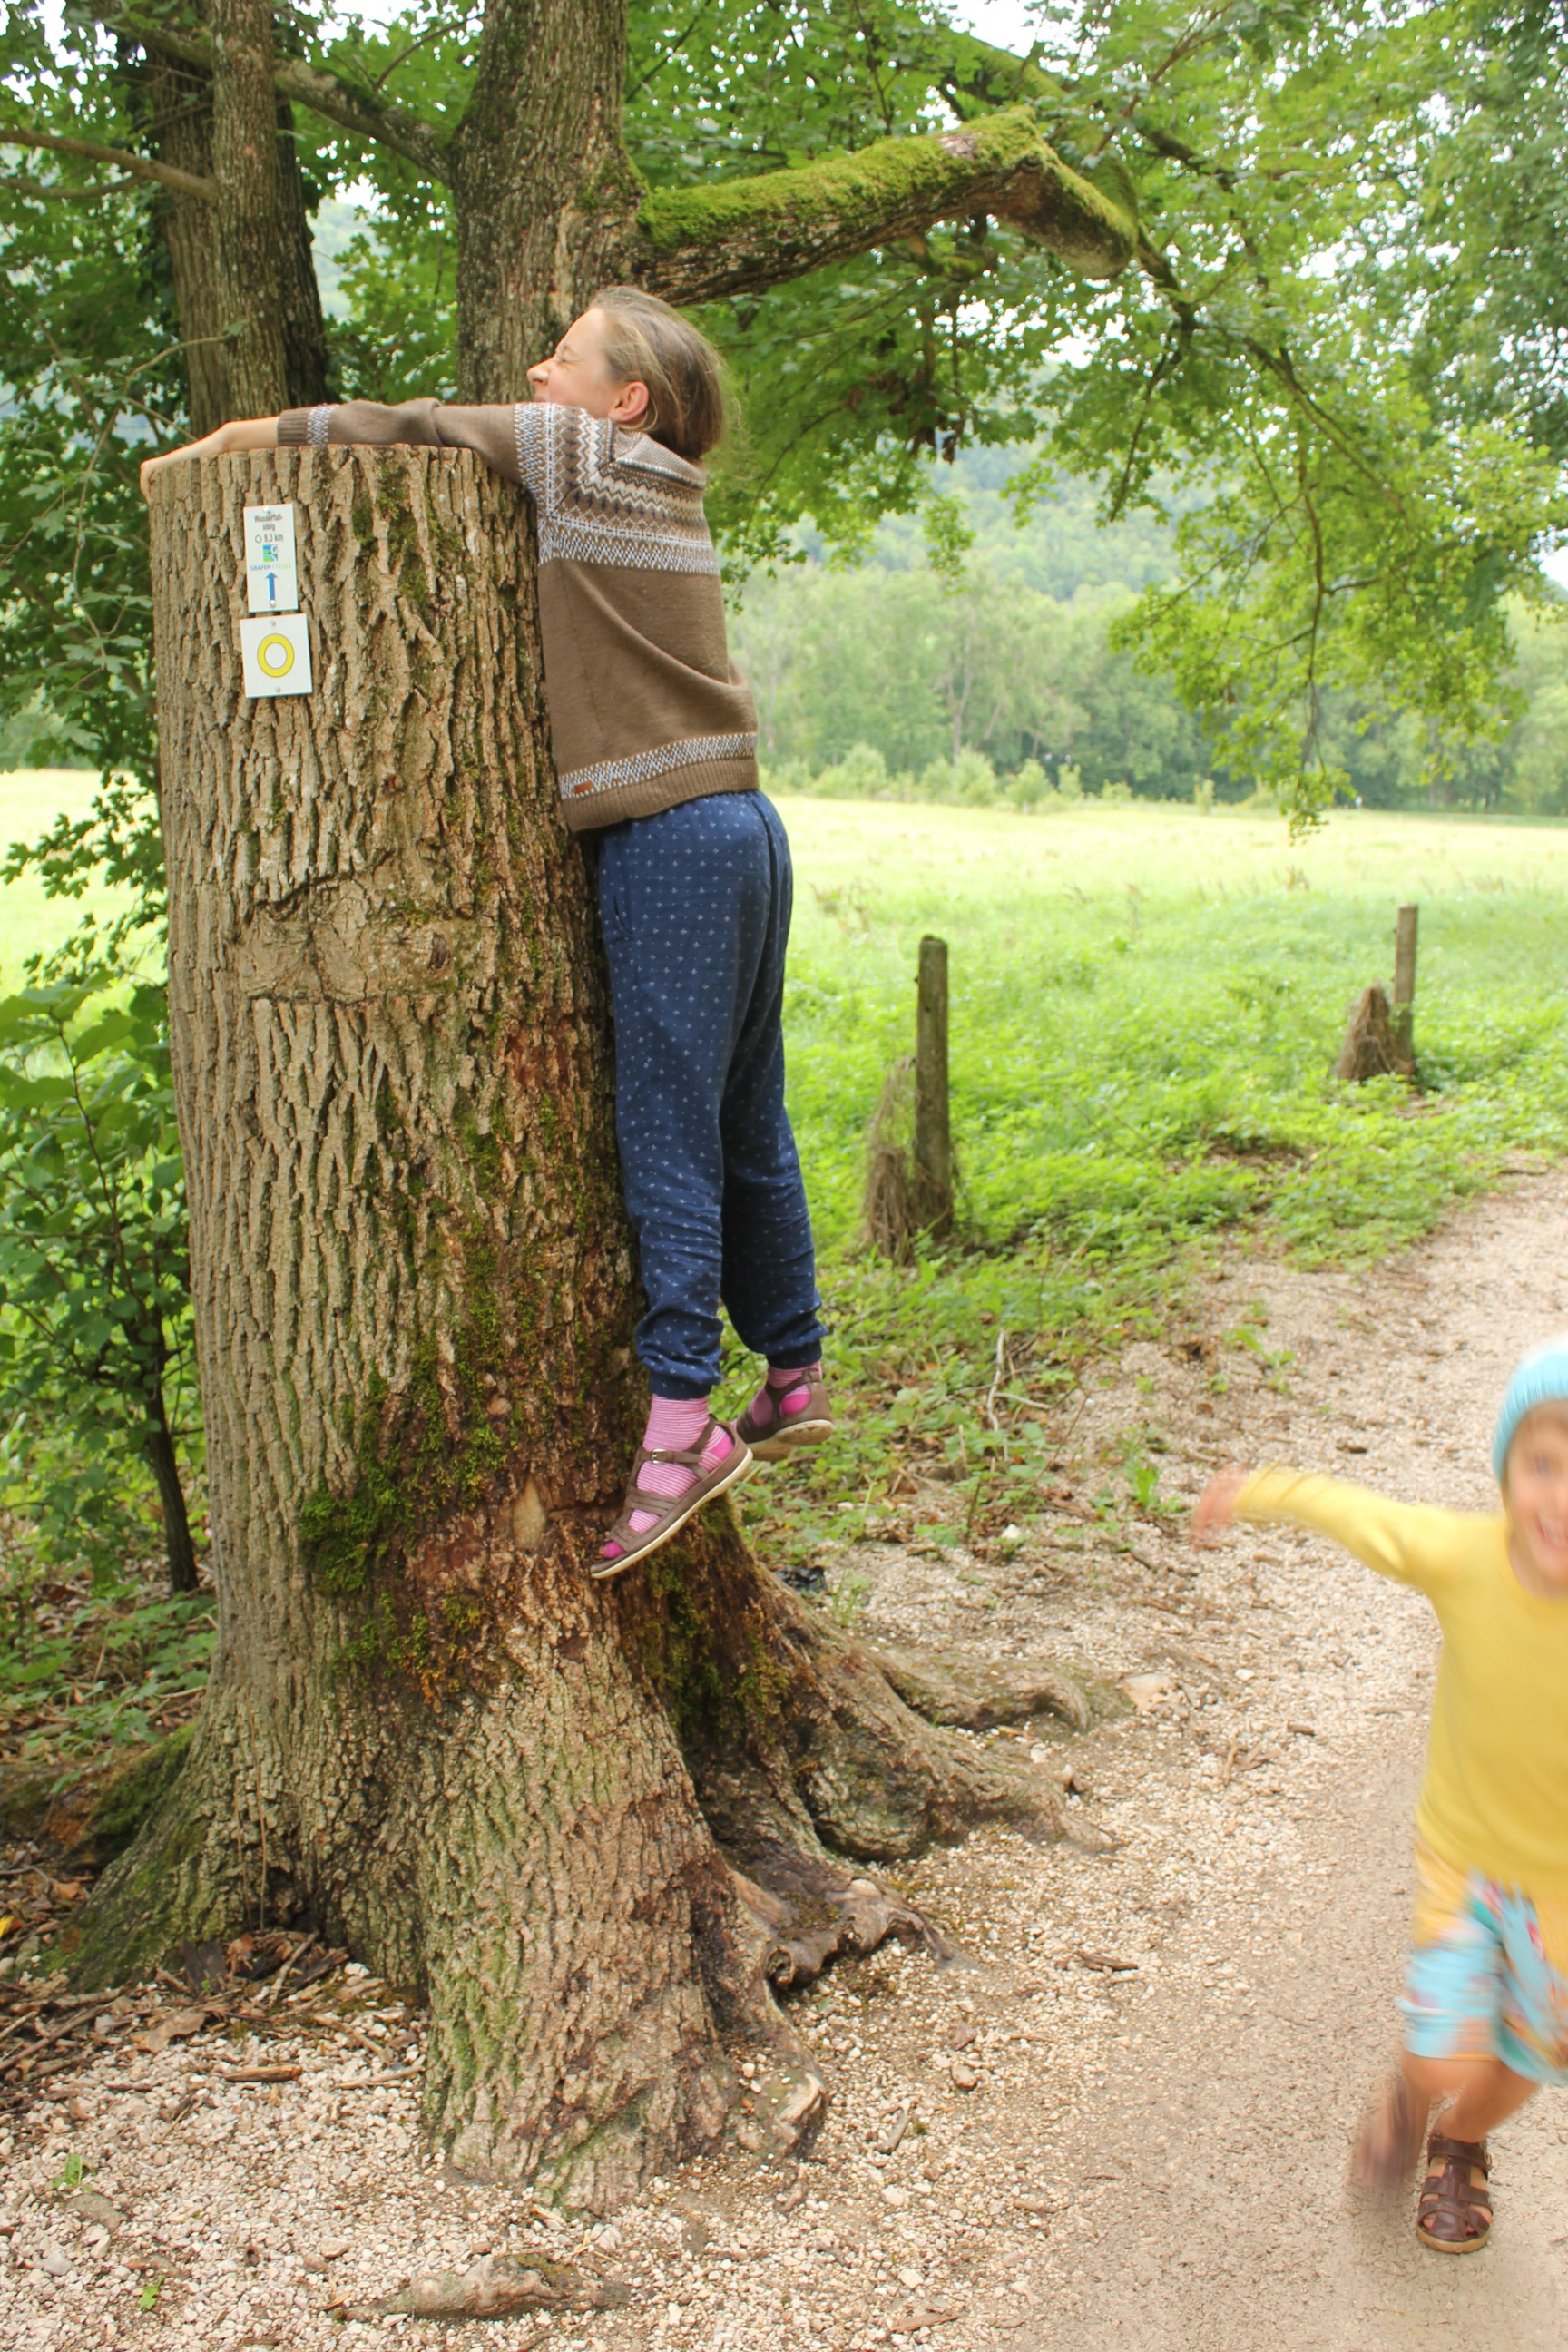
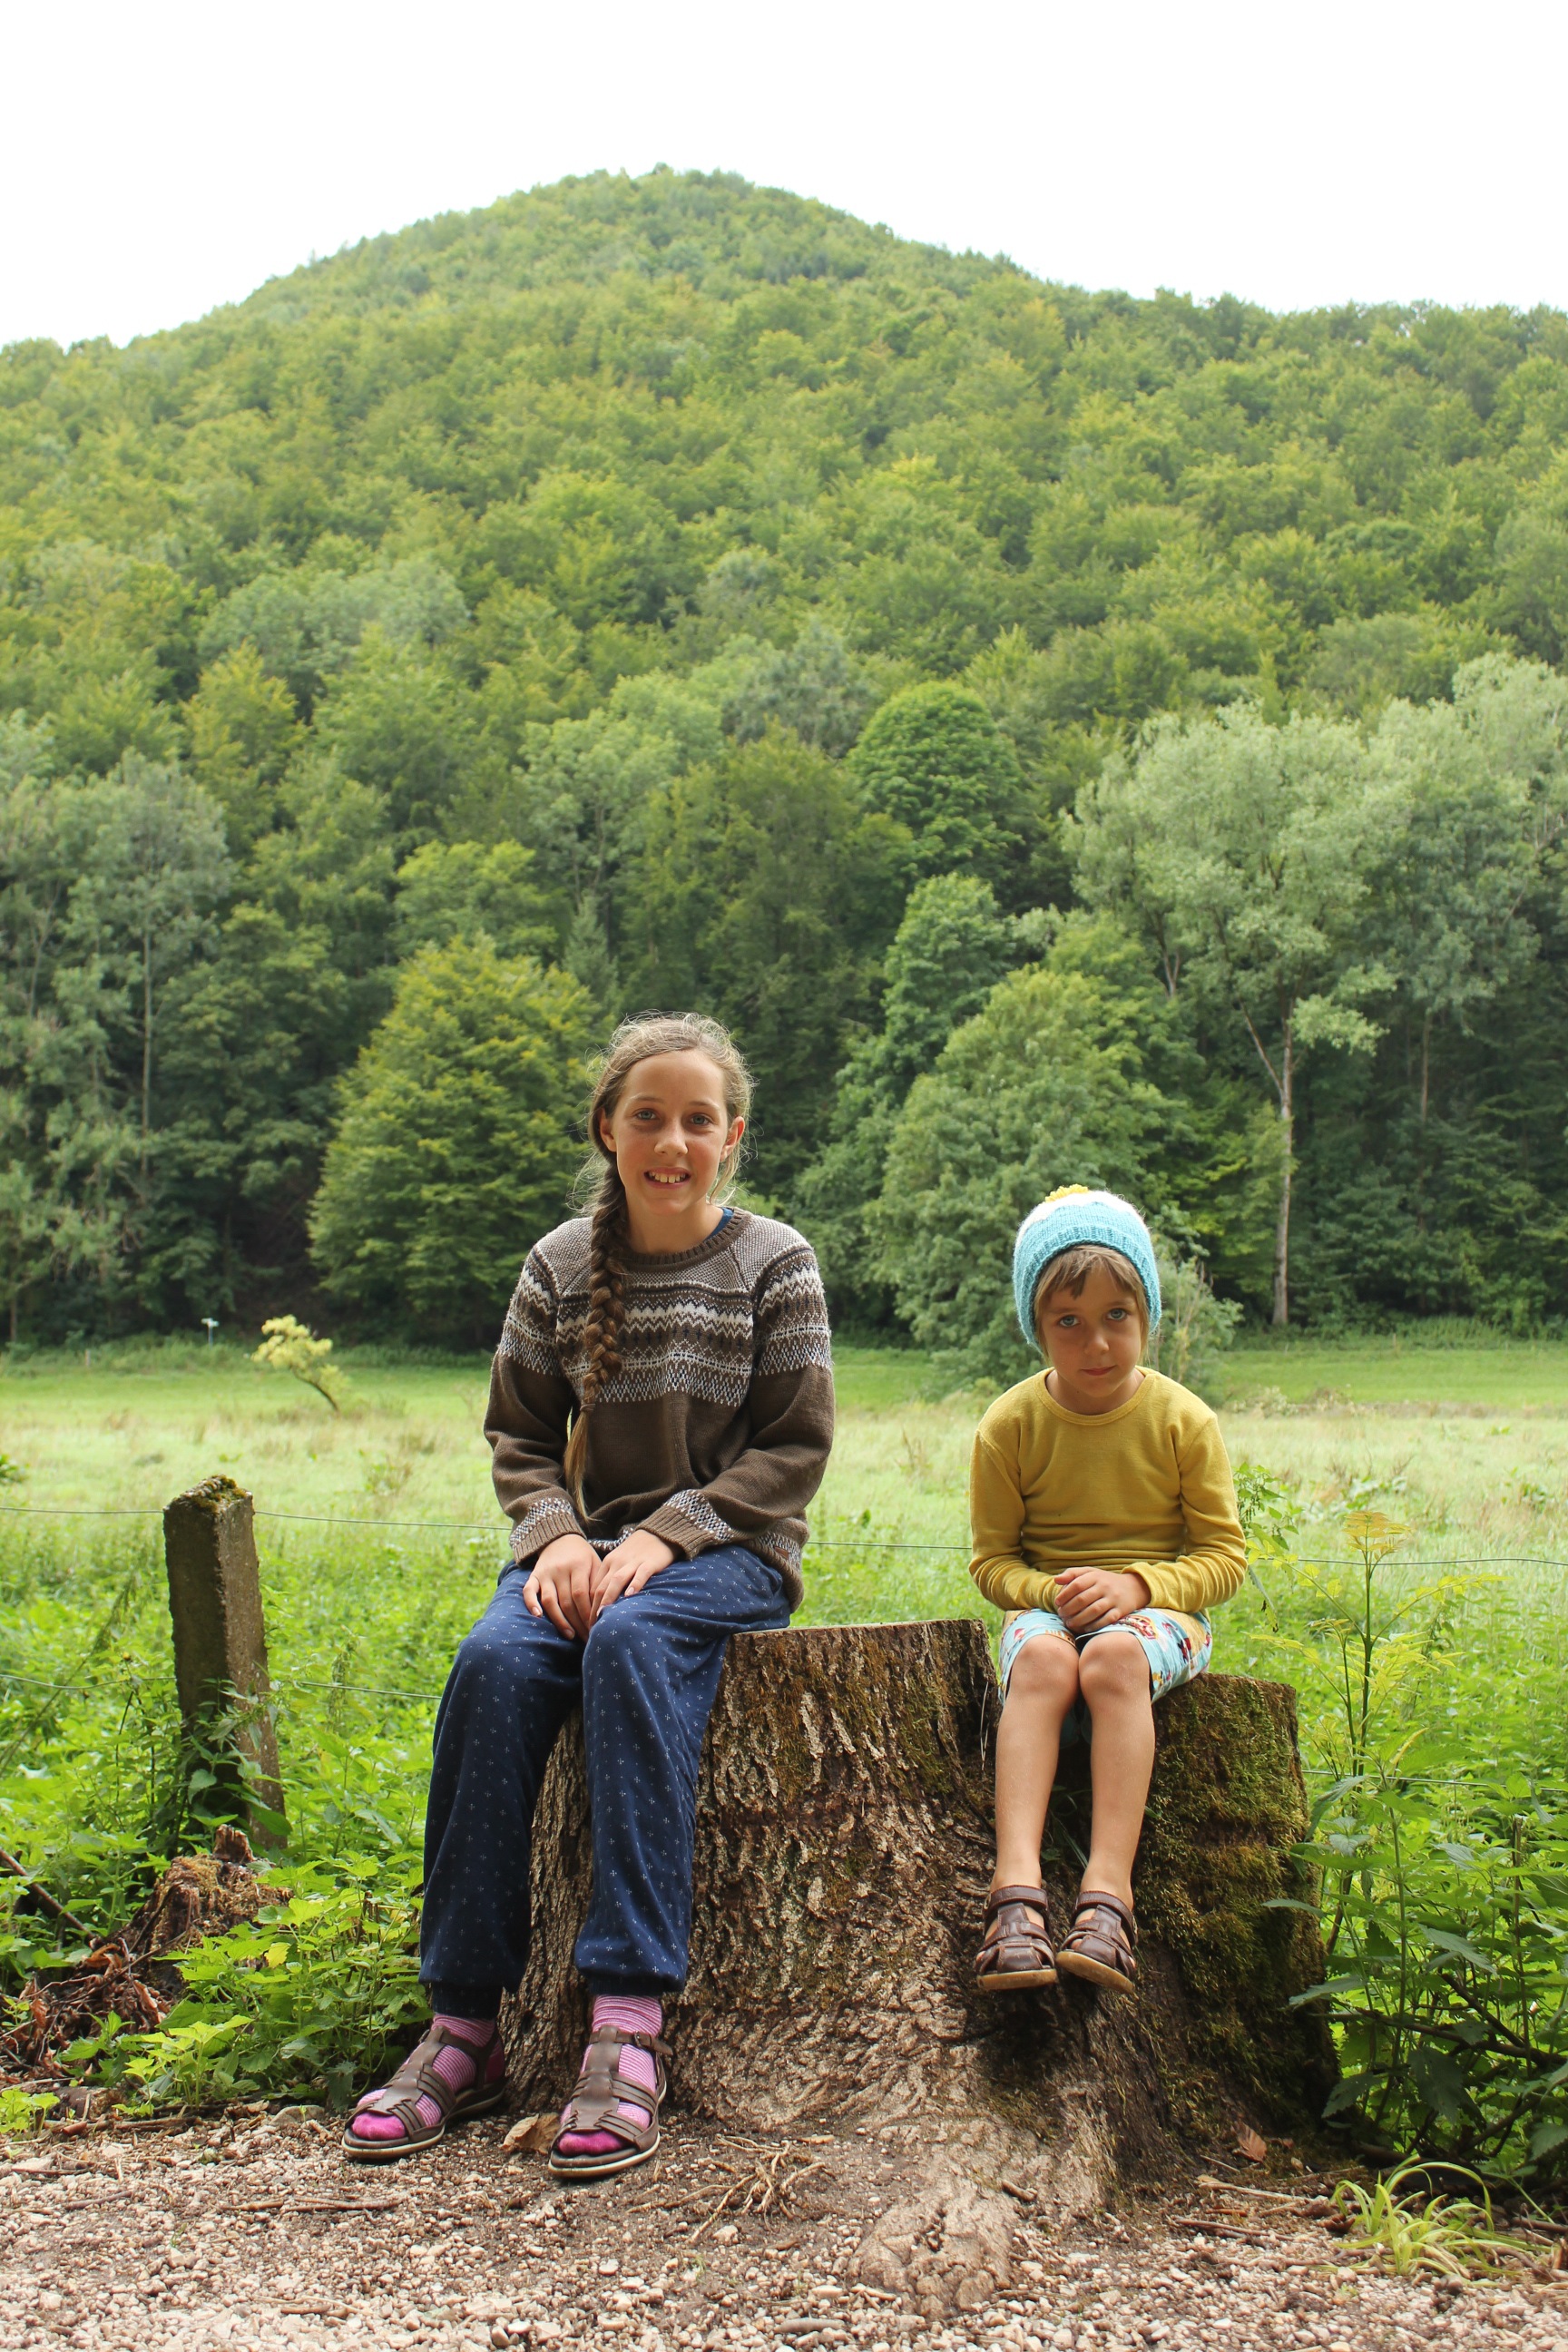
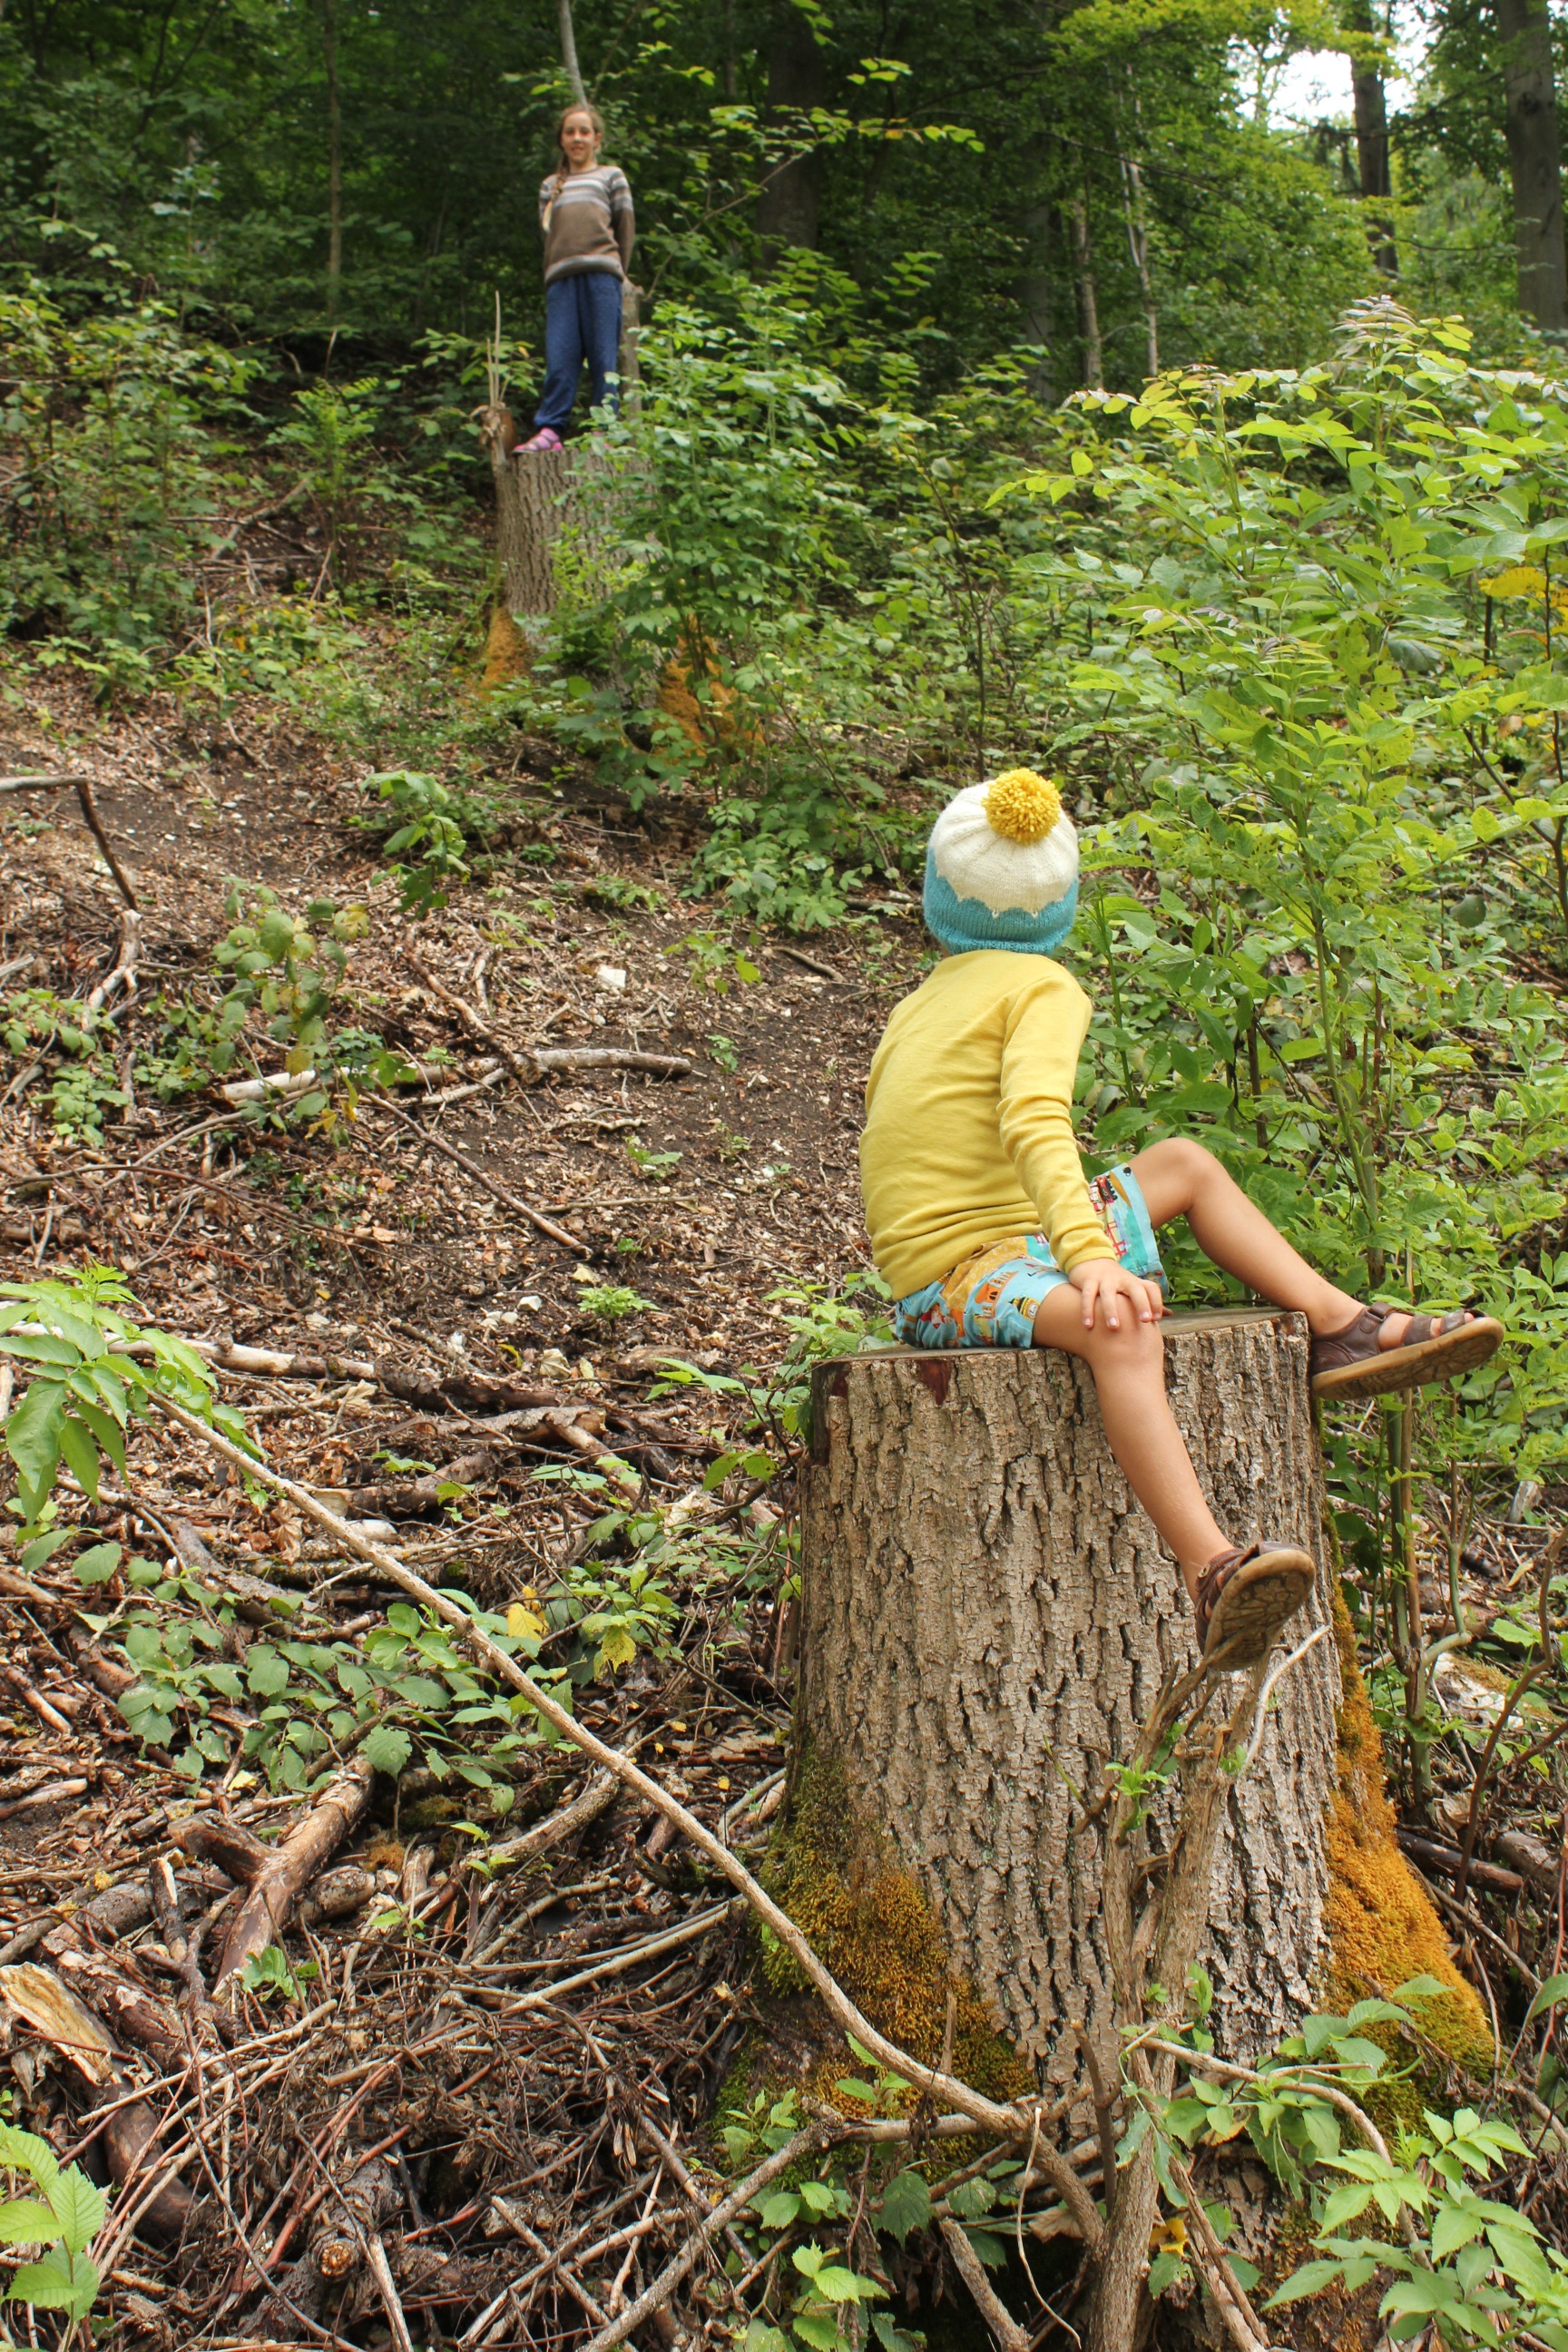
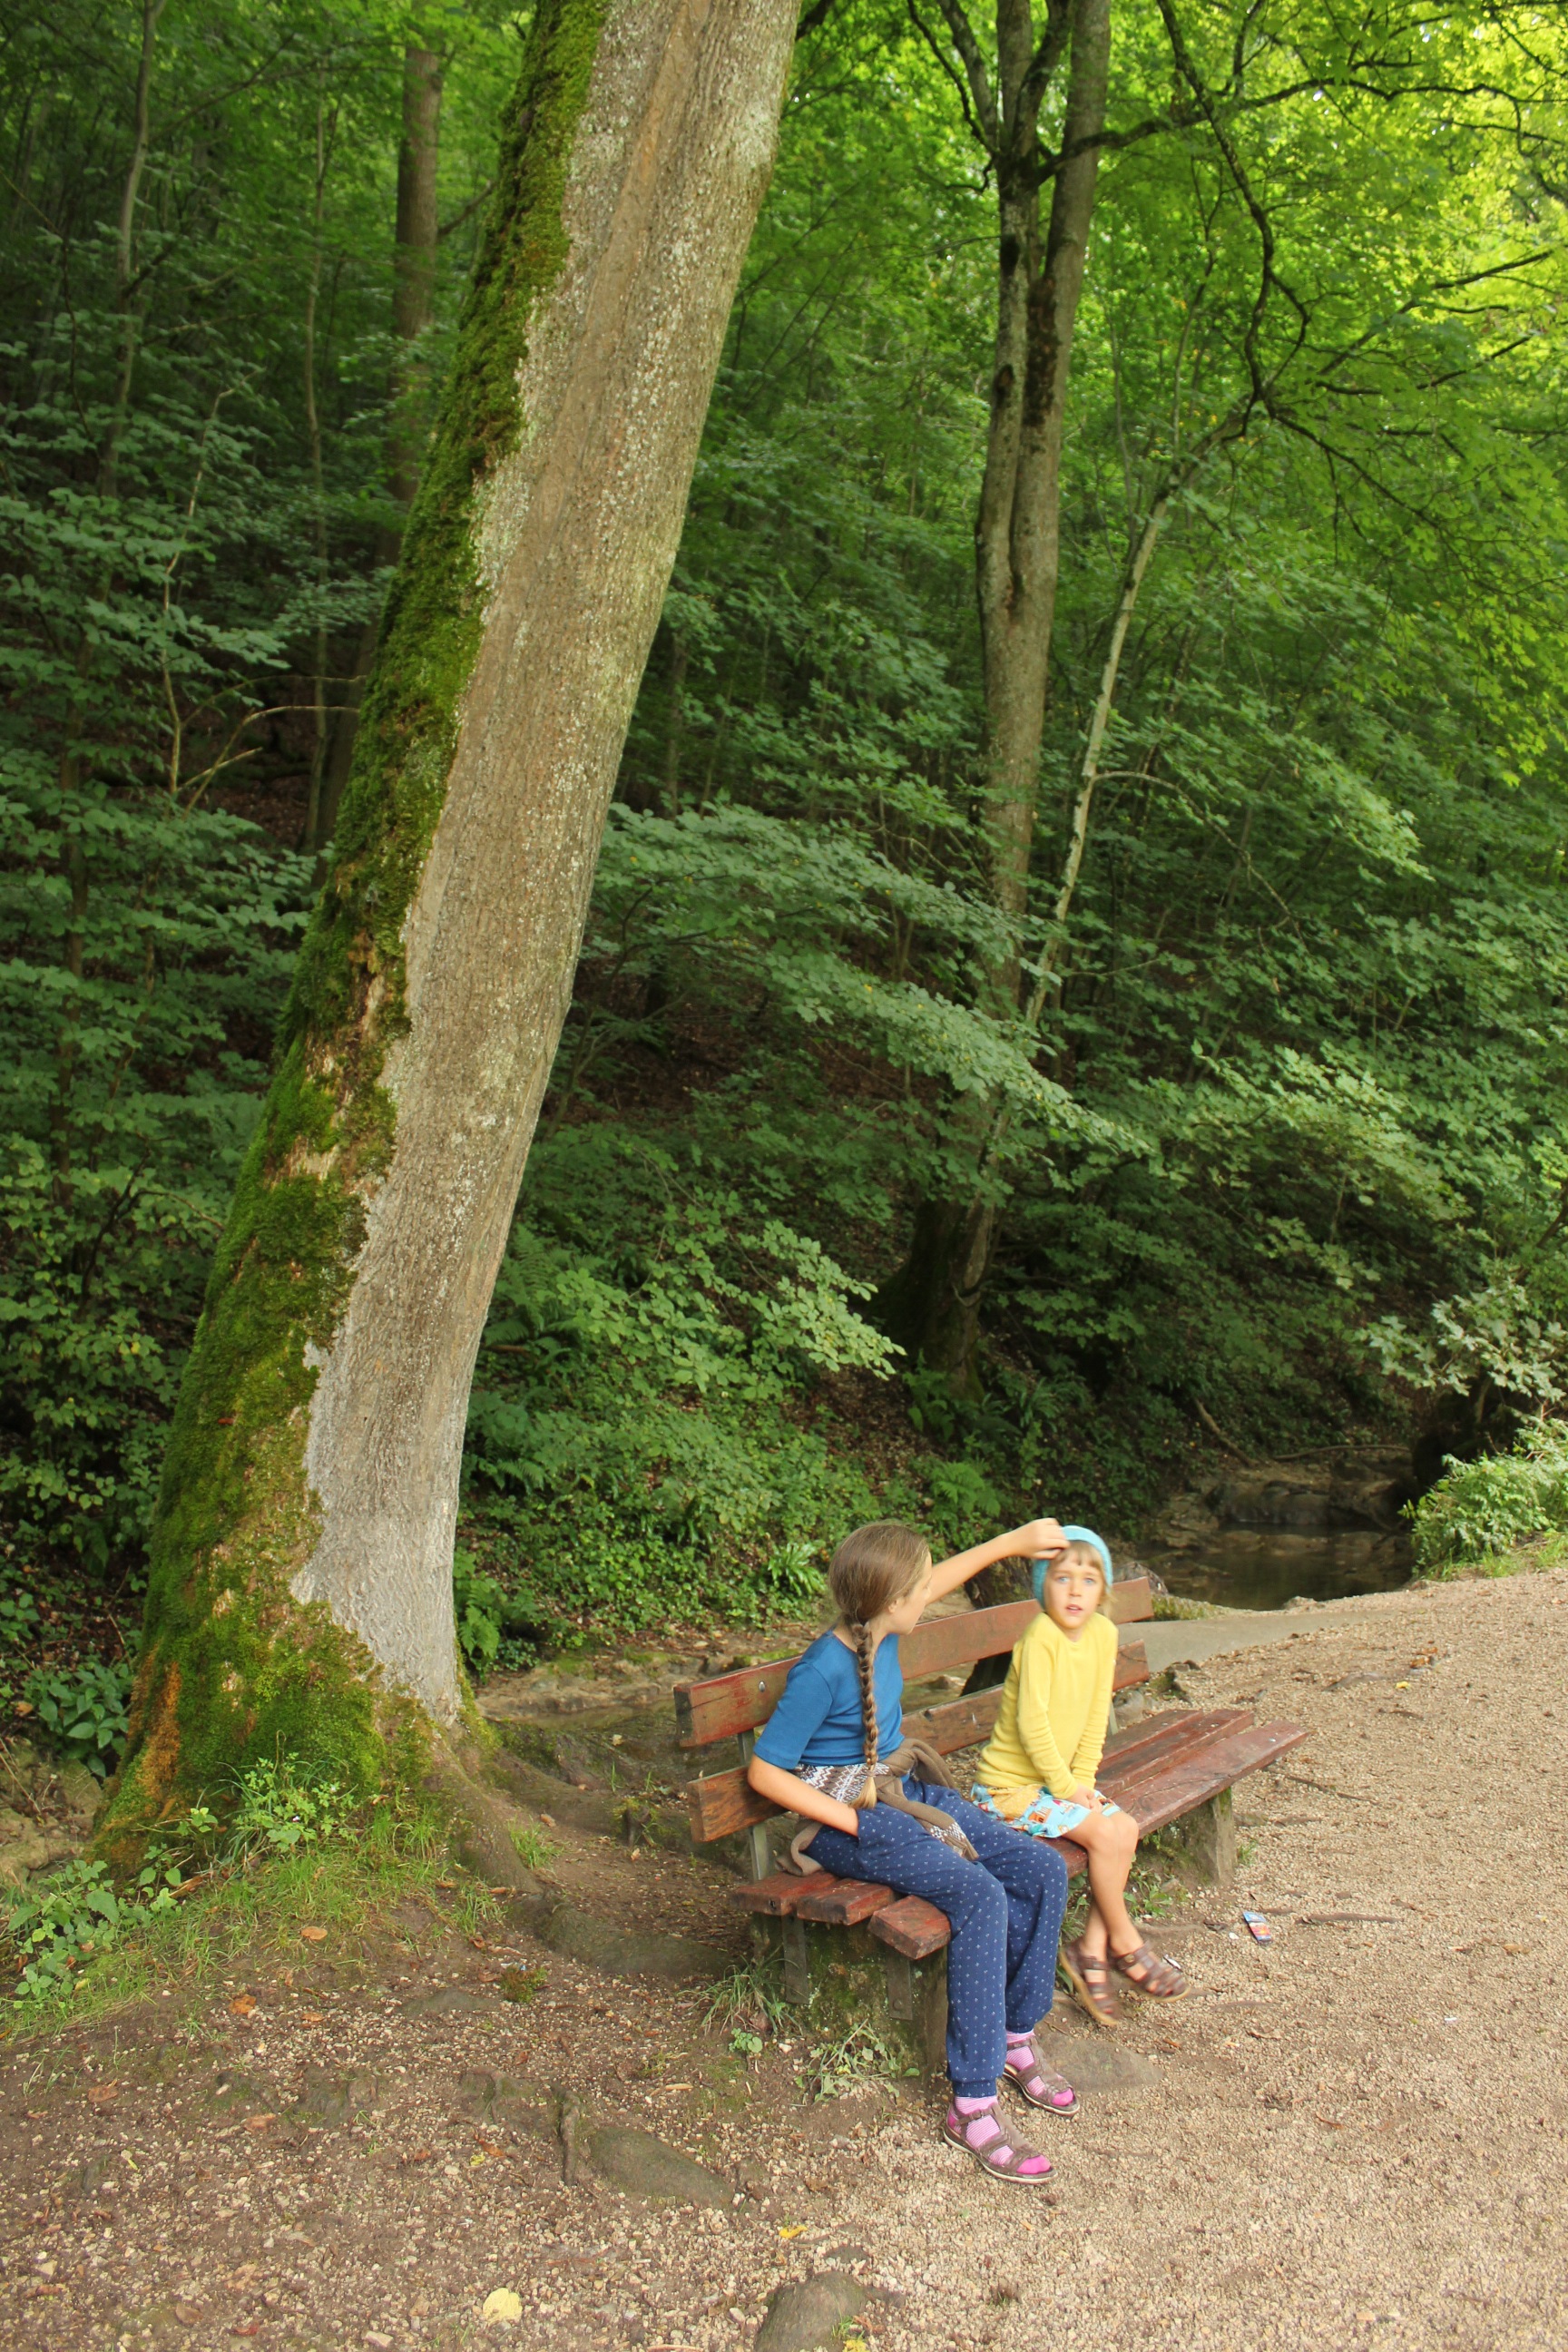
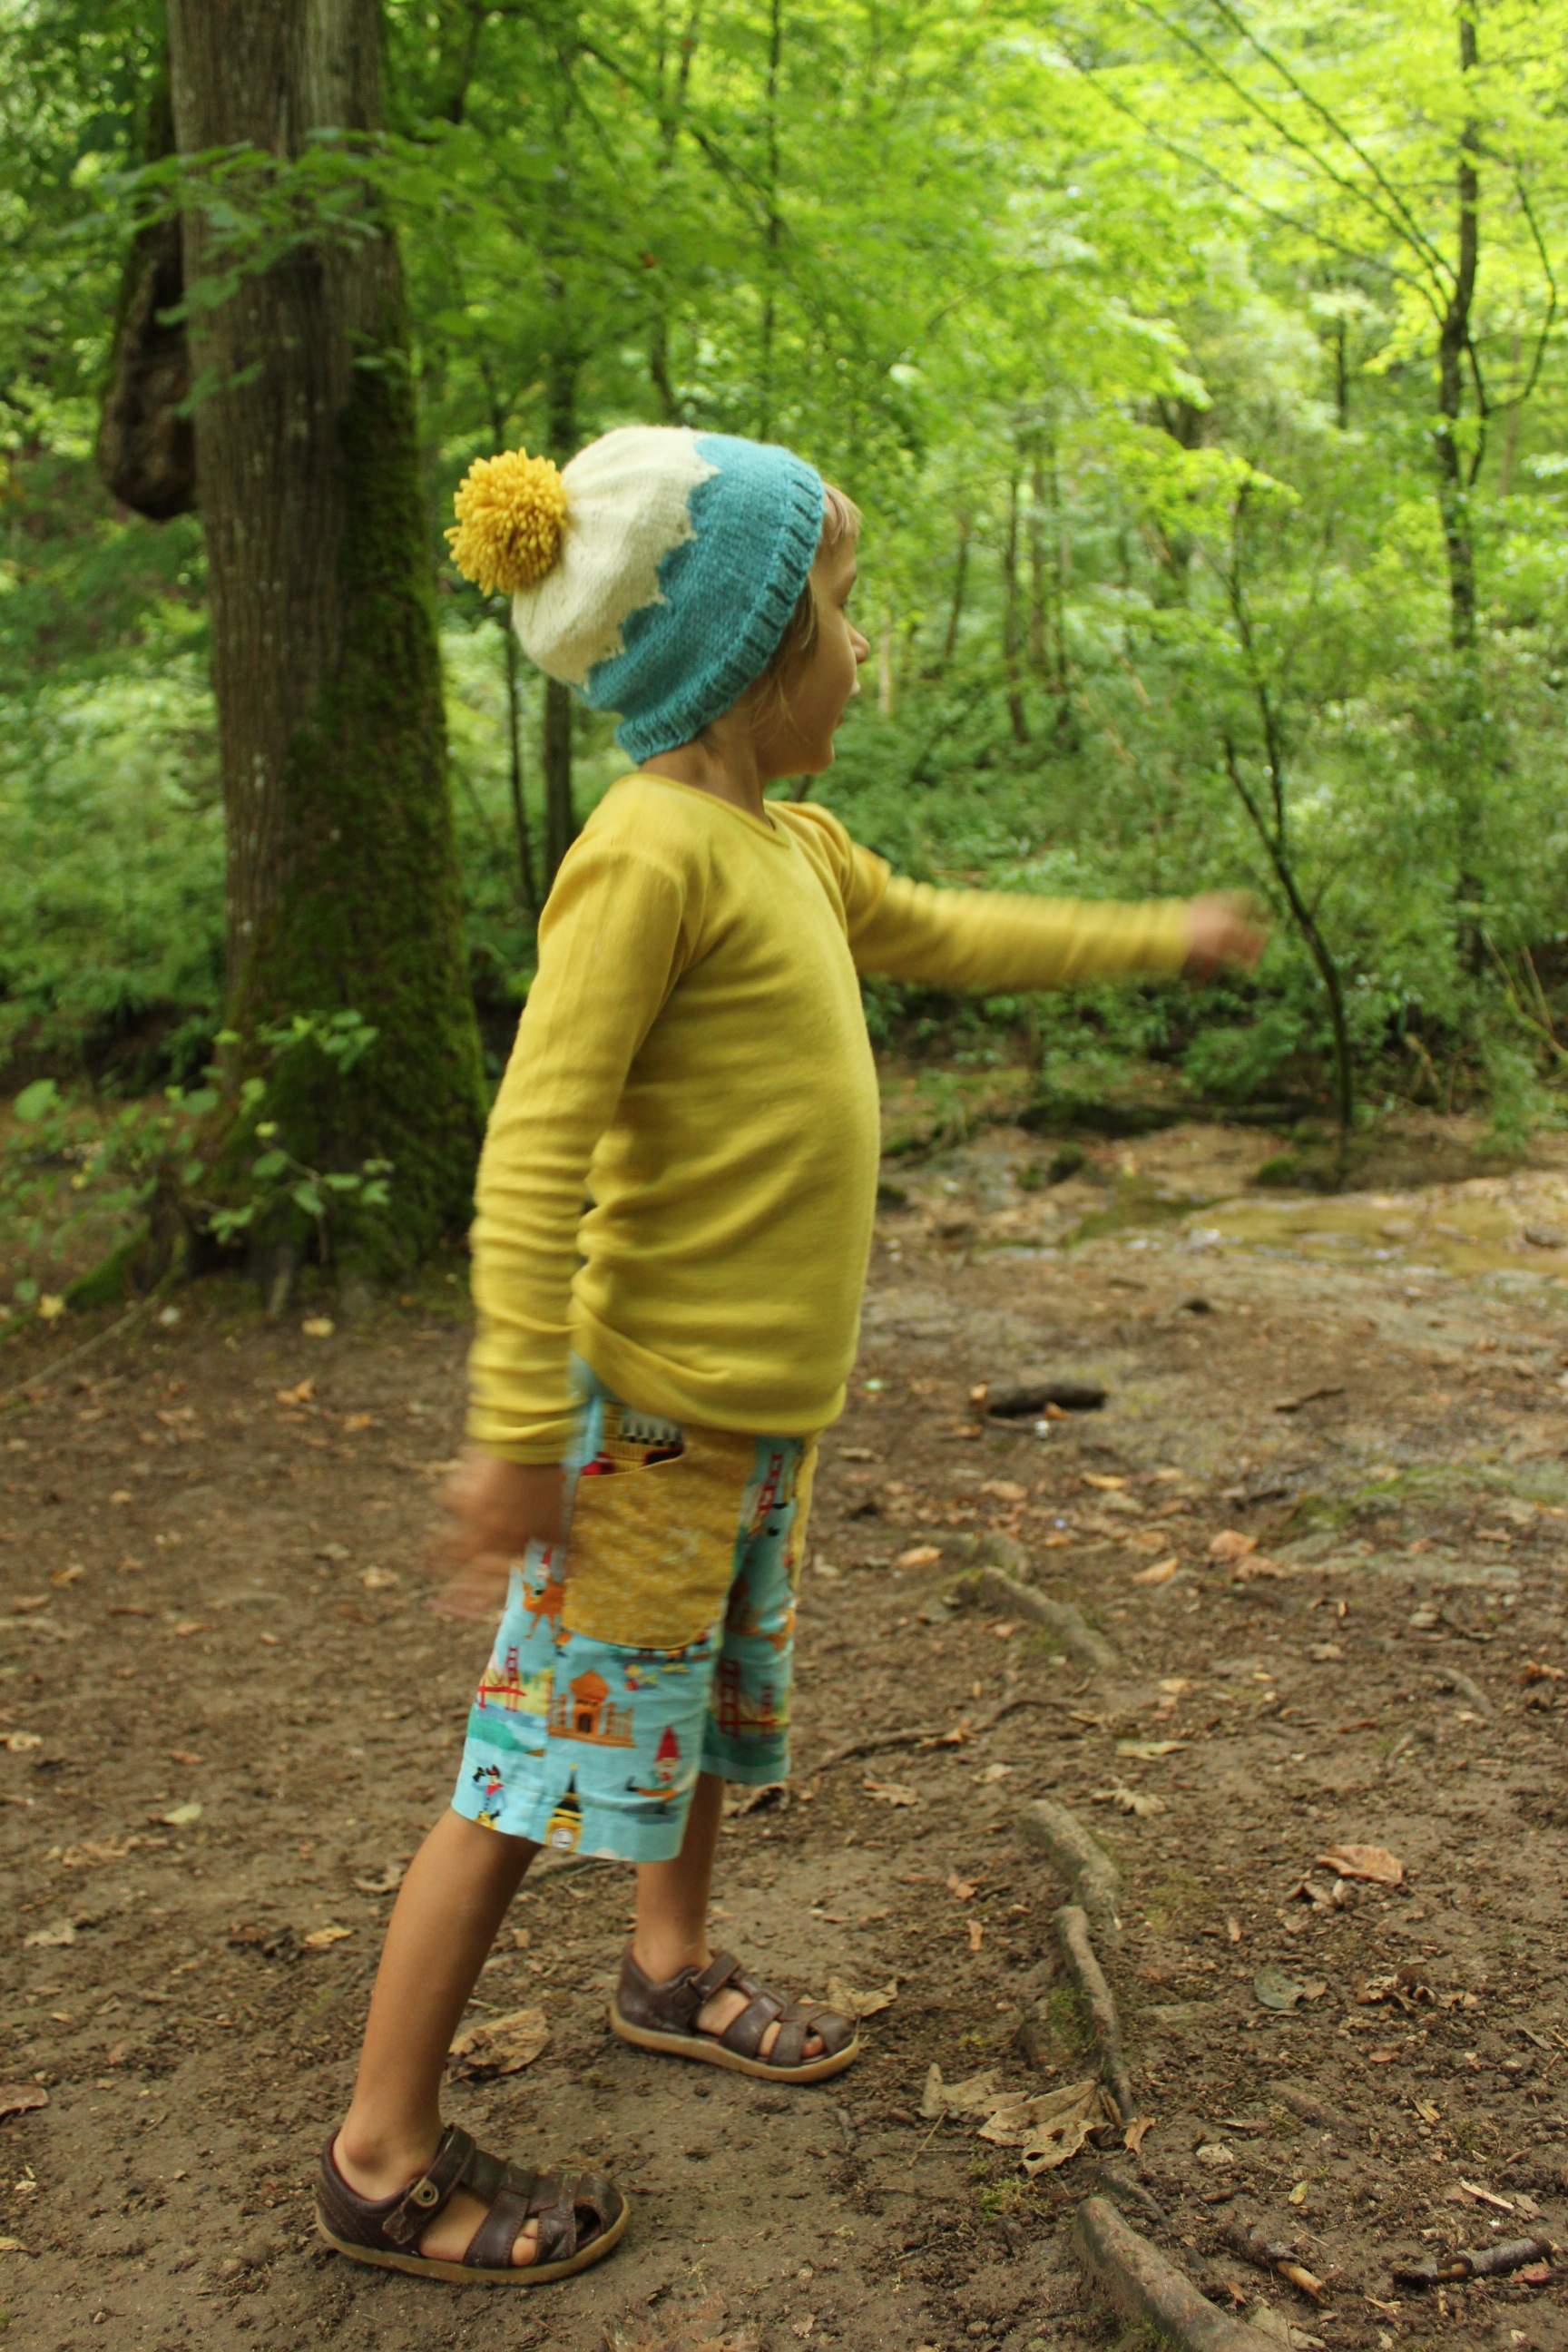
The children wanted their portrait taken on every stump! I soon started distracting them so they would walk past them…


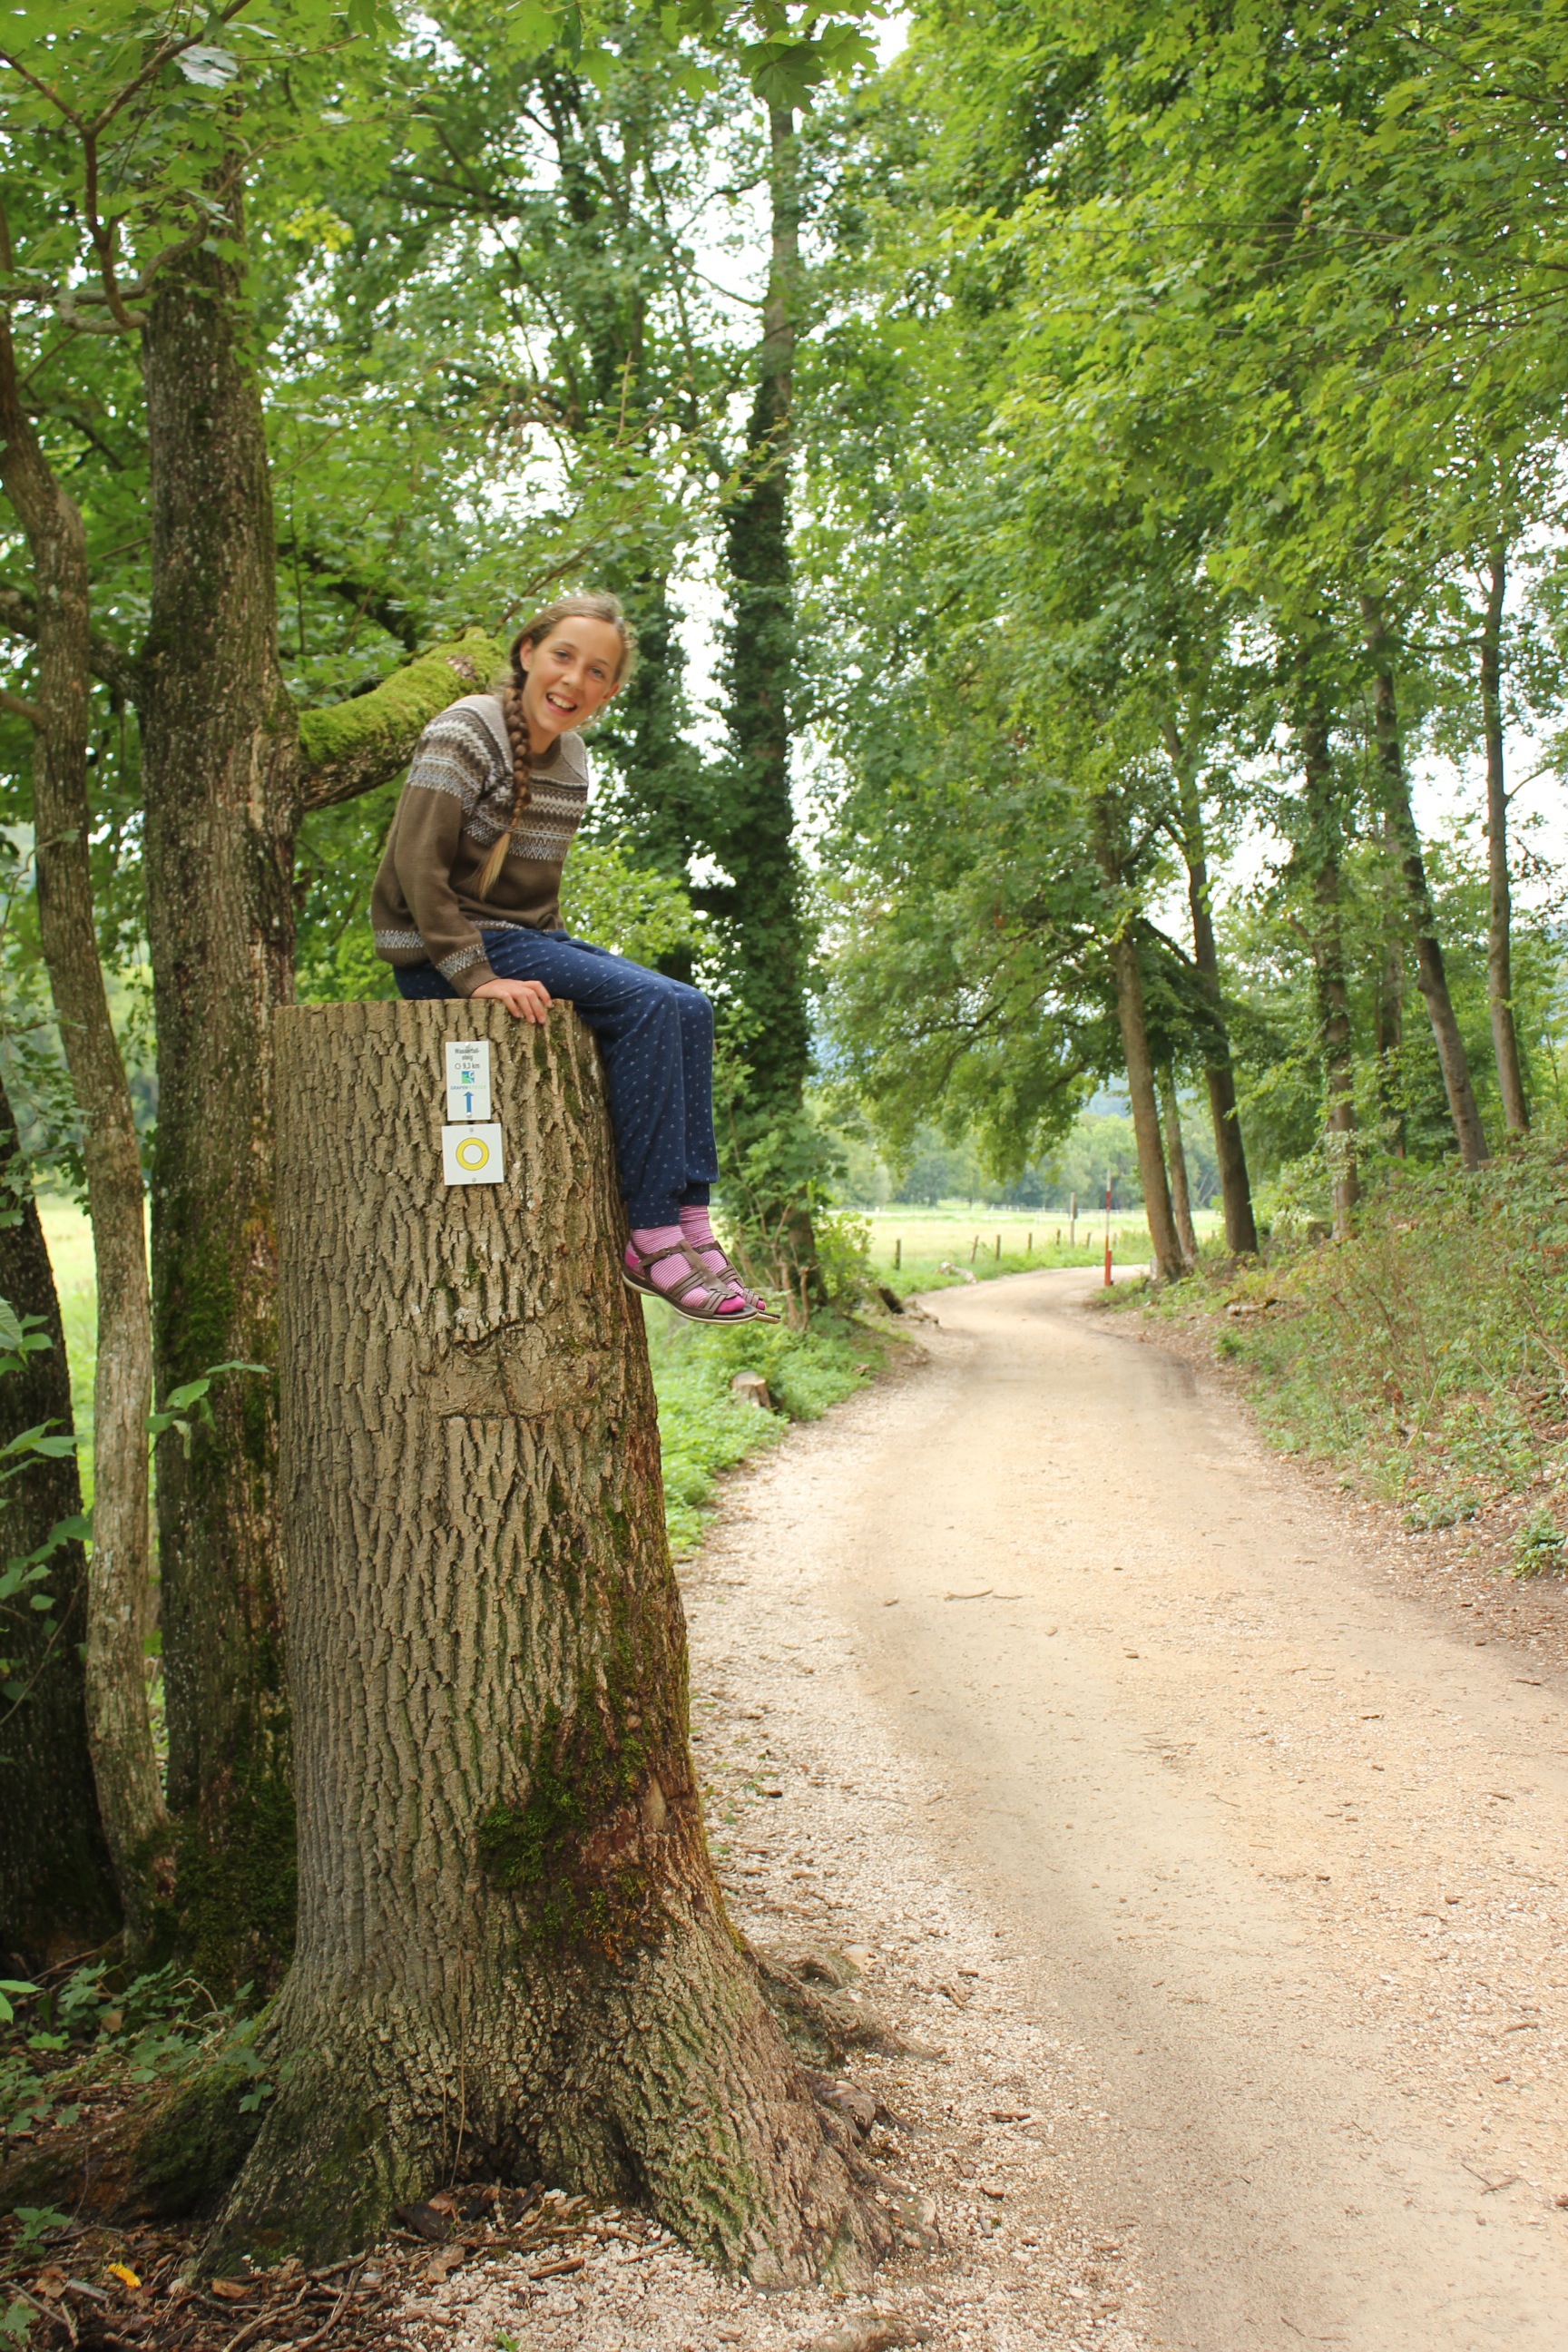


 Above photograph by Lily.
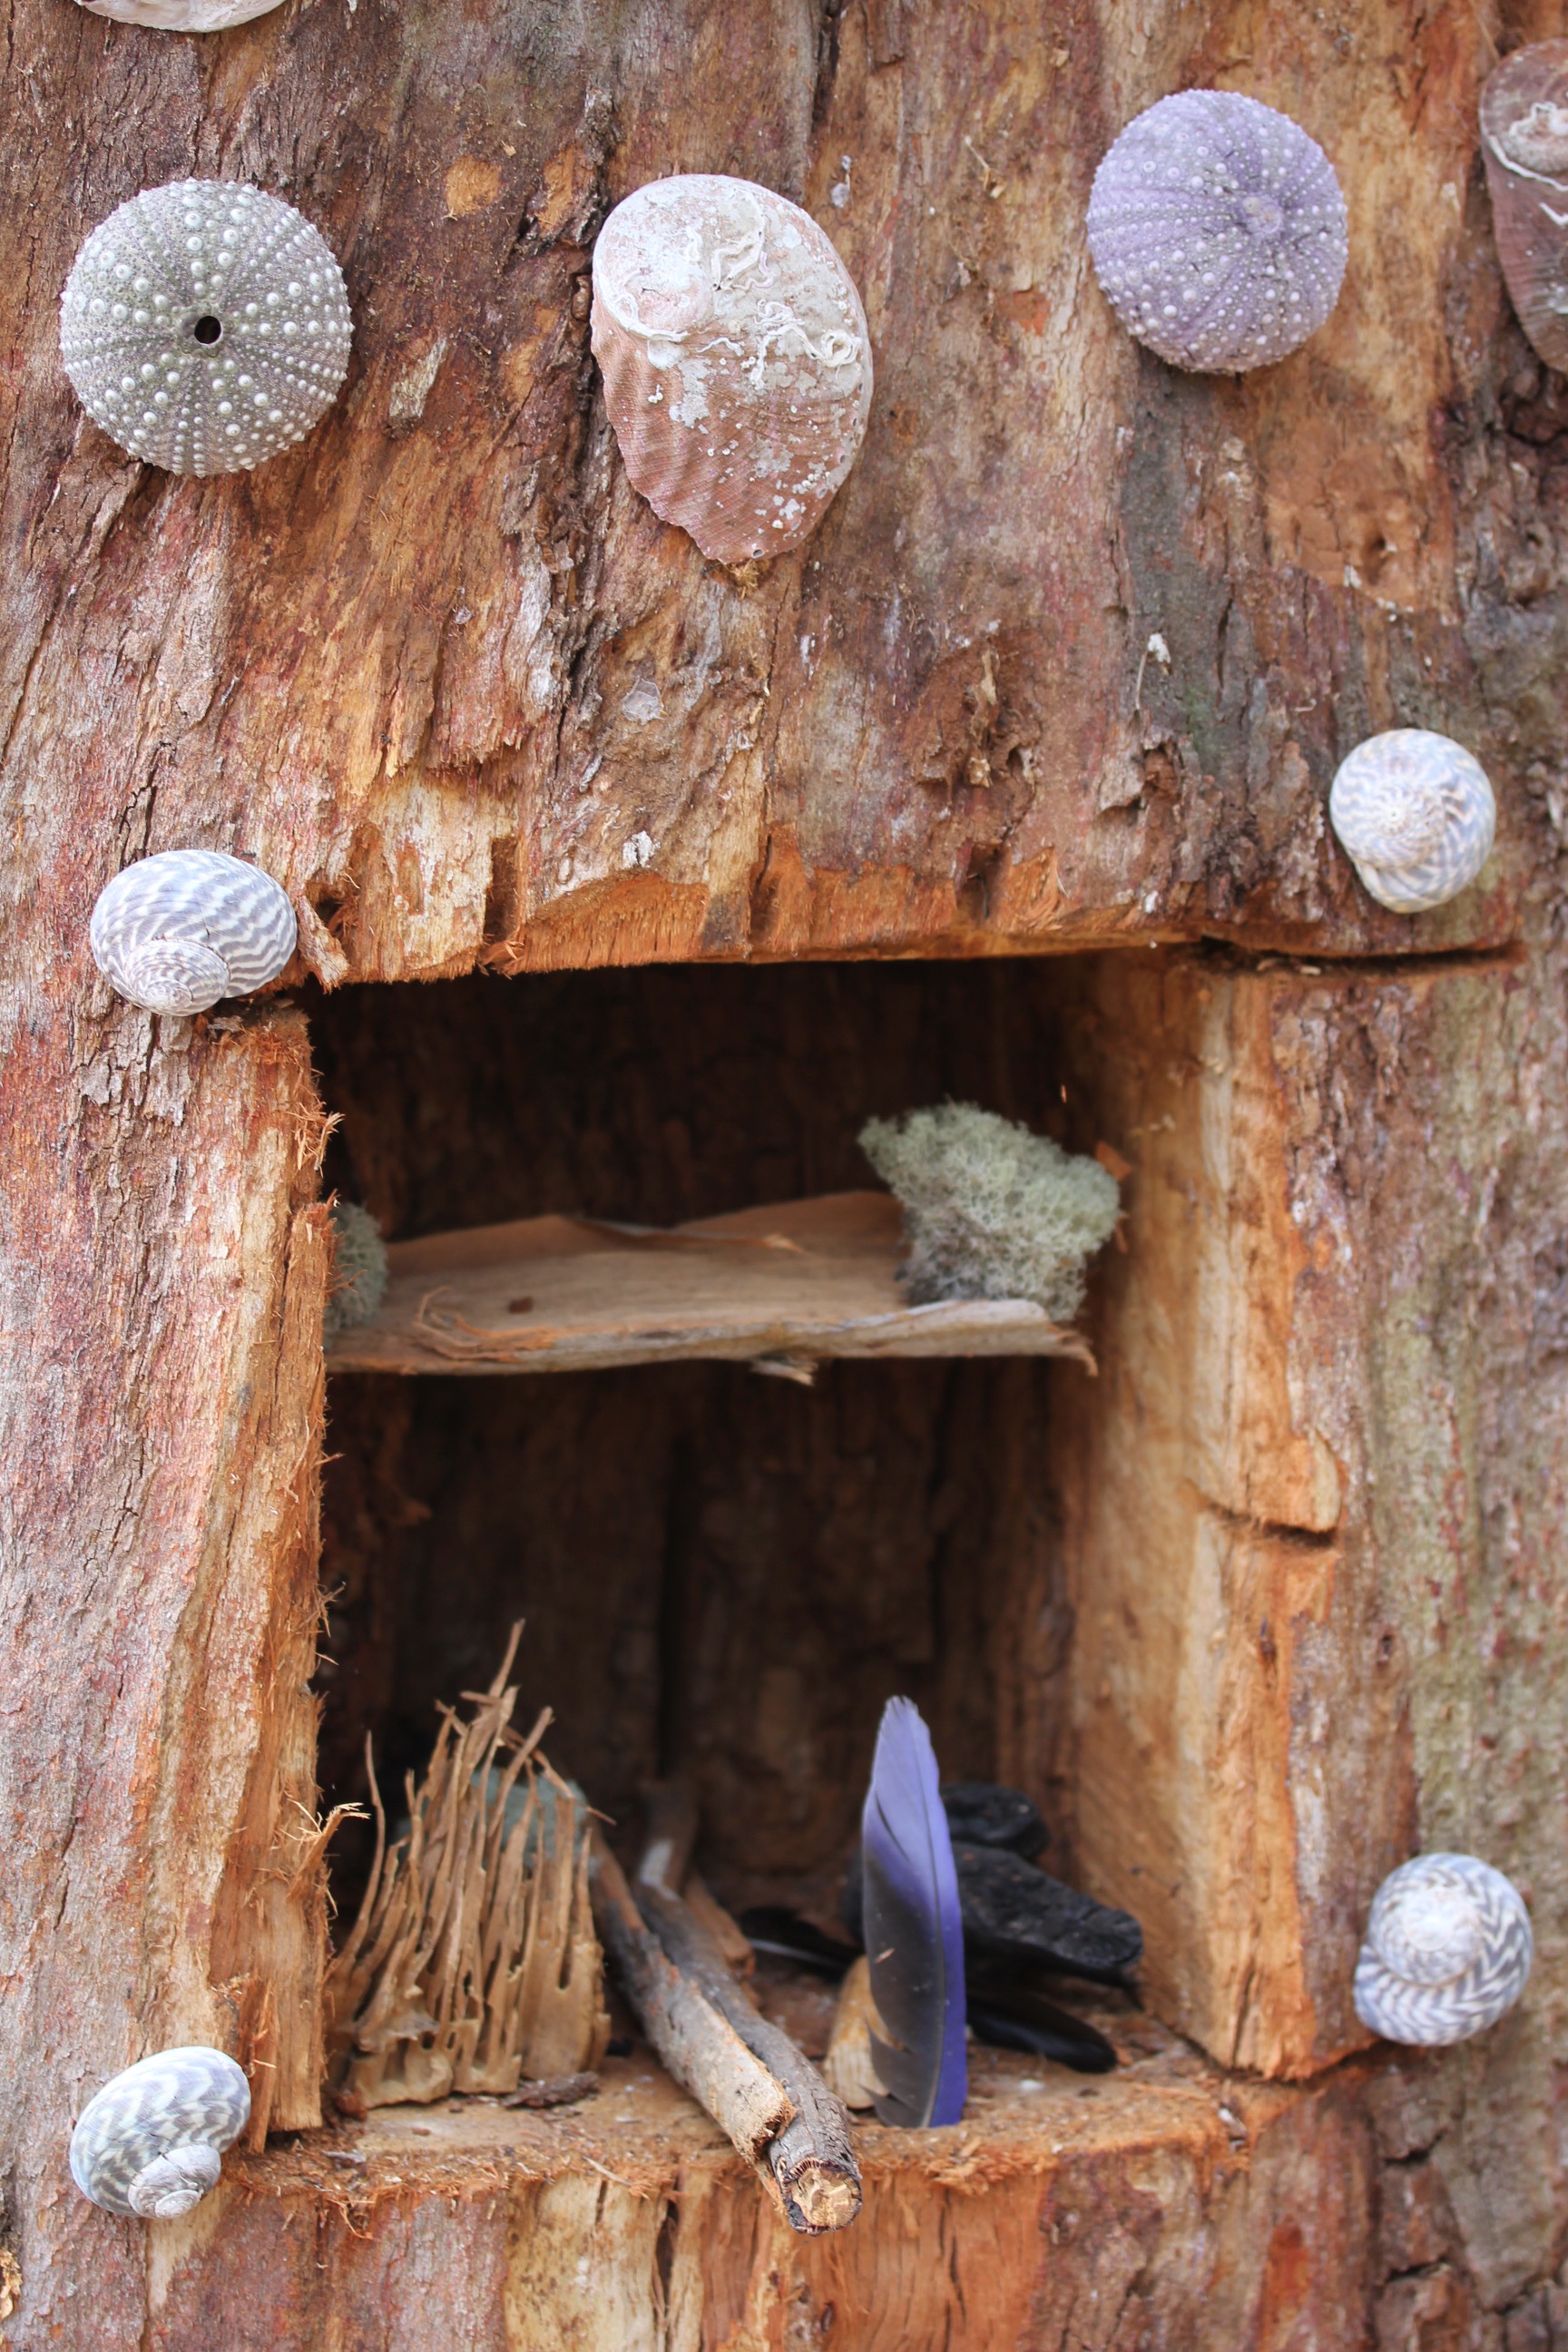
 The fairies who live and play here are this big!
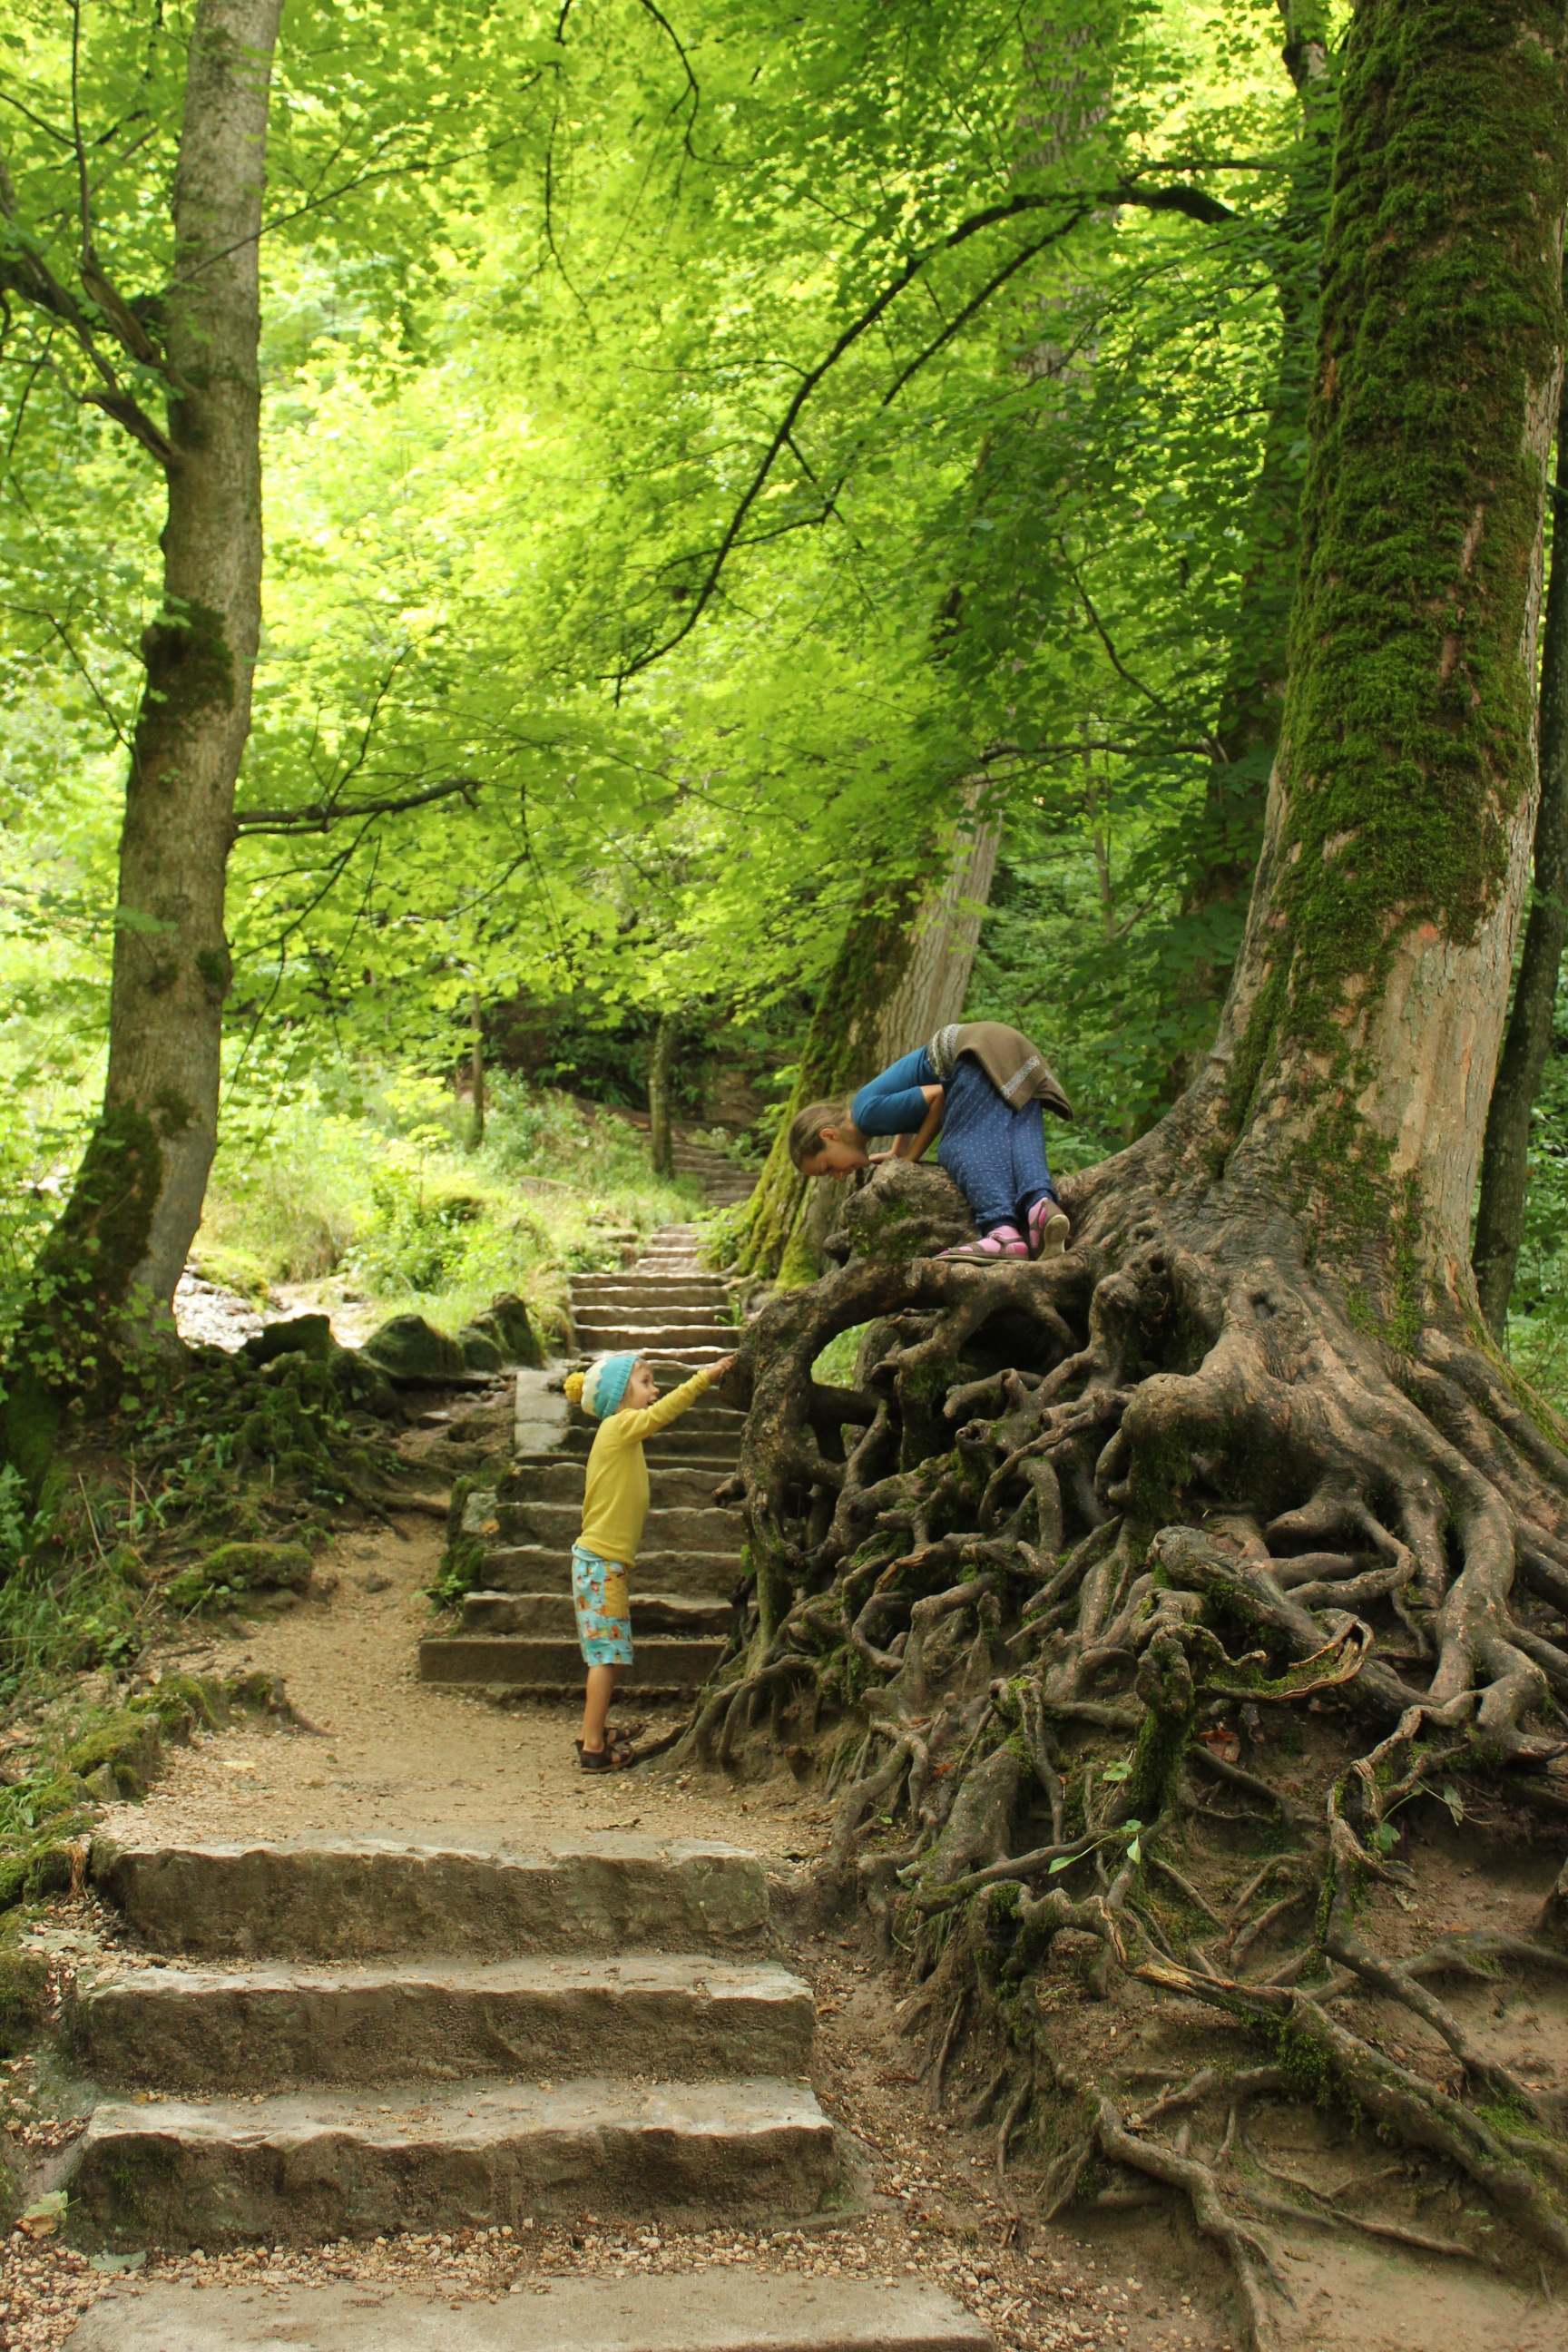 If I was a fairy I would live in this hole and that would be my slide to your house…

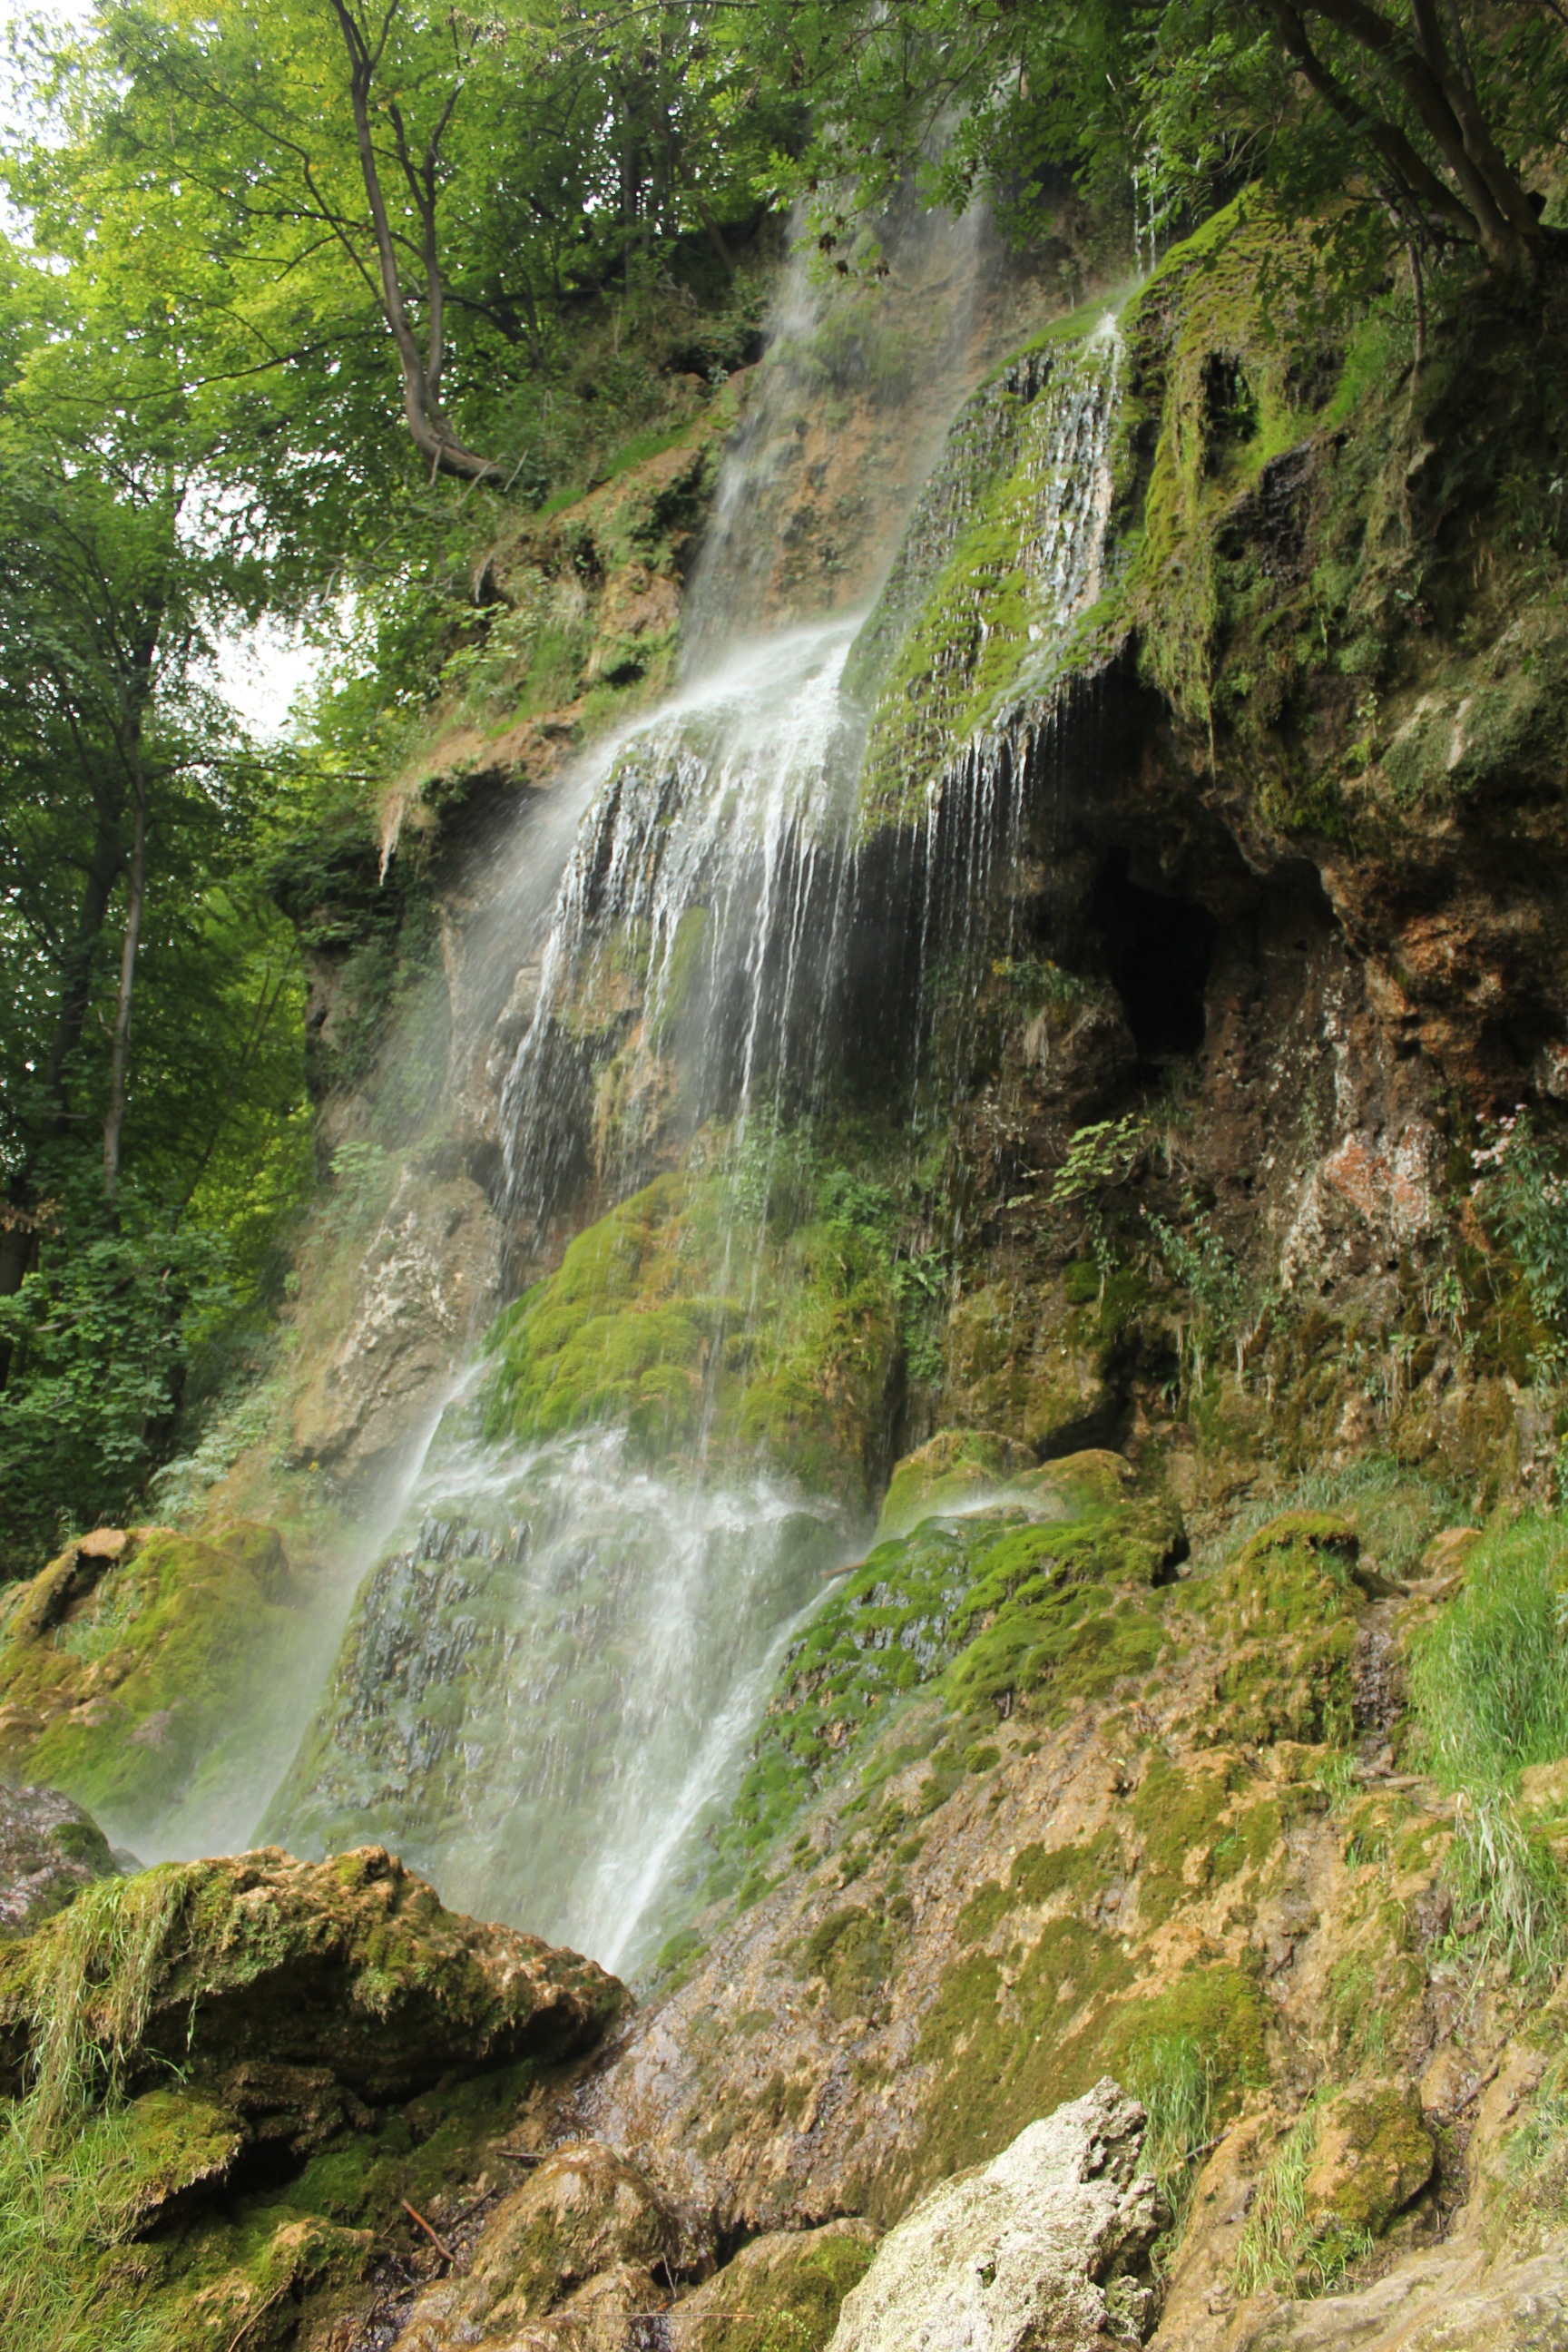
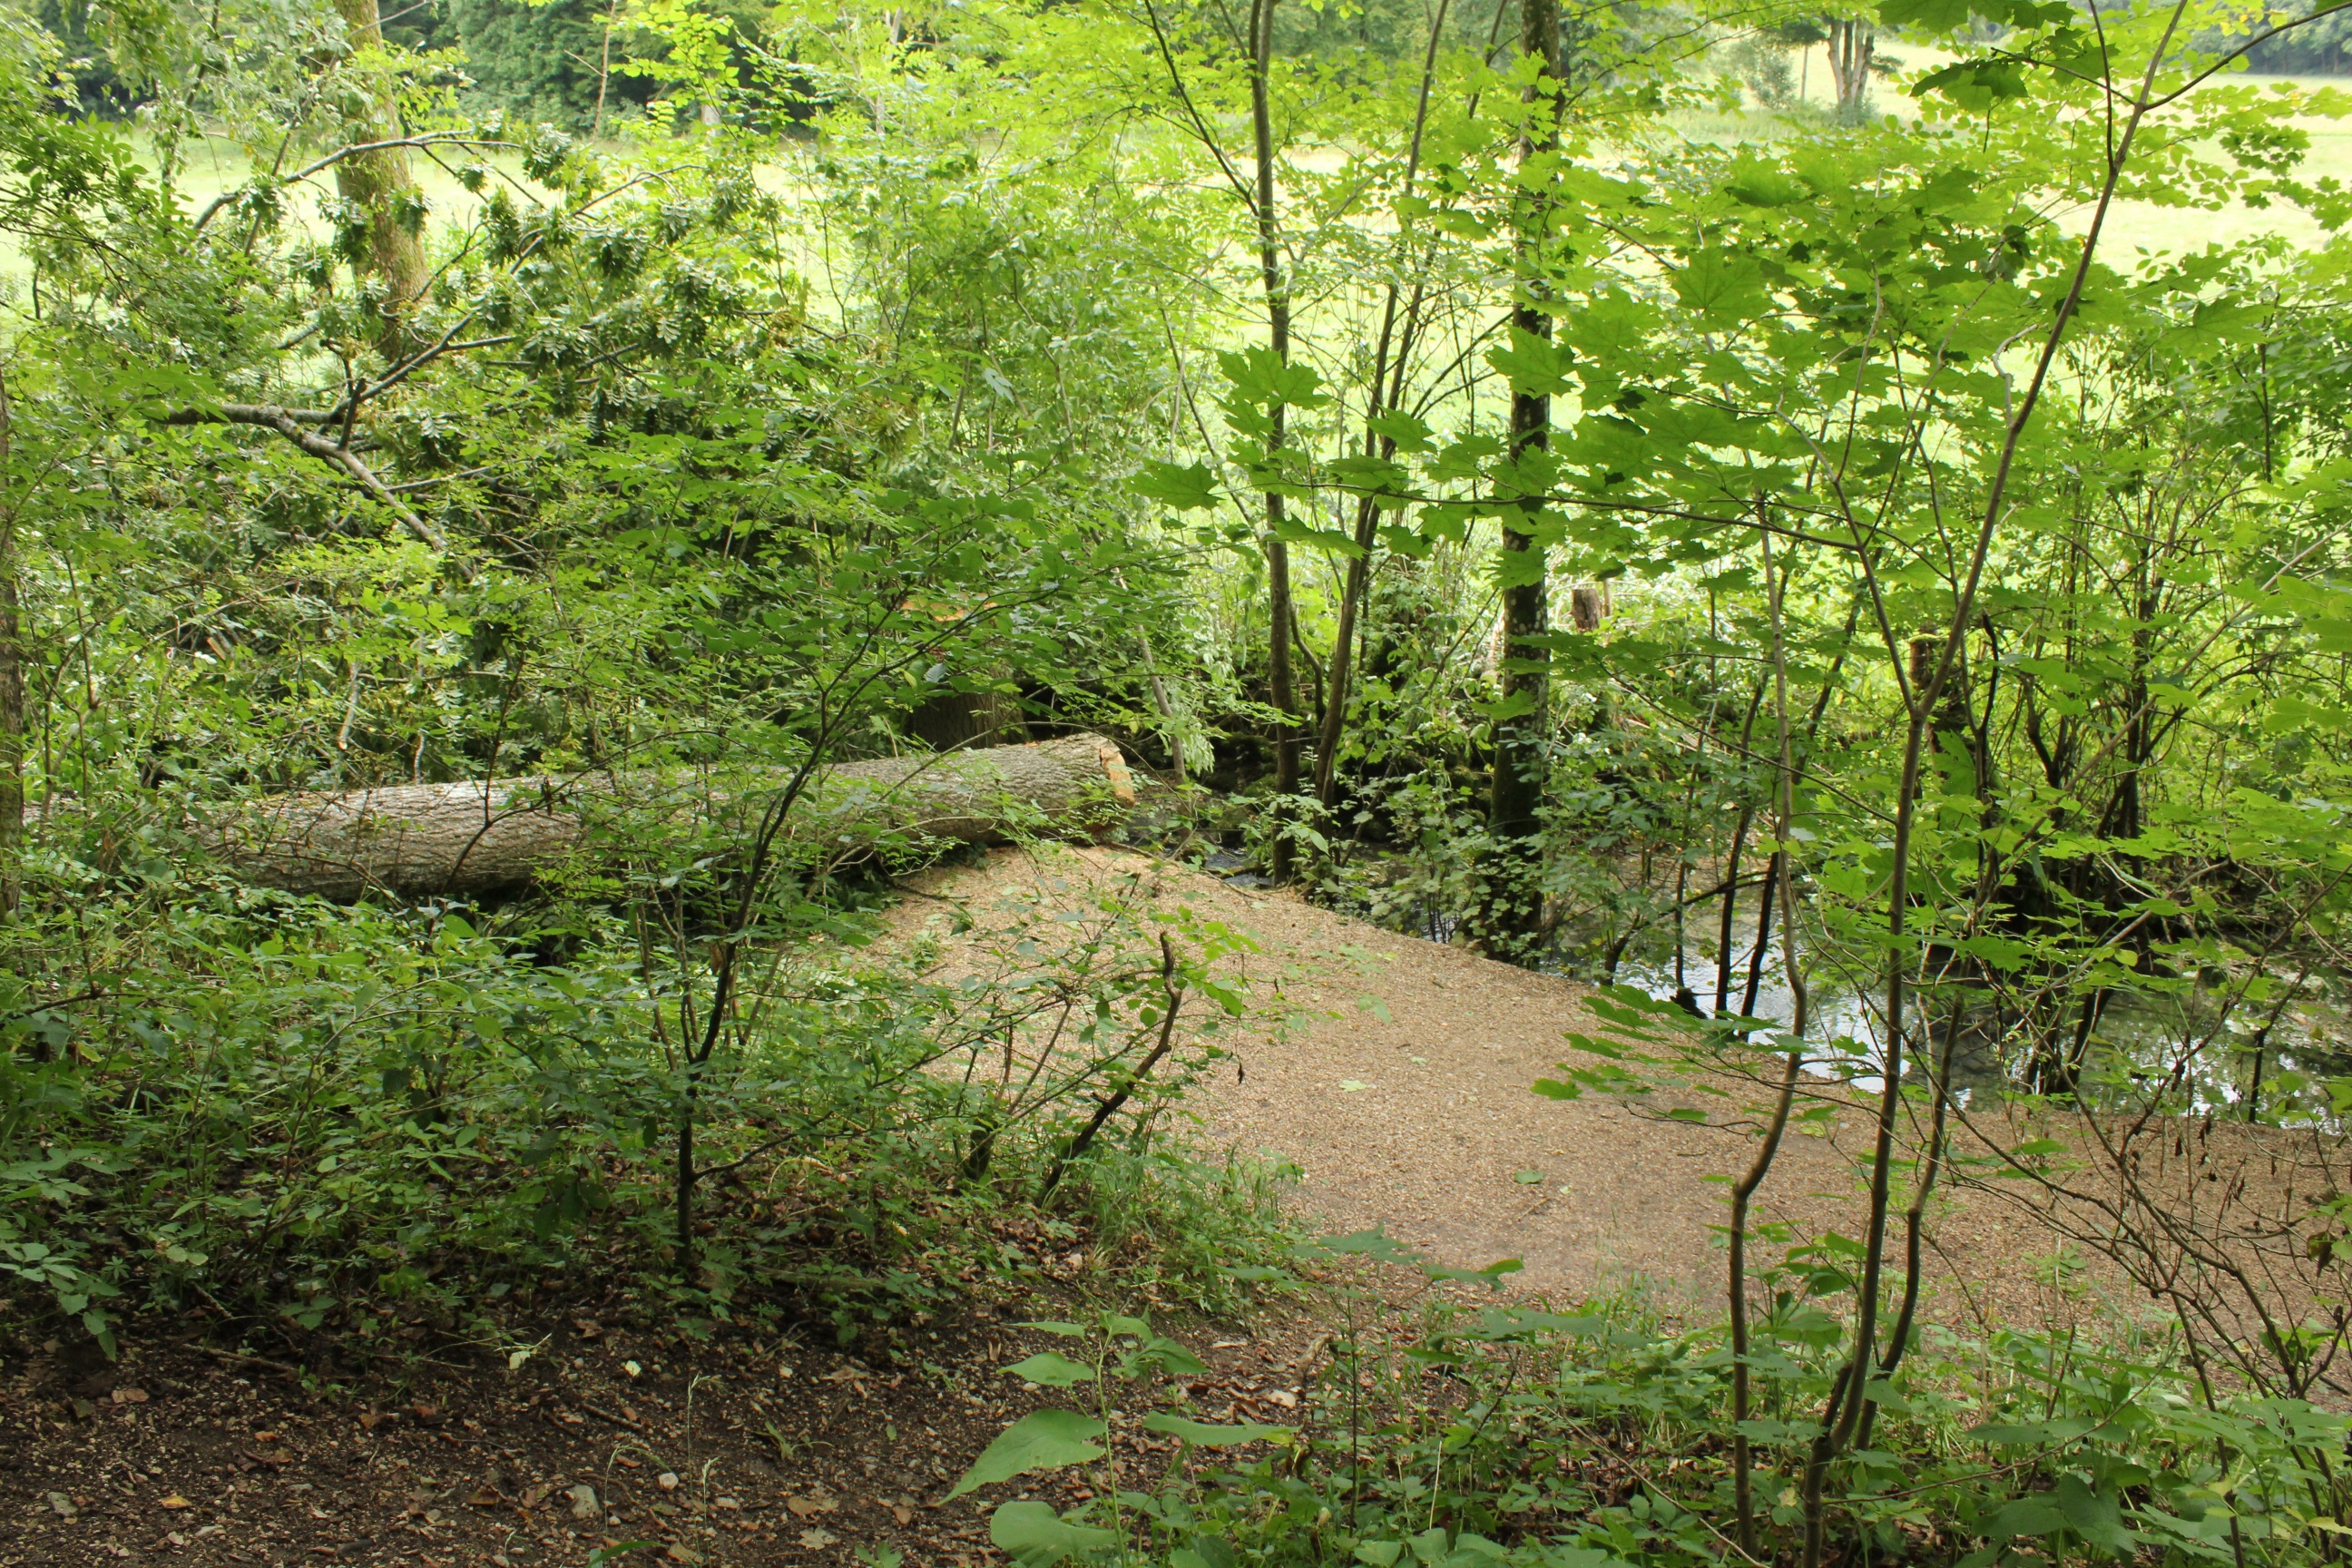
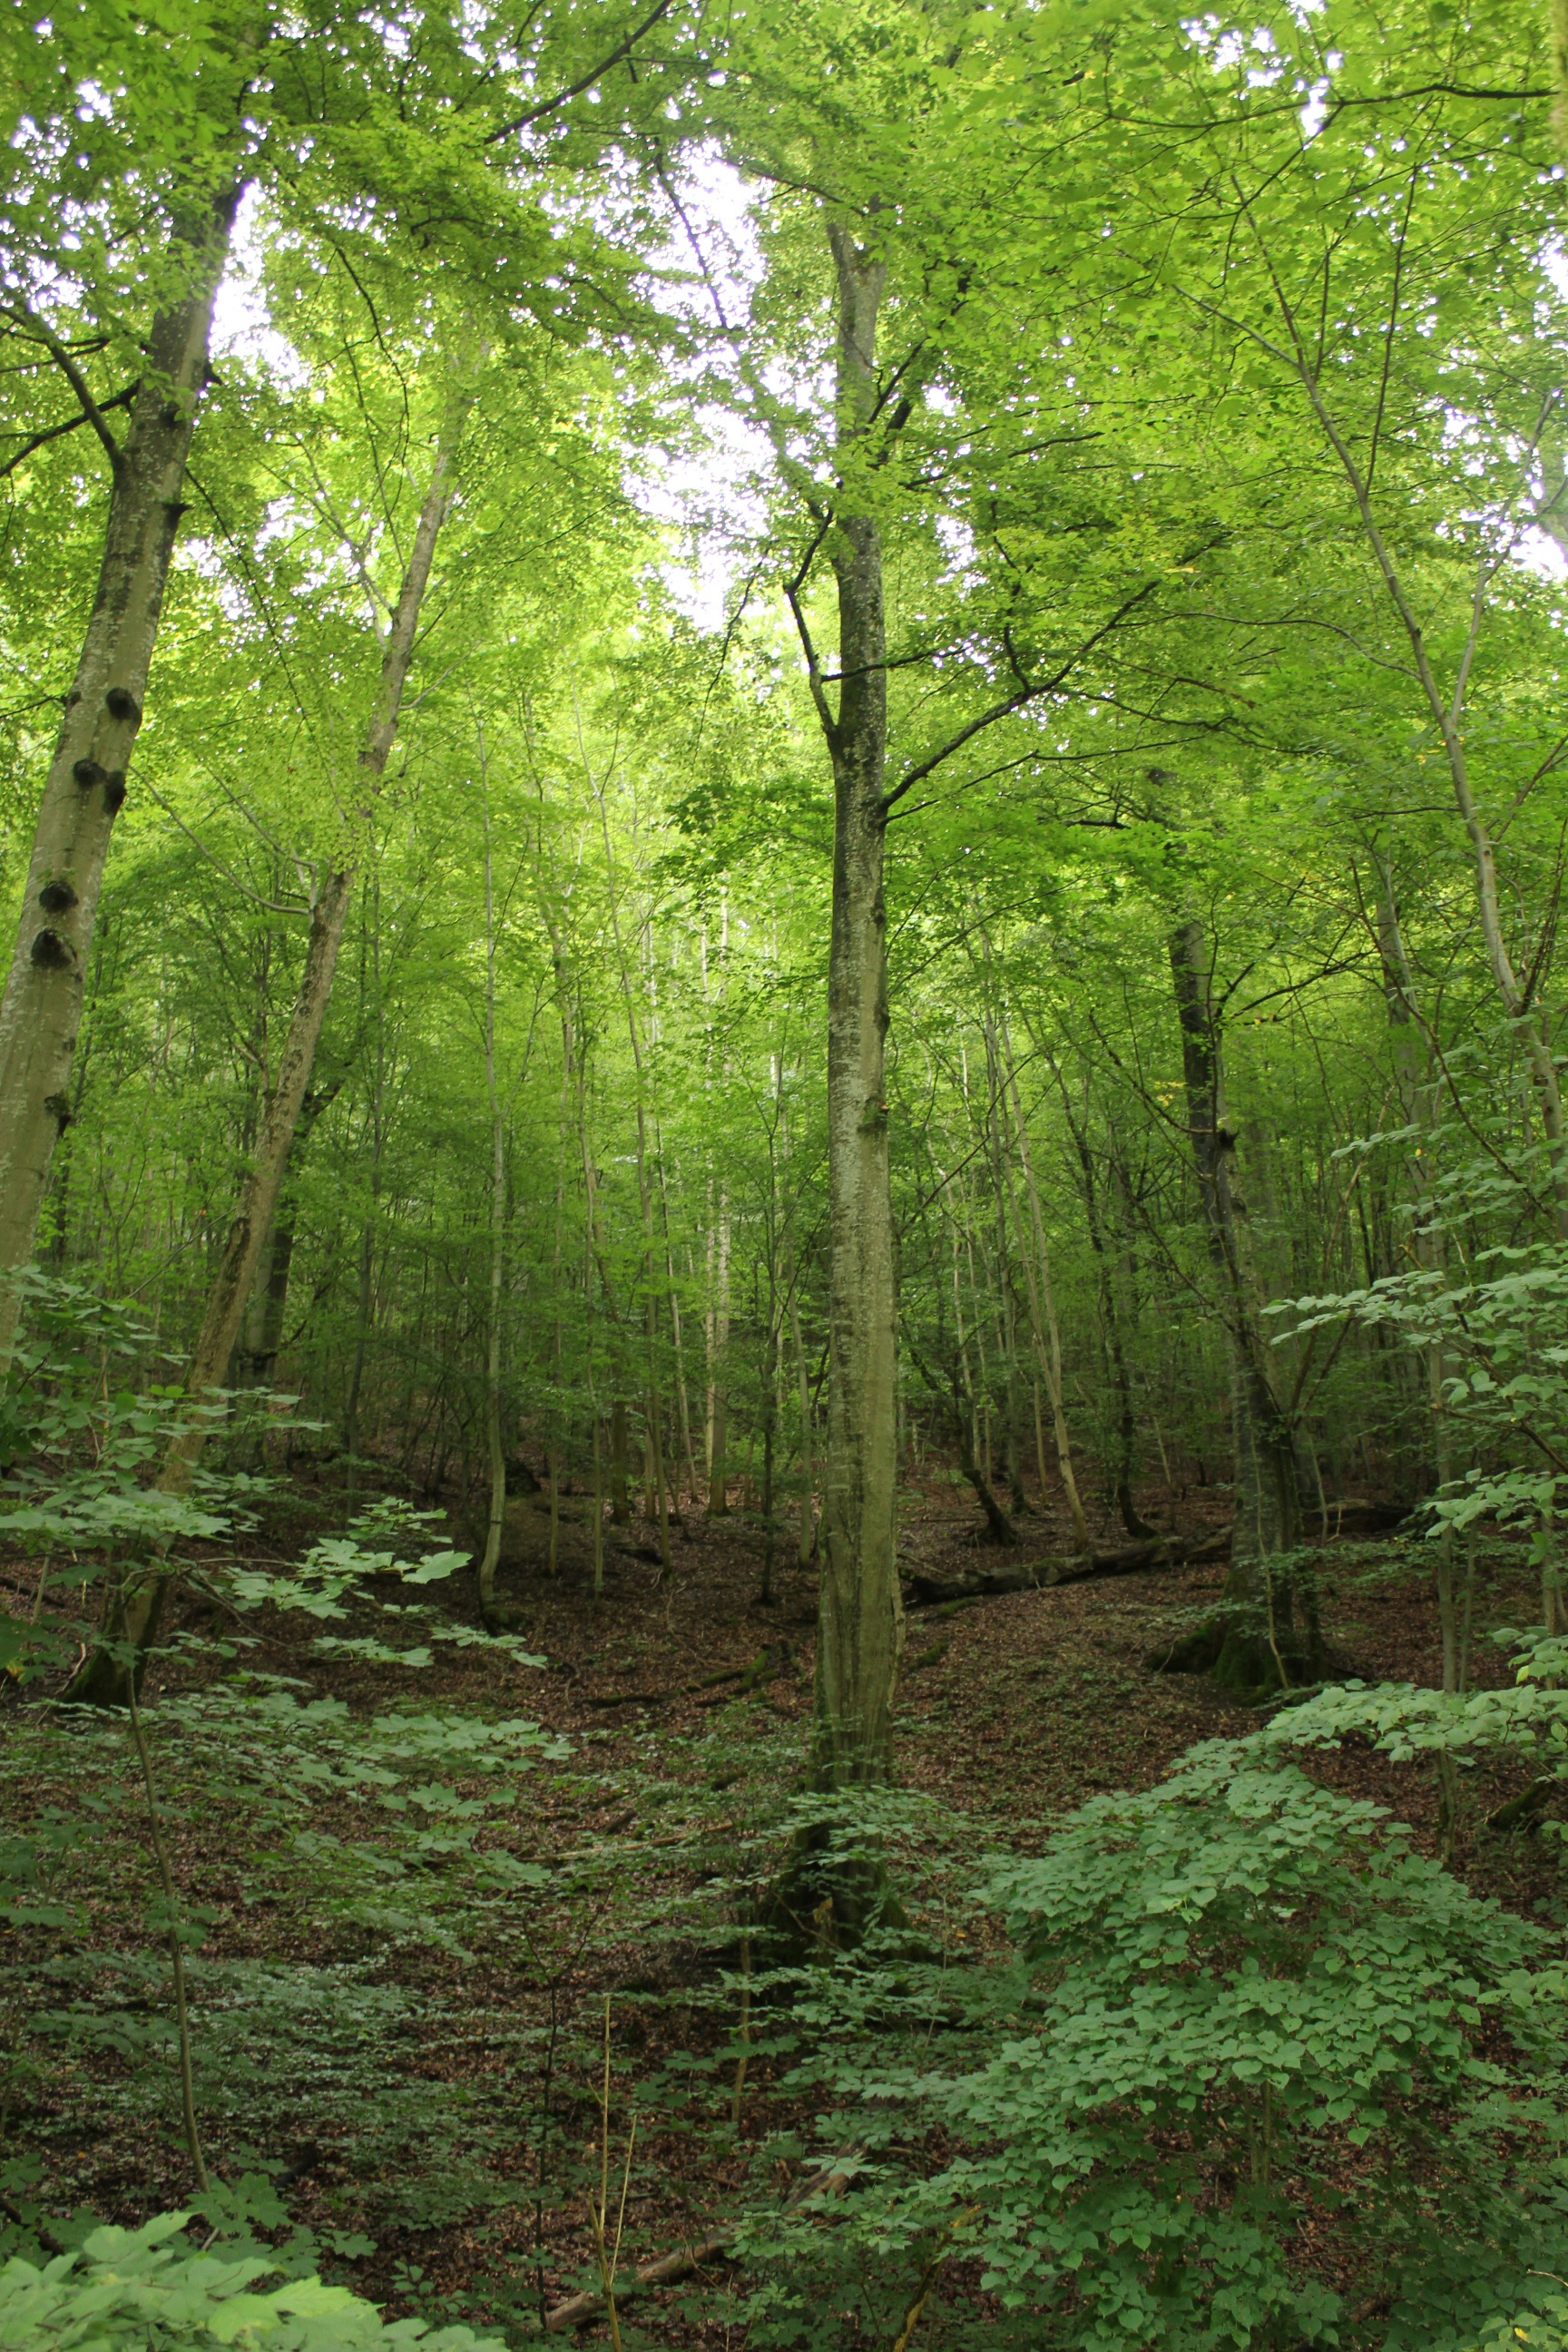
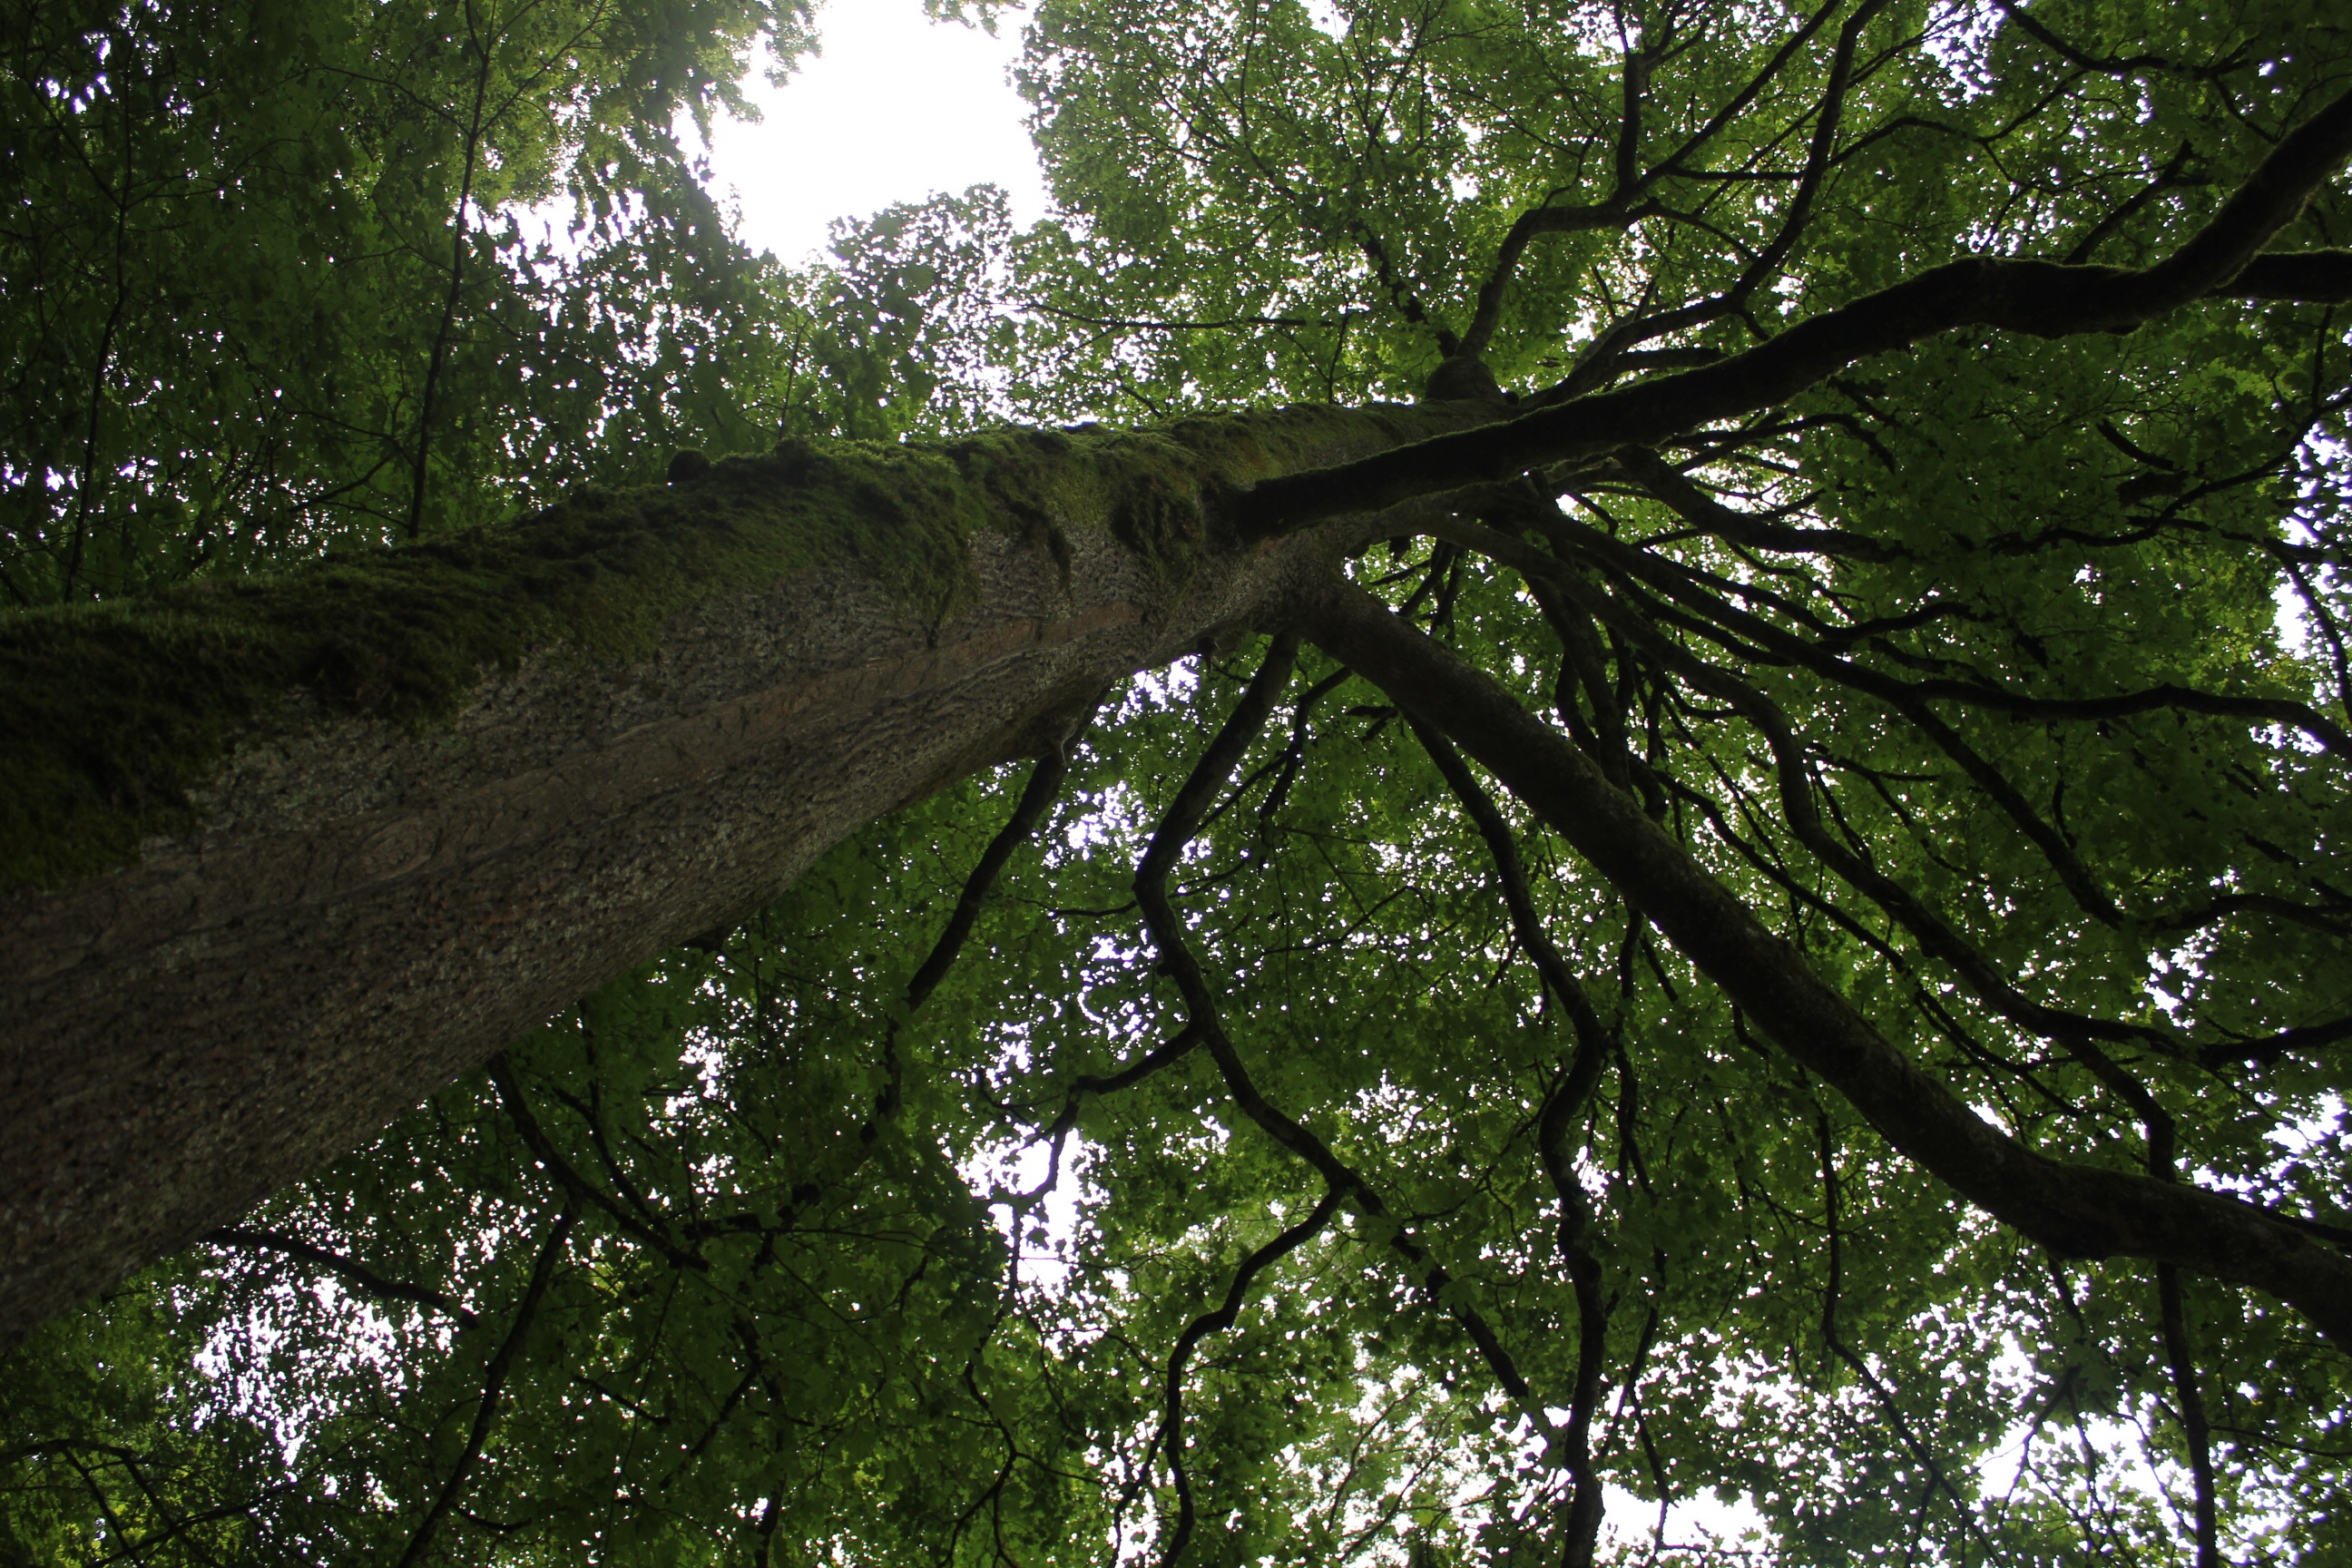
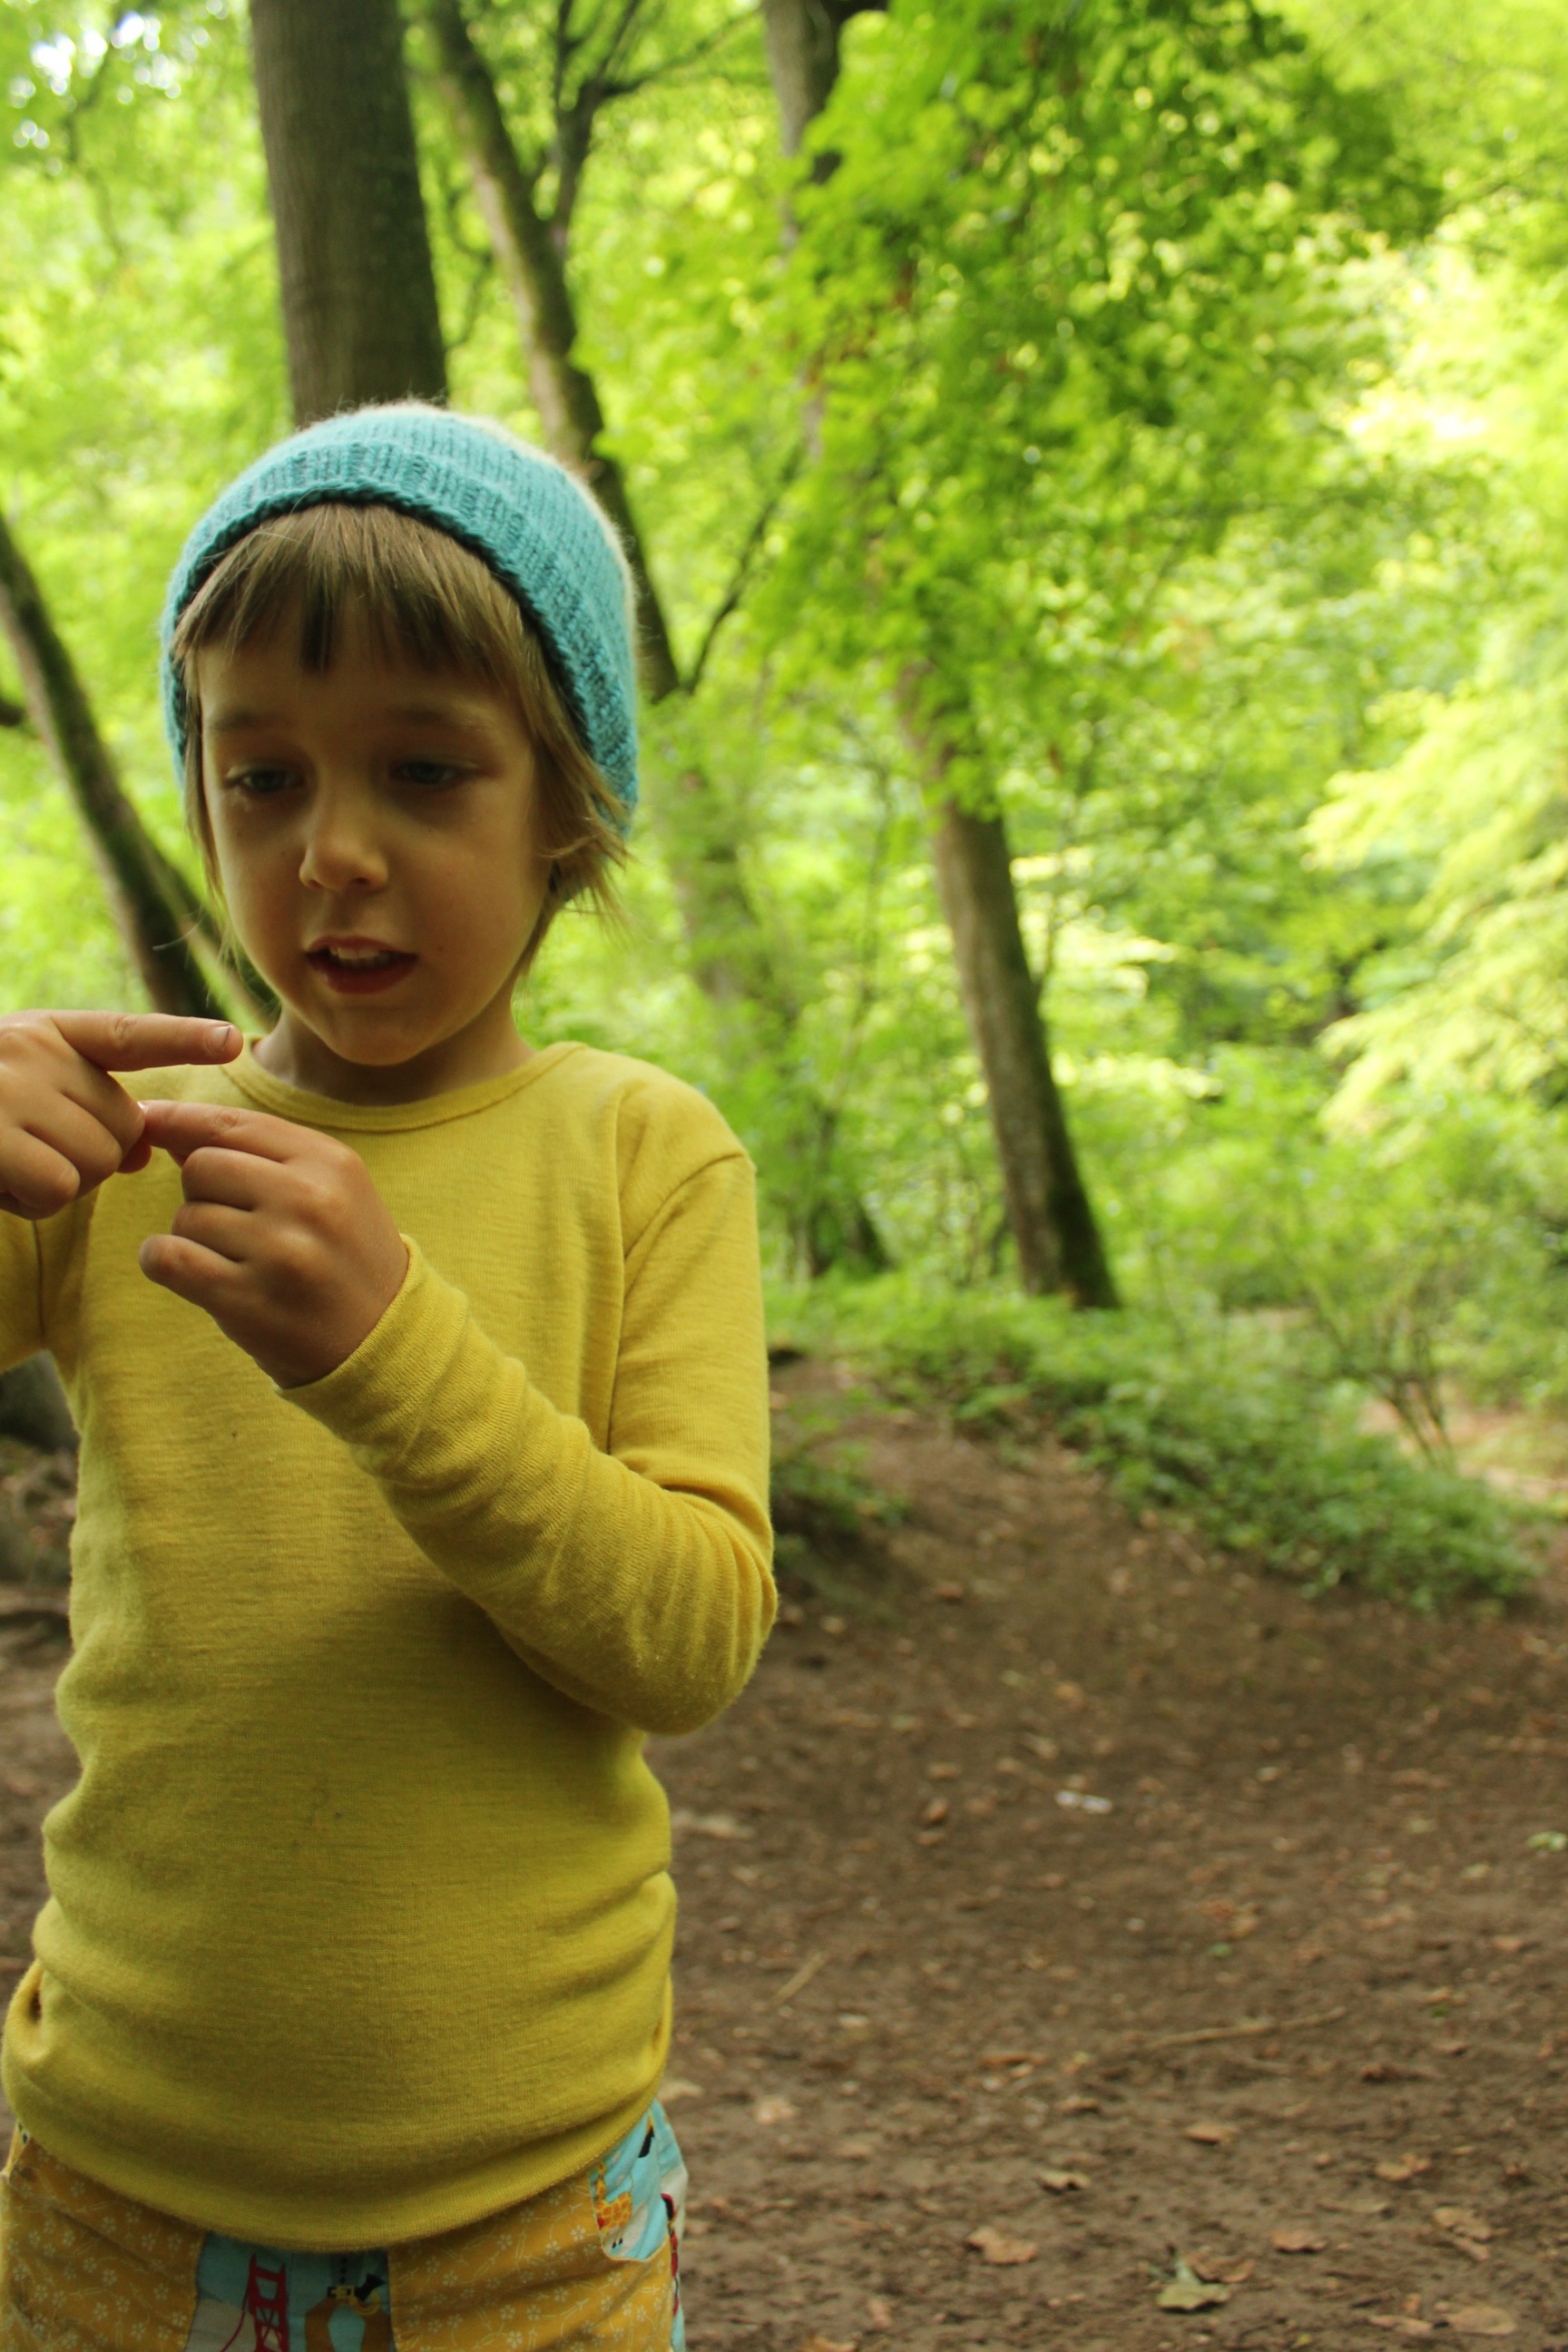
Well, maybe a few words because the walk to the Bad Urach waterfall really is beautiful and an easy path of about 1.3 km. the woods are enchanting, the creek you walk beside burbles merrily and my children where so entertaining (and cute in that outfit Cedar) it helped lift me out of the mental mud. Walking is good therapy. Especially when it’s somewhere gorgeous. Even though the forest Wass being loped that day, it’s shocking to see these beautiful mature trees cut down! Perhaps they are weed species like the camphor laurel on our area.
Things where really compressing for me, in our last days in Germany. The end of a four month chapter in Europe and beginning transitions towards home, tying up threads and feeling all the feelings. Hey, you’ll be happy to hear we sold our van the evening before we flew ! I know I know!
Keep calm and knit! I reconnected with my knitting pins to make lily this Little Sallops beanie. I enjoyed the pattern and have made it before, and will again no doubt. It’s satisfying to see something I have made, loved and worn, Cedars shorts I made from this pattern, and his wool/silk blend sunny yellow shirt is from Engel. The Engel factory is nearby and I relished seeing the origins of these wonderful clothes and the bargains in the seconds outlet!
I’m so irritated my original words vanished, this is a mere ghost of it. Anyway, i guess it’s practice for non-attatchment…
I love this apply cherry berry part of Southern Germany and we are so blessed to have friends to stay with. I realised just before we left there is a thermal spring bath in Bad (bath) Urach, something to go back for…..
Oh my god. Do this again? I need a long time for the challenges to fade and the good memories to take the front seat! For all you sitting at home and wanting to travel abroad with a family! It’s amazing to soak up other cultures and history and be inspired for our own home and garden and community and education and speak other languages and see my eleven year old conversing in German with the village kids and eat wonderful fresh cold climate produce and visit nearly every living relative I have and eat ice cream and play croquet with my 93 year old grandfather and hold hands with my Grandmother and observe Cedar soaking up every element of Opa’s farm education and walk and walk and walk and sniff mountains and flowers and watch your children blossom and find their place in family and soak up stories and places and wonder at this big beautiful world and live into how other people live and be inspired and expand ones reality and mind and overcome difficulties and be more capable and resilient than I ever thought I was and cherish friends new and old and be courageous and be kind and and….
And far out! It’s exhausting and over stimulating and challenging and difficult to meet four peoples needs and live in a 2.5×3.5 m space and doubt your choices and wonder if there’s a darn good reason most people don’t do this and and to be ungrounded and find your way when you know nobody and no one is inviting you in and you are lost and can’t speak the language or find a decent cheese, I mean camping place….
So yes, maybe one day we will make a trip to Europe again.
Because really we didn’t get very far….
Have you travelled extensively with your family?
Where would you go if you could?
Travel well friends.
Roselinde
The Treadle Machine


I am unsure how time passed so swiftly
But here we are
Thinking a lot of home and our return in a couple of weeks
What is happening in my garden?
Many stories not shared, I can’t claim I am a proficient travel writer!
Four people in a small space, so much outside to see and explore, where is the plug anyway?
Packing sorting packing
Being held lovingly by a friends home
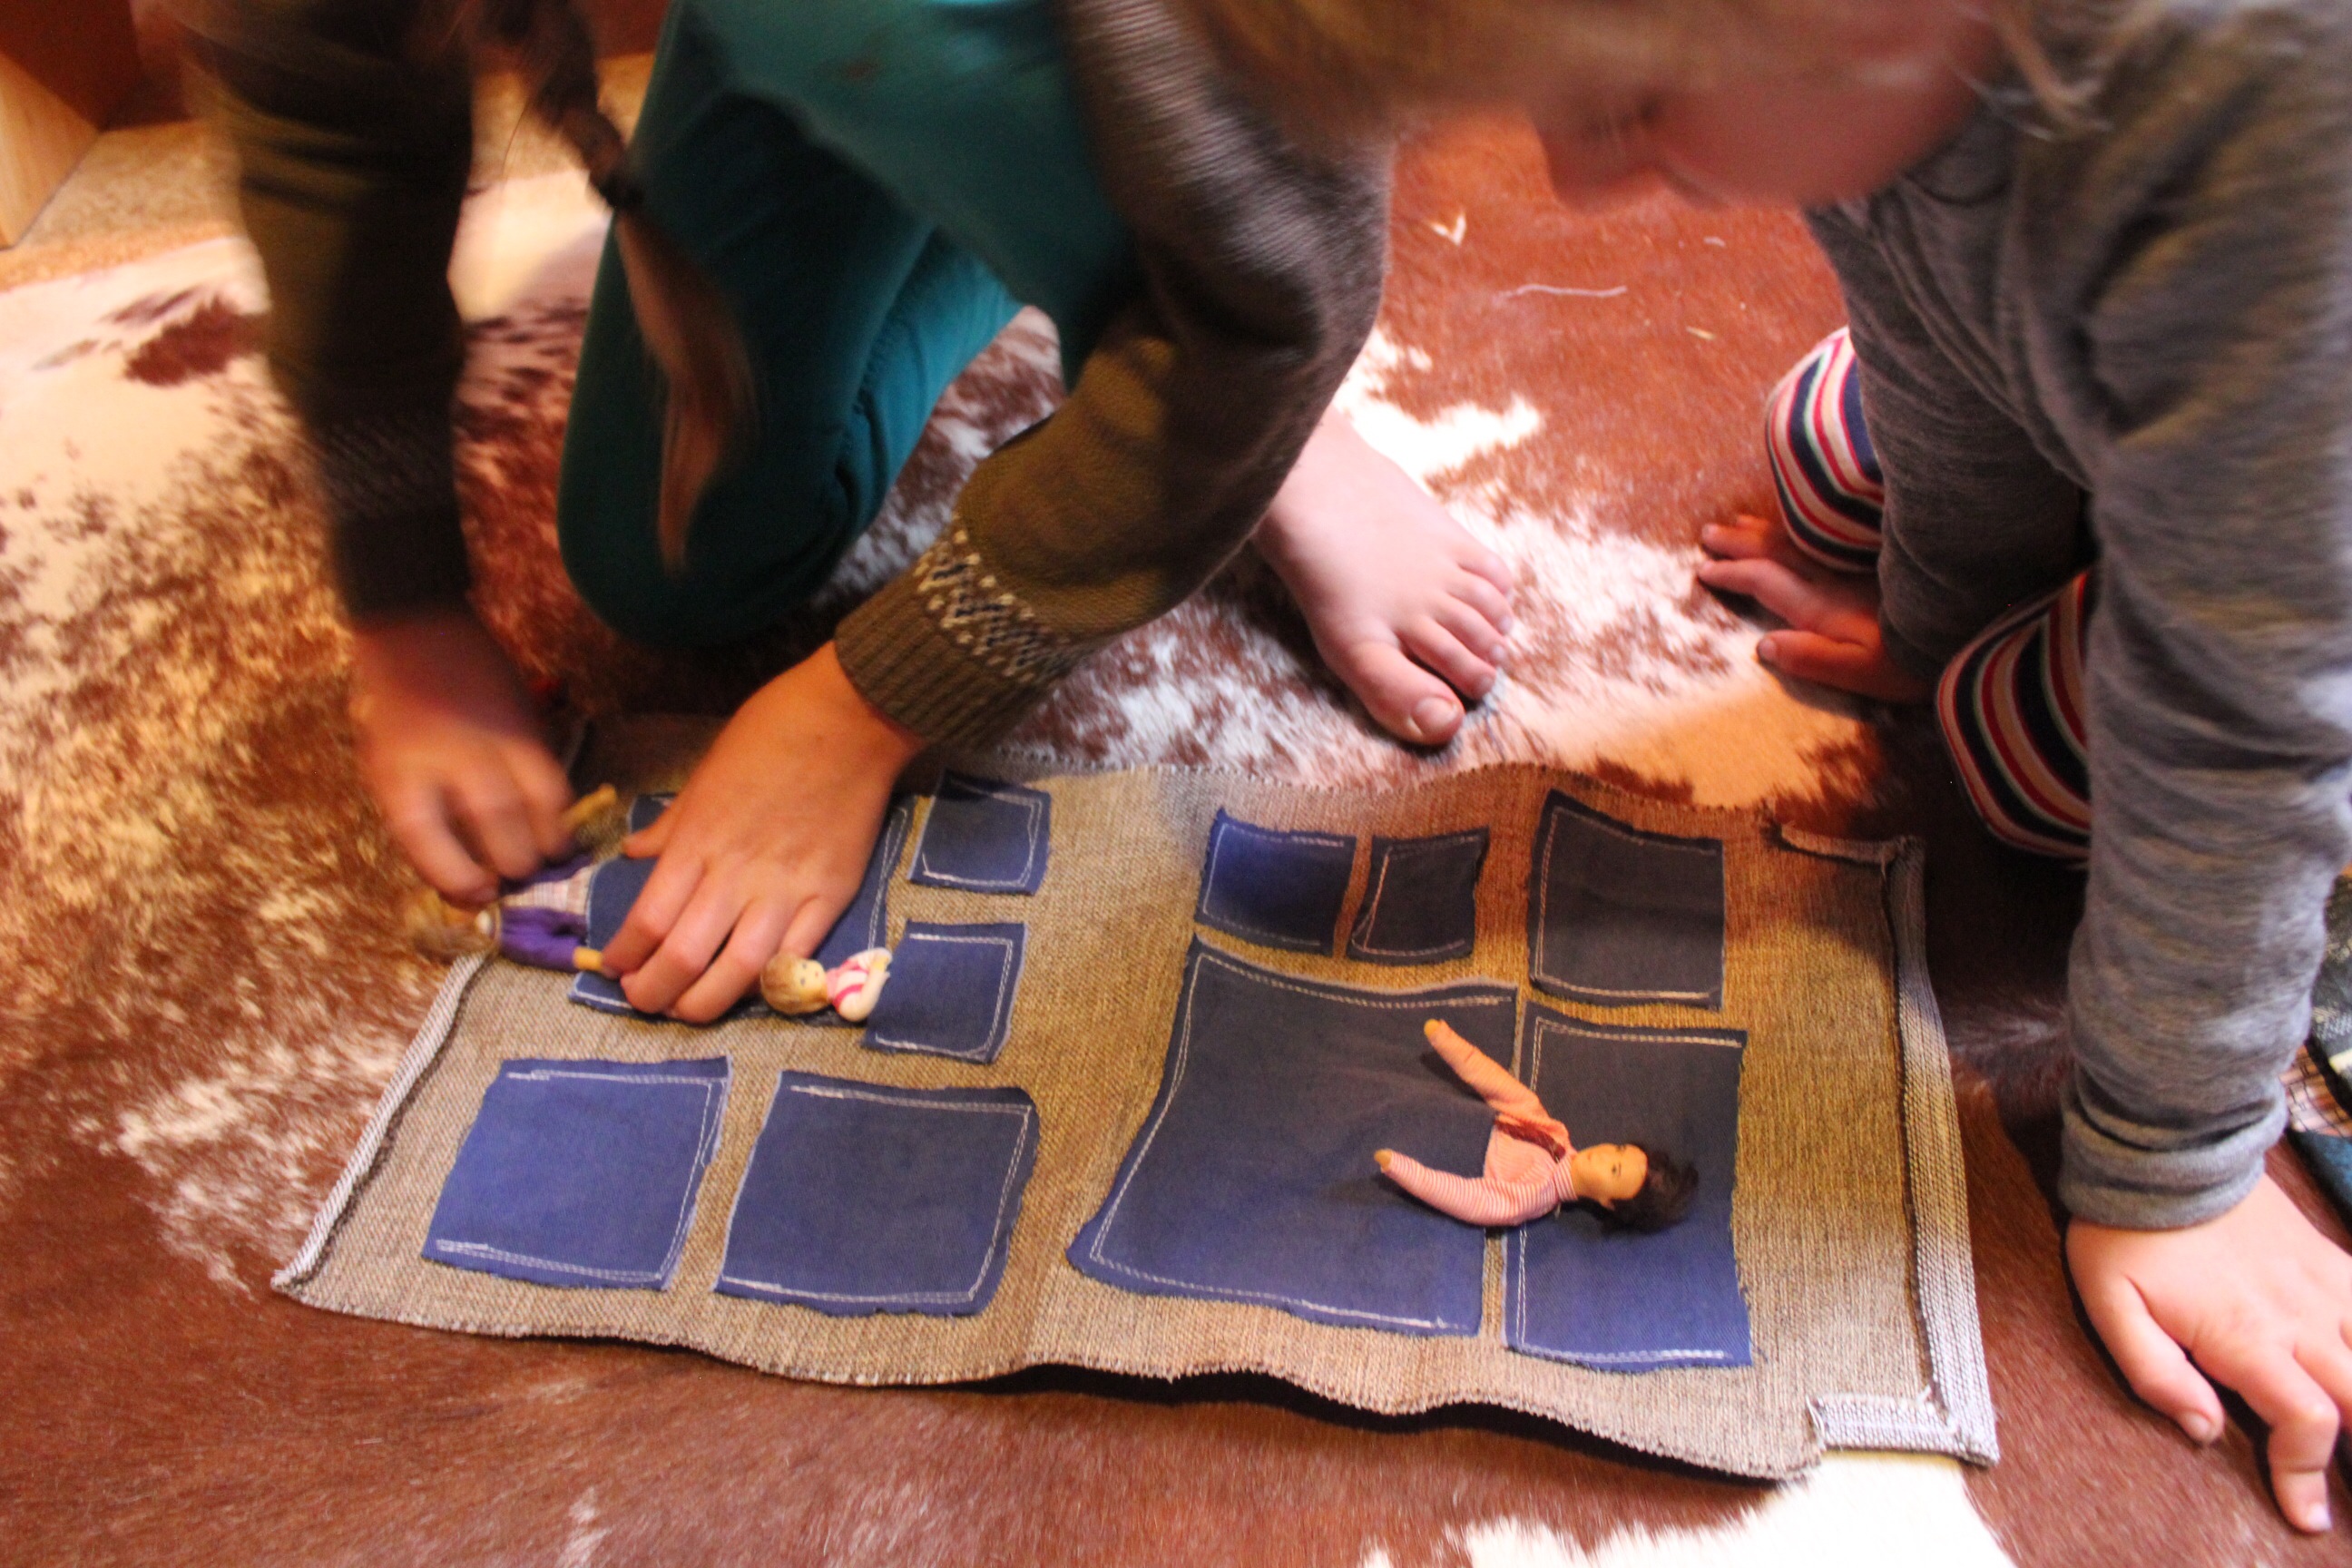
Watching Lily make a travel bag for her birthday dolls and small things
The treadle machine is a new experience and has a gentle sound and rhythm
I am impressed with her independent skill revealing itself with sewing this project
She began as a wee girl sitting on my knee ‘steering’ fabric or ‘driving’ the peddle for me
Look at her now!
This moment…
This moment
a friday ritual
a single photograph from my week

x
Natural Dyeing of Eggs
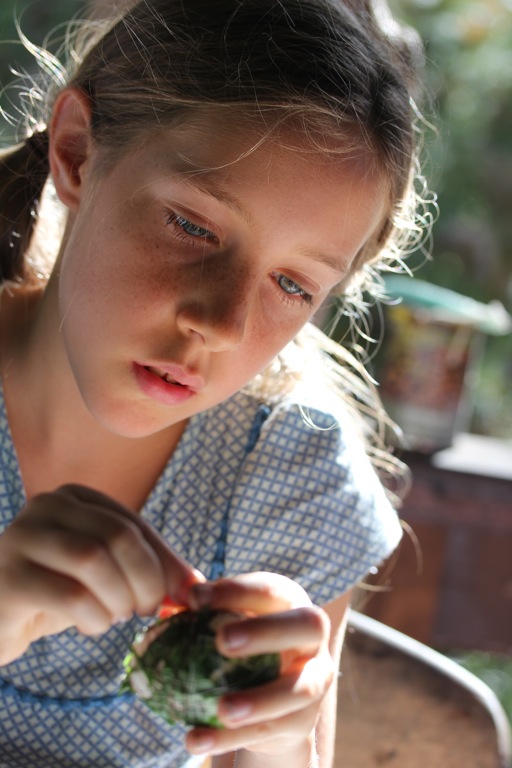
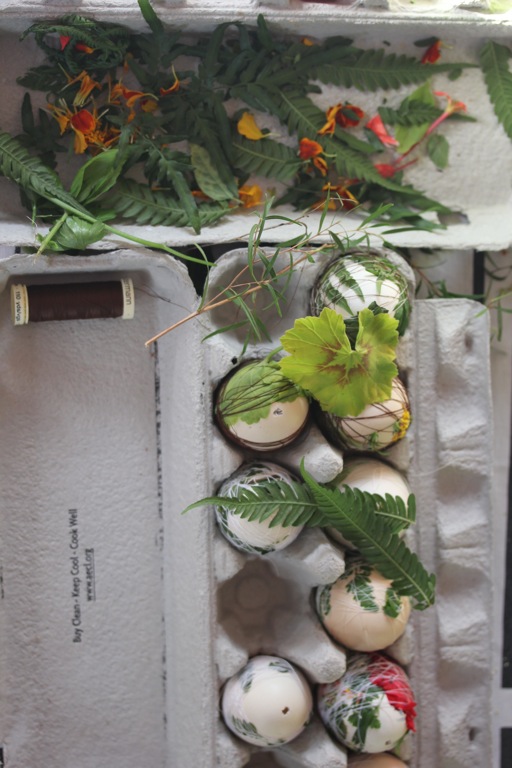
Friends in town invited us for a natural egg dyeing date today. It was a new method to me and the results are beautiful! In years past we have water colour painted, drawn upon, dyed in stockings with onion skin and parsley, wax crayoned and dyed and more. something in the natural plant and berry dyes pleased me so much today. the shades are unpredictable and all the colors are well, edible. it brings to mind my natural dyeing of silk joy which has been put aside for many months. i keep opening the carton to caress these wonders. thankyou hens.
it was a pleasure to share one of our/their Easter rituals as often I hold festivals for my family alone. we spoke about festival traditions in the family and I realised with the weekend approaching fast i am ill prepared! {apart from having lots of eggs}. I look forward once again to seeing what authentically comes for the festival this year. it’s an interesting time to marry Easter to Autumn and i have found a few stories and inner images which sit peacefully for me. our Autumn table evolves slowly and soon the Egg tree will appear.
this book Easter in Autumn is helpful for southern hemisphere dwellers. i am seeing how contributions can become tradition in a few short years and the grounding this gives my children and myself. if you want to bring more depth or tradition to festivals, i recommend beginning simply, or adding just one or two things you can easily uphold and add to over the years. i enjoy Lily’s anticipation of events, Cedars current enjoyment, worry expectations {my own mostly} may not be met, {can i really make sourdough hot cross buns this year?} witness her recounting past festival highlights to others and propel myself to find my Zopf recipe!


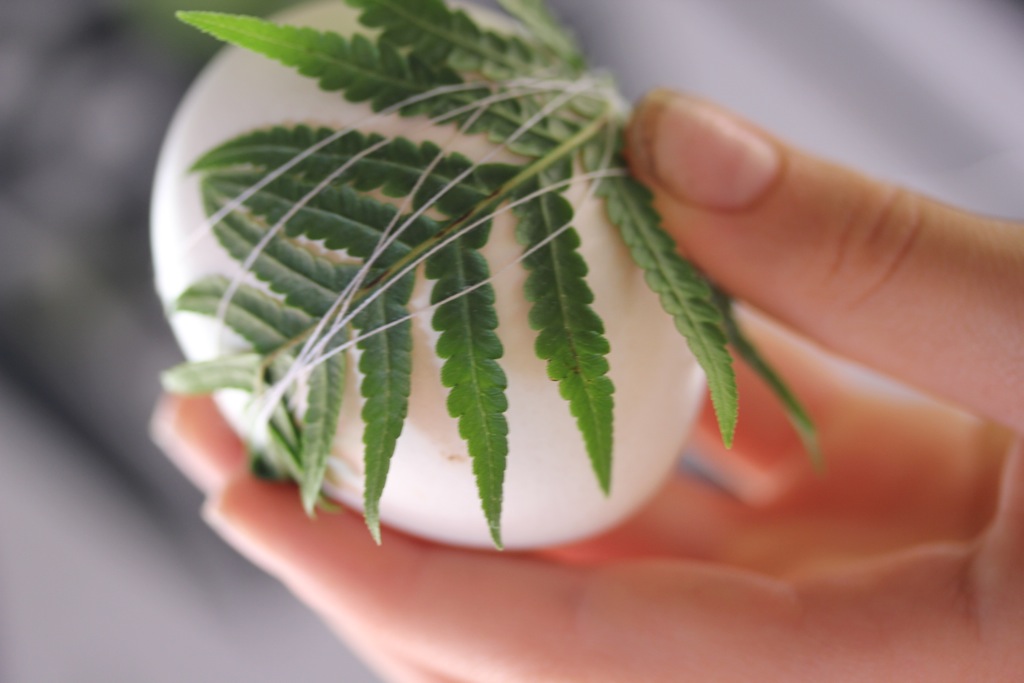
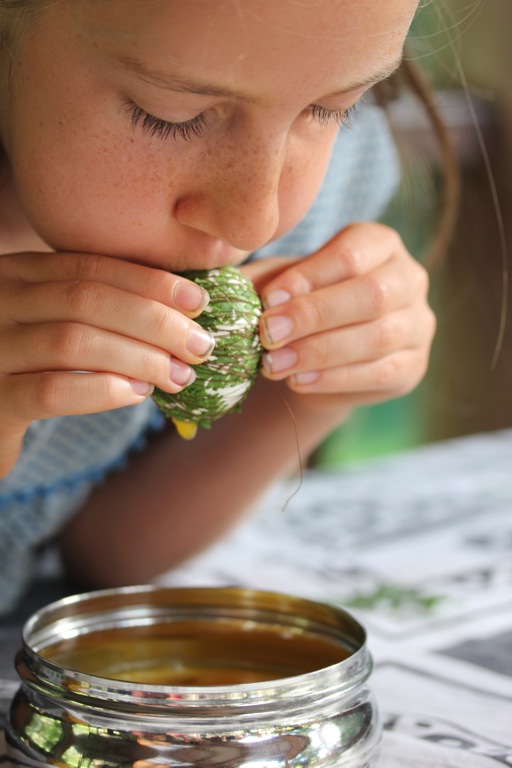
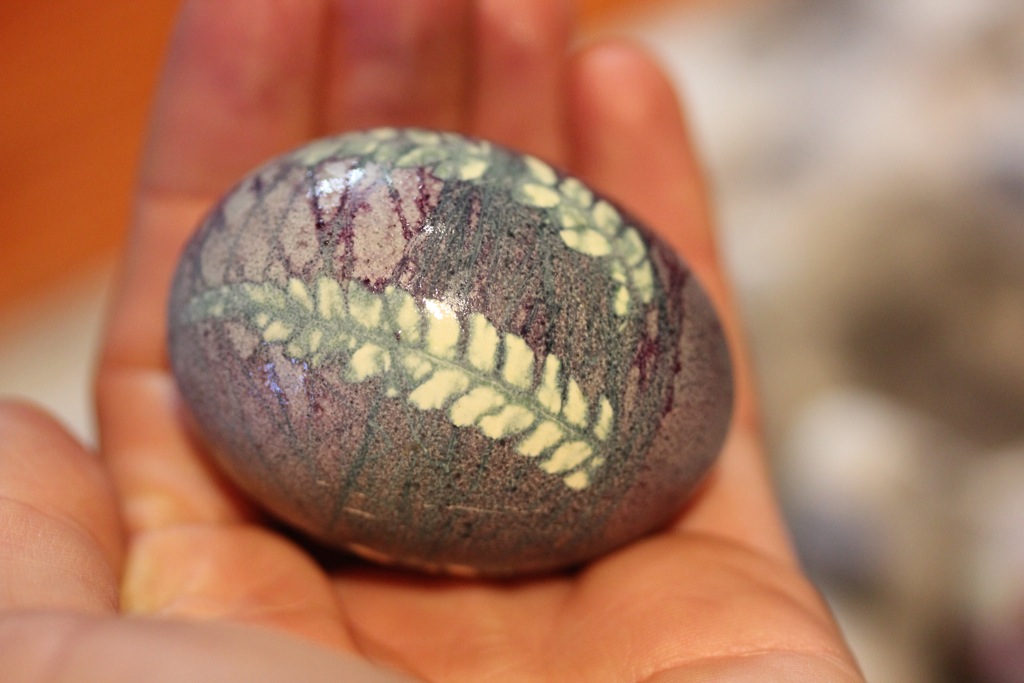
Natural Egg Dyeing/Eco printing method
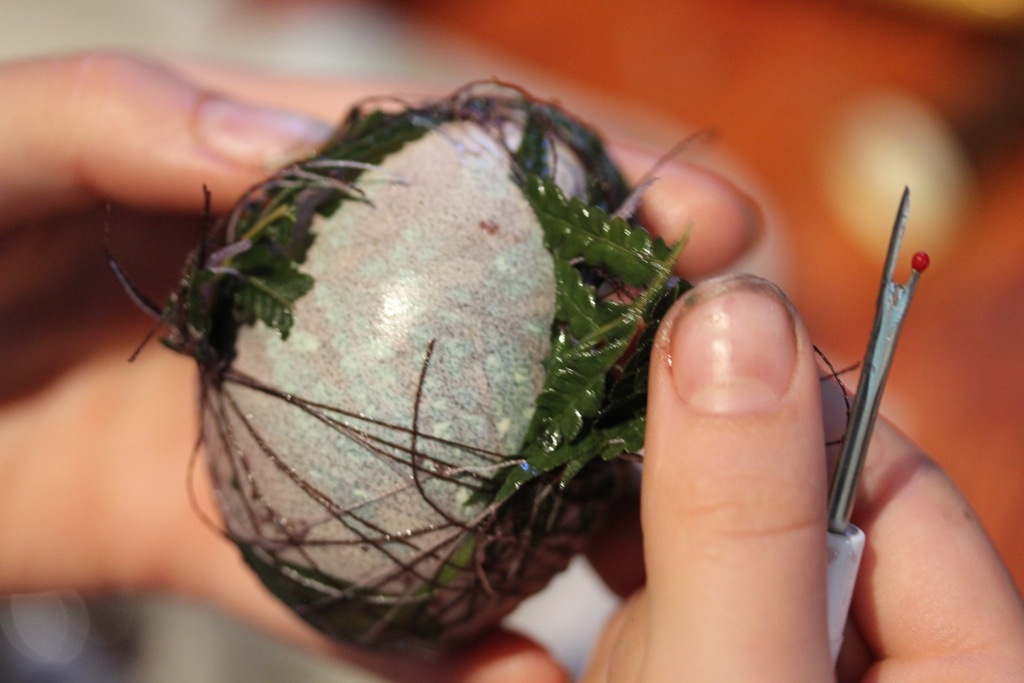
Using just herbs, ferns, flowers and weeds from the garden; press the leaves and petals over the egg (white shells for best color results, this year i found them in the library, raised by the High School kids garden chooks) and carefully wrap with sewing thread. this is tricky with a T at first. so be patient and help the little ones. leave a tail of thread hanging at the beginning so you can use it to tie up at the end. the more you wrap and press the leaves onto the egg the better your chance of a print. leave the north and south pole of the egg bare so you can blow your egg out afterwards. {thankyou for your wise counsel today E}
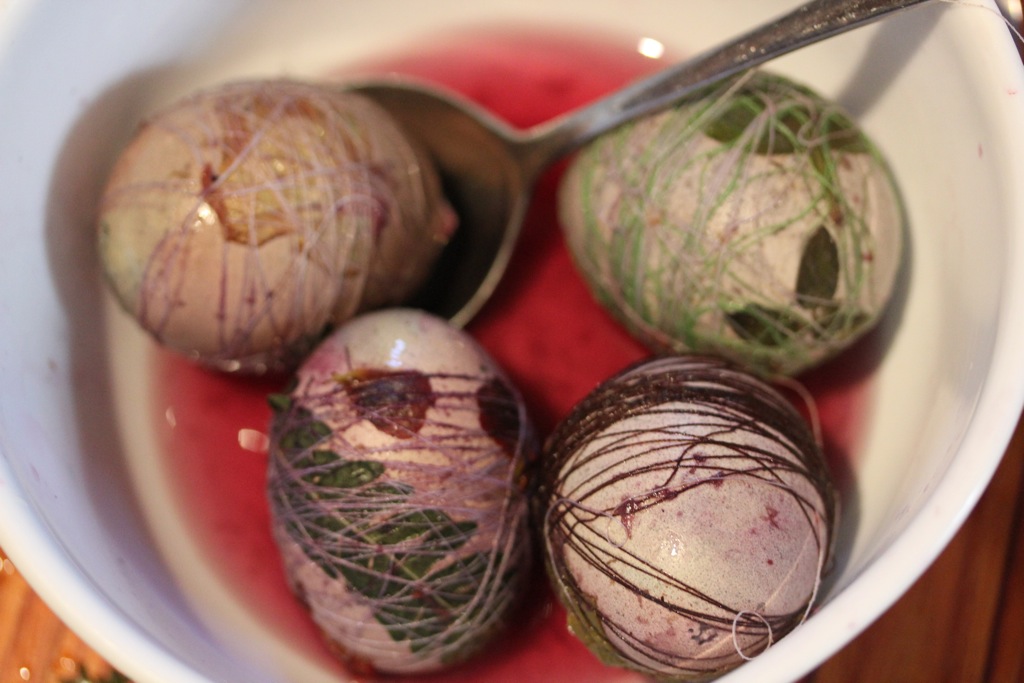
carefully blow your eggs and then pop into boiling water/dye bath for up to 10 minutes. for the dye bath use any plant/food matter which has a great colour content such as berries, onion skins, coffee, tumeric, red cabbage, etc only 500 mls or so is needed to do batches of 4 eggs.

a brew of red hibiscus flowers in water dyed the shells a subtle blue, the pot of mixed squished up berries had more success with mauve to rich purple. keep turning the shells in the boiling dye brew to get an even colour as they will float on top of the liquid. remove and once cooled remove the thread and plant matter with a thread cutter, unpicker, seam ripper??. (technical name eludes me right now) useful sewing tool. everyone needs one!
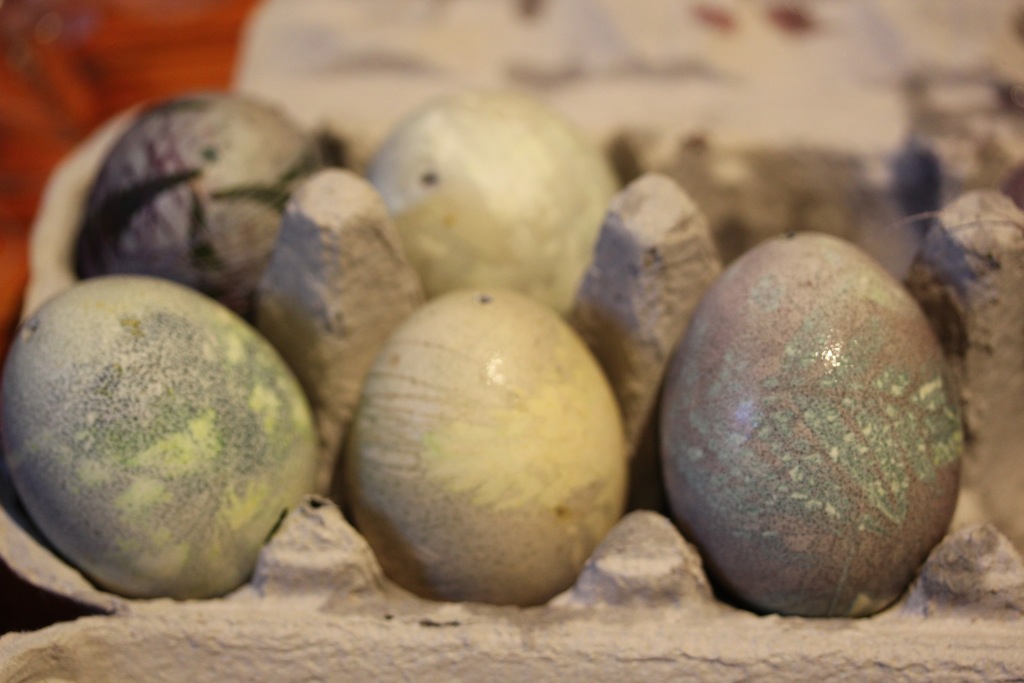
so for our Easter tree we have these beauties. we will break up matches and tie string on them to slip inside the eggs tomorrow.


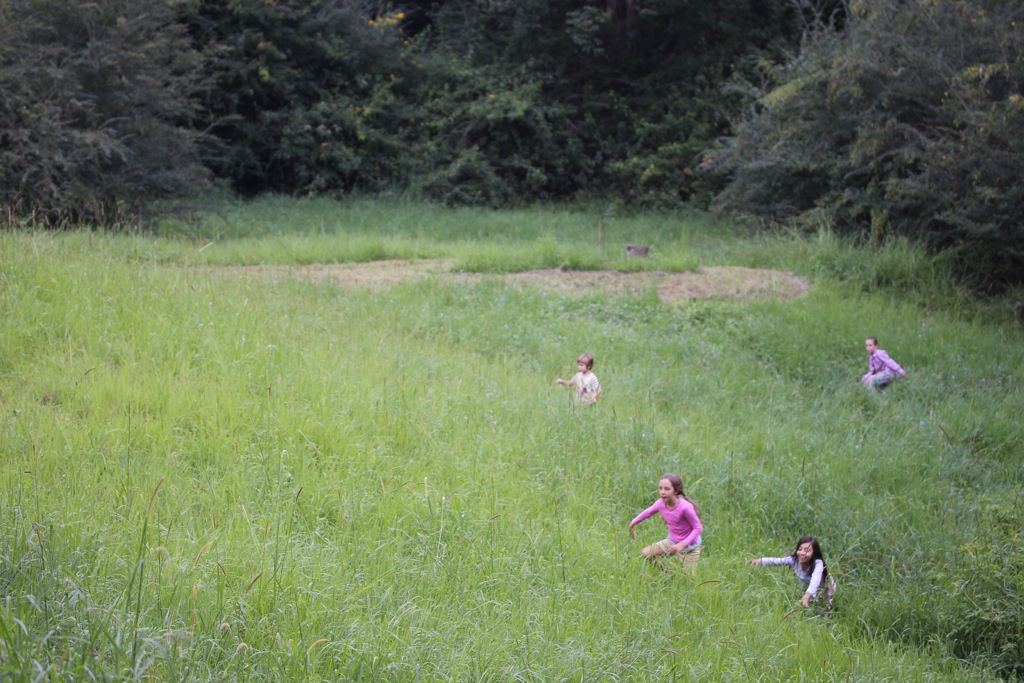
after all that fine work the children gallop exuberantly around the field. picking up ticks no doubt….
a natural dye note to myself for next year.
marigiold petals dyed a wonderful gold.
waxy ferns made a resist to the dye
basil made a resist
chocolate mint left a lovely green
hibiscus left blue
parsley left green
and there where many surprises.
try a tumeric bath
*let each child have a different colored thread so you can easily identify them and wrap wrap wrap them very well.
*have a dog handy to lap up any dropped eggs
*make a potato and goats cheese frittata with the eggs….
*if you only use edible plants you could hard boil the eggs to eat them. though who gets hungry at a blue egg….
i have this post on my Easter and blowing eggs from last year.
so, what are your Easter traditions?
have you natural dyed eggs or anything before?
x
ps is it as odd for you as it is for me to be here writing and sharing once more? many reasons behind my blog holiday and i have written eggsplicitly about it all. it just isn’t where im at today. call it writers block.
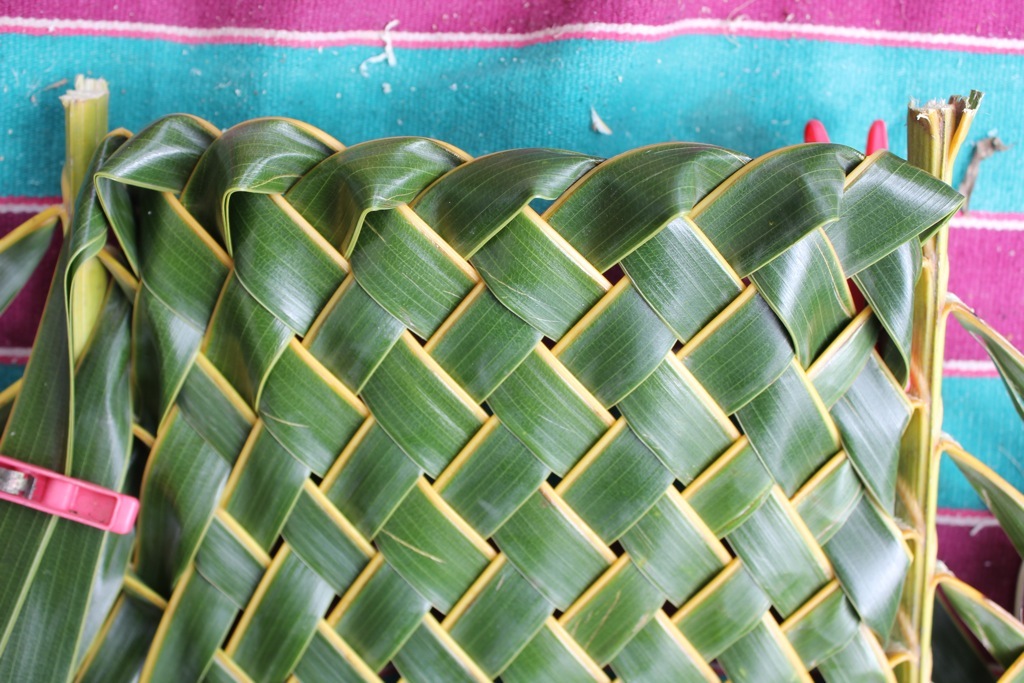
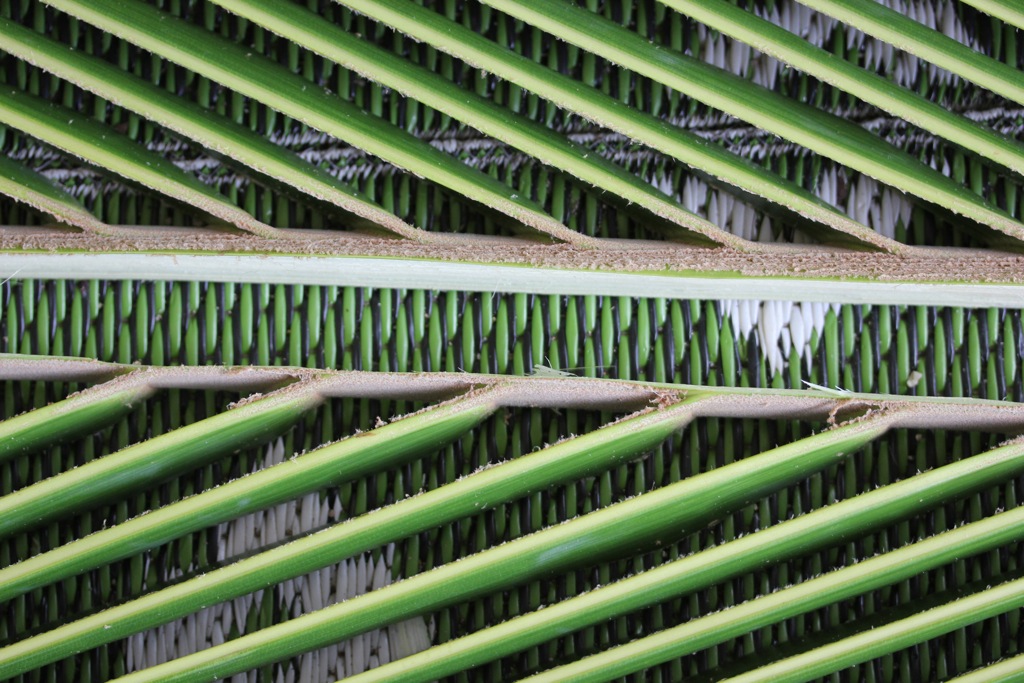
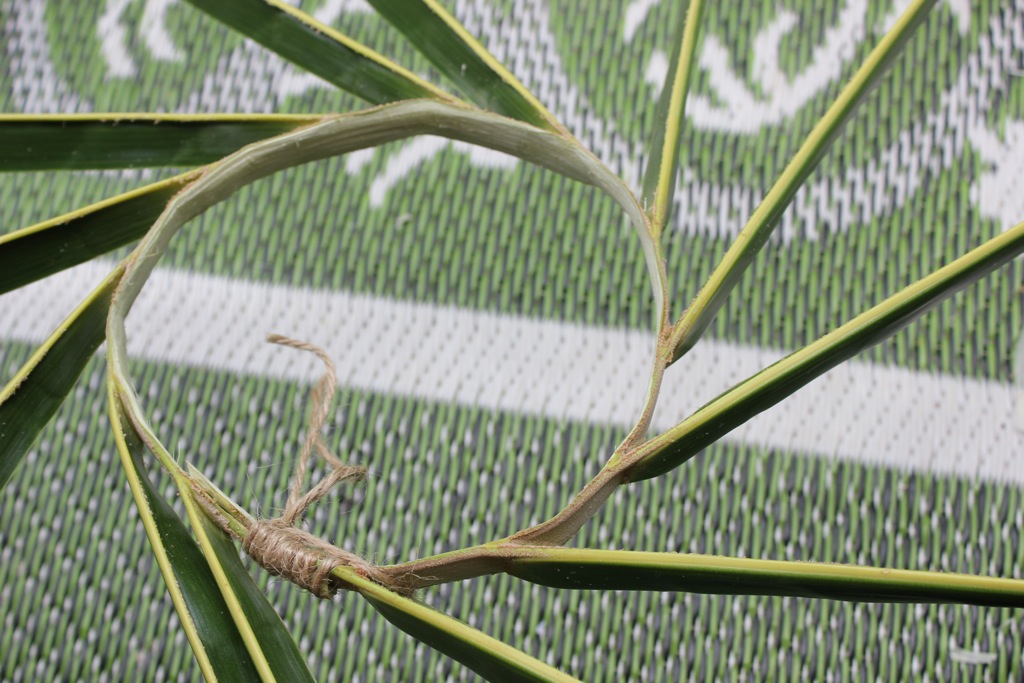
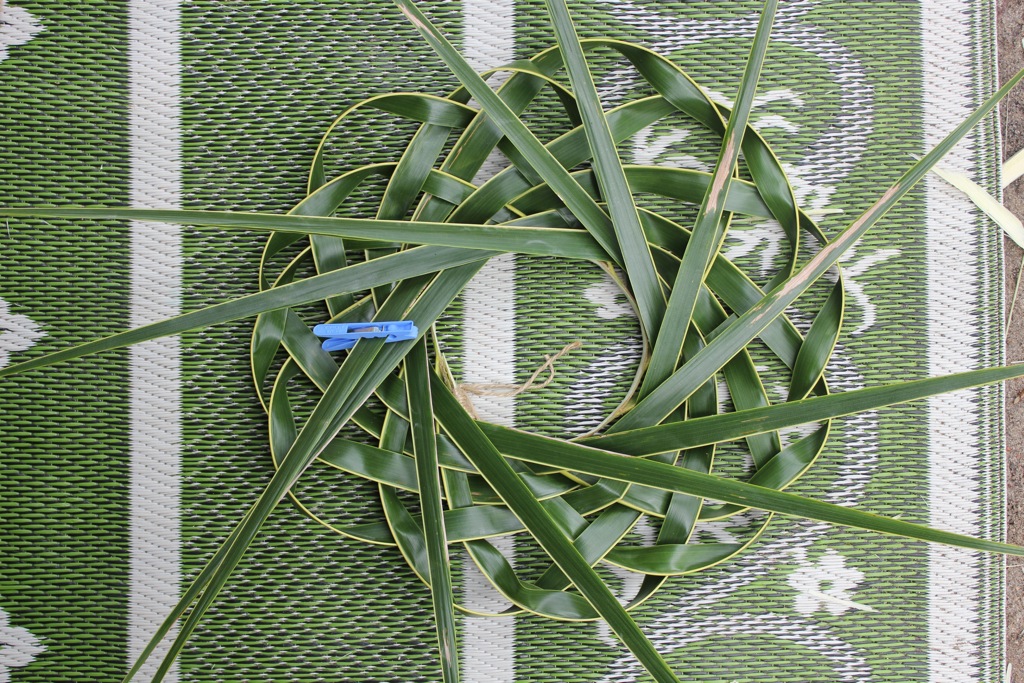
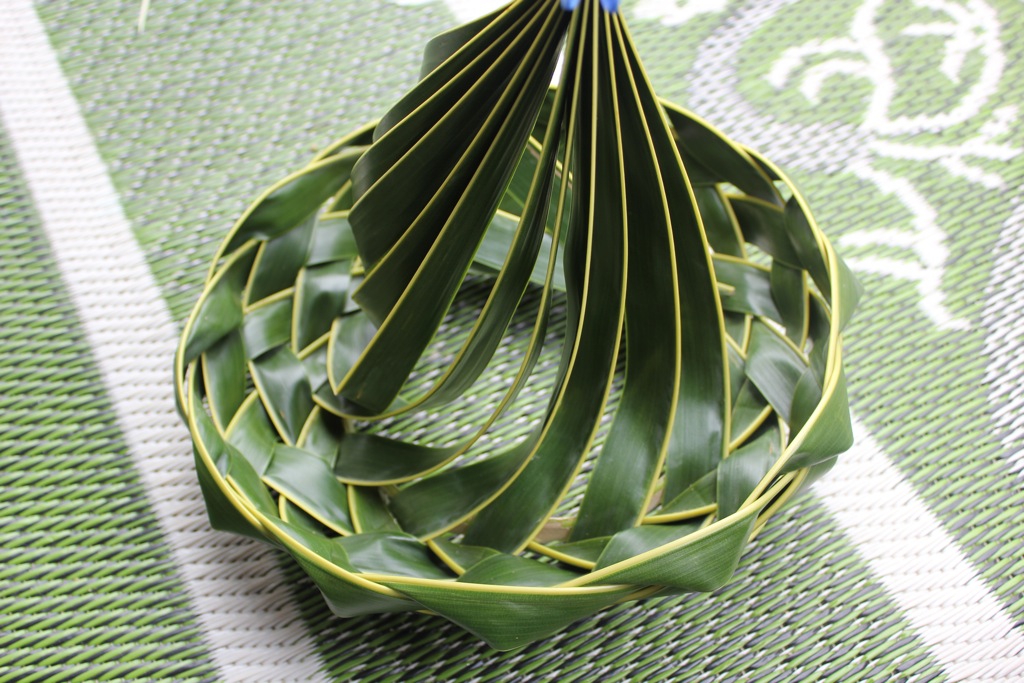
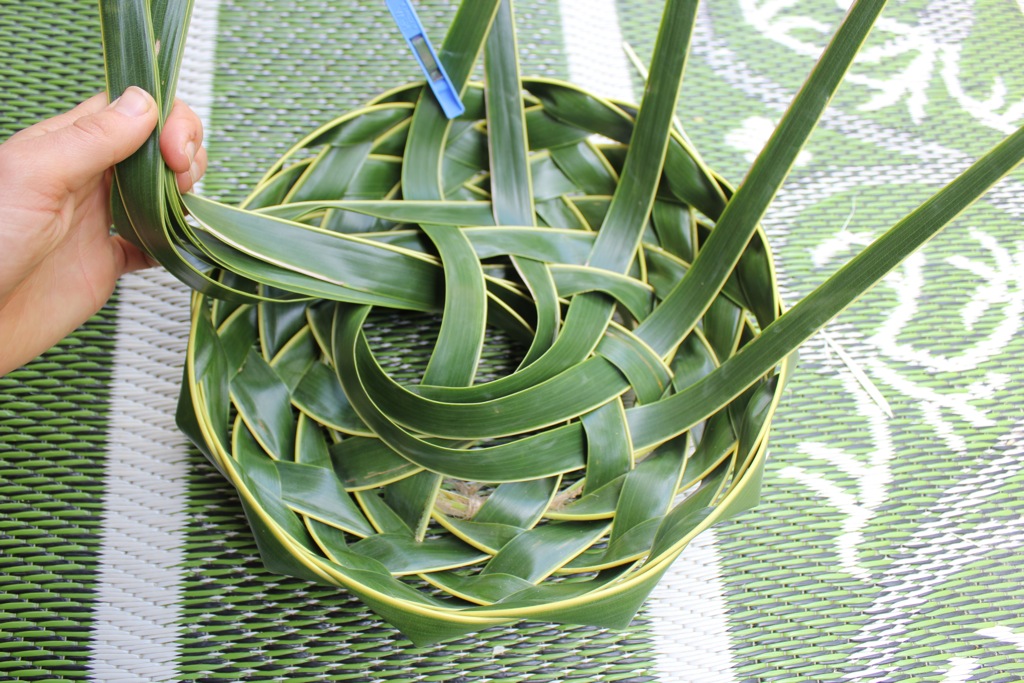
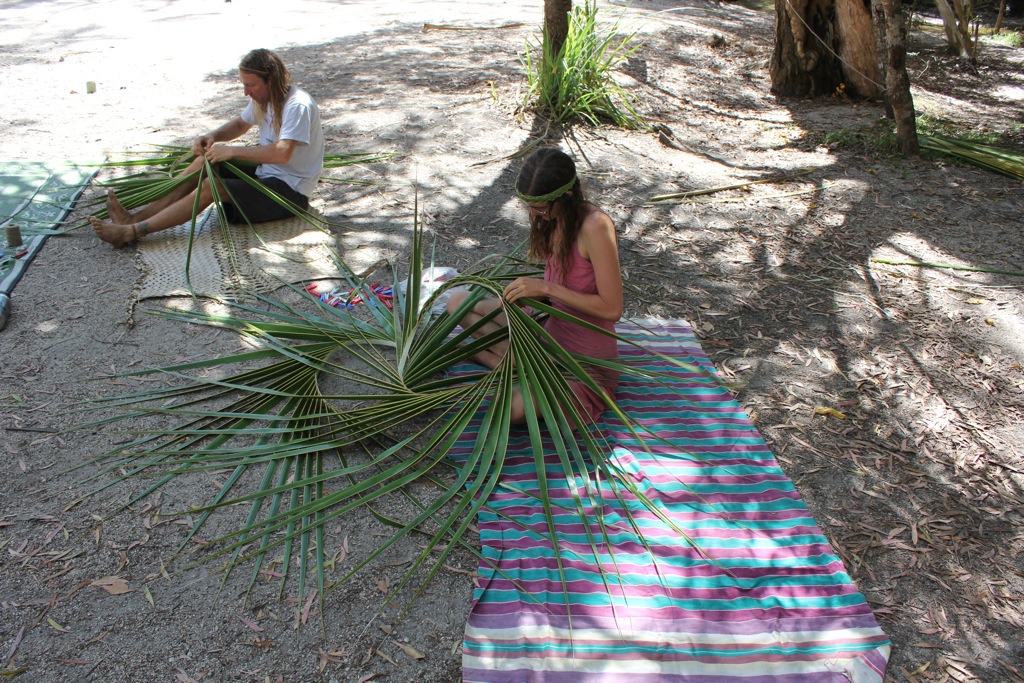
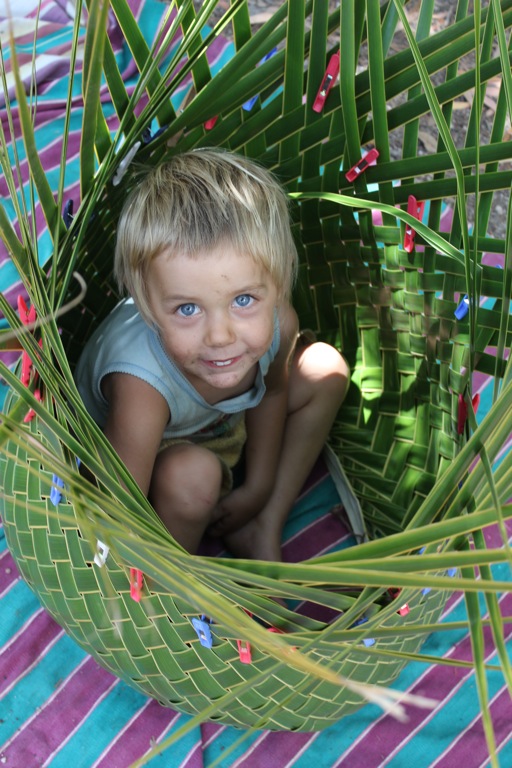
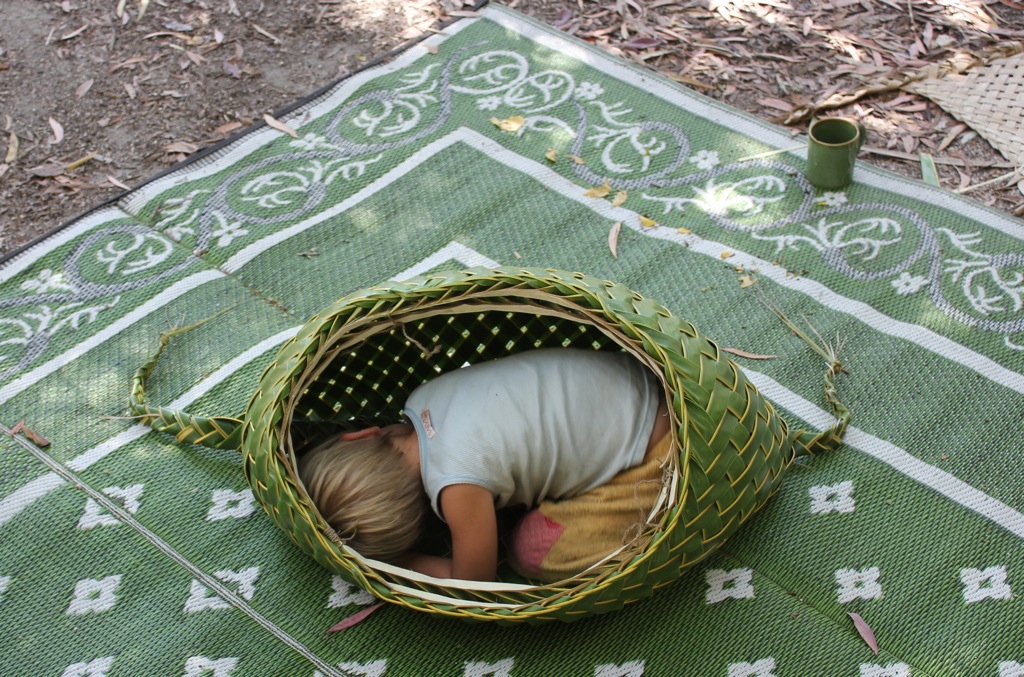
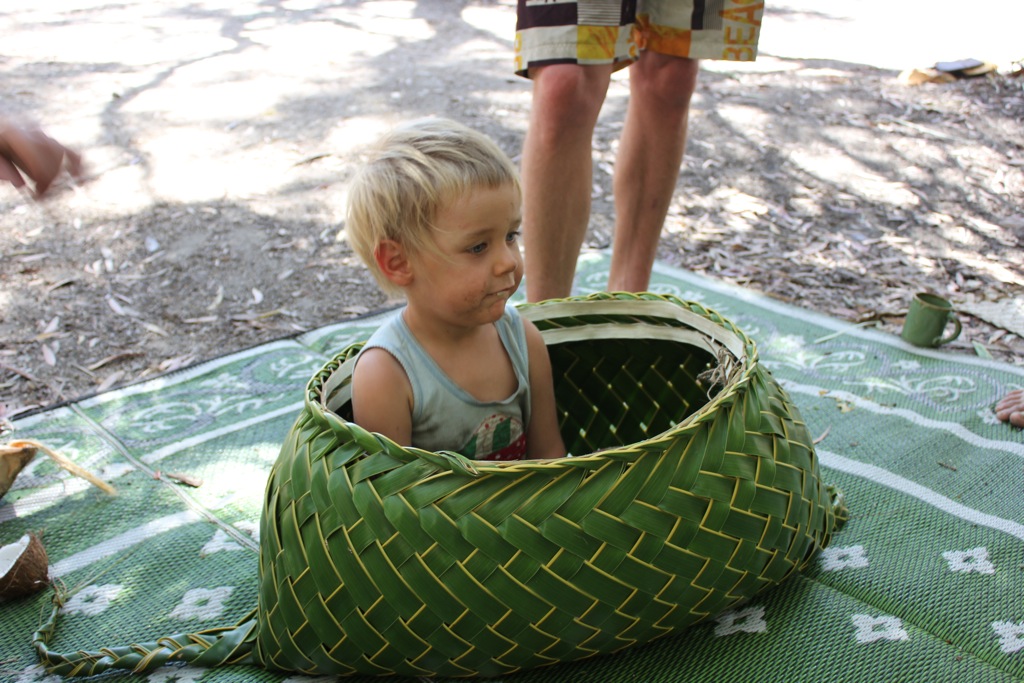
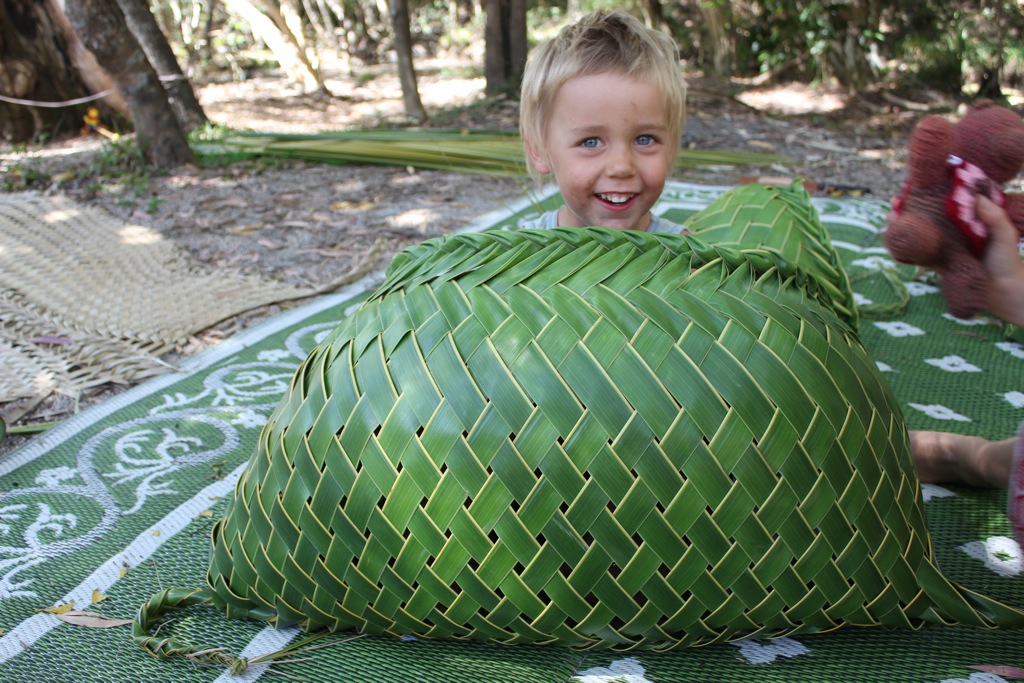
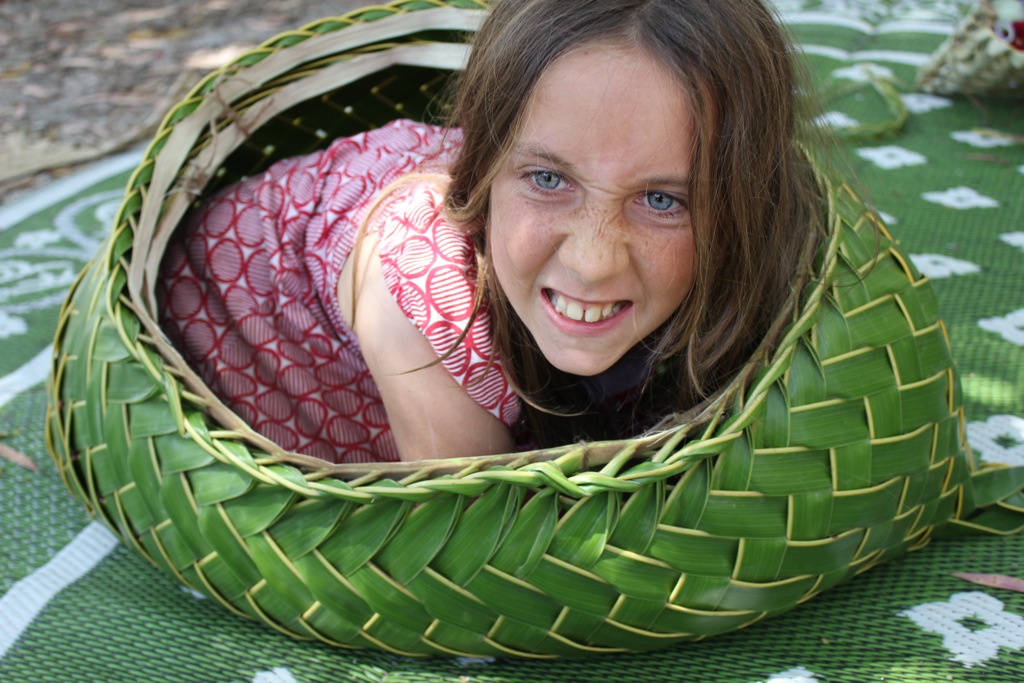
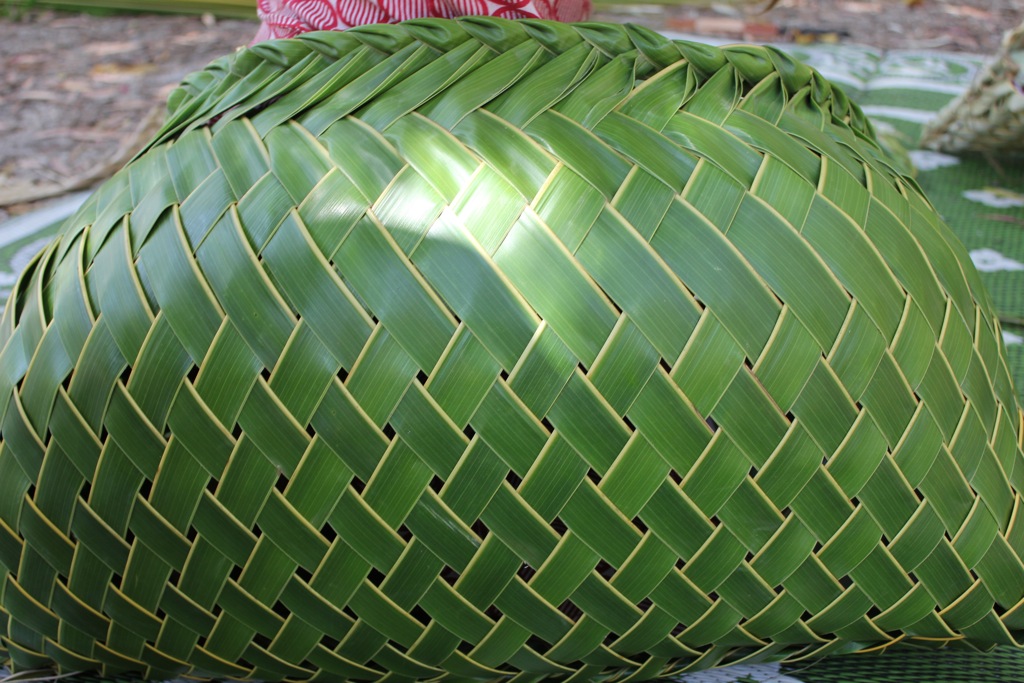
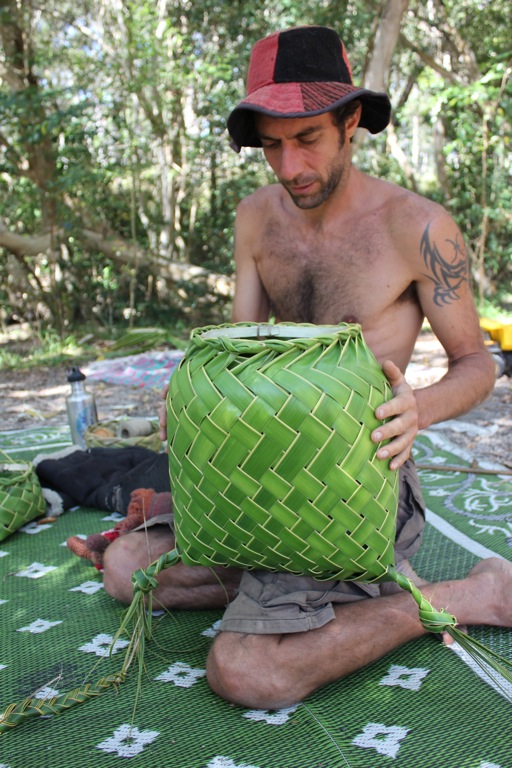
Coconut Palm Weaving {dilly bag, fruit bowl, taro basket}
Here are some long promised coconut palm weaving processes
first The Dilly Bag


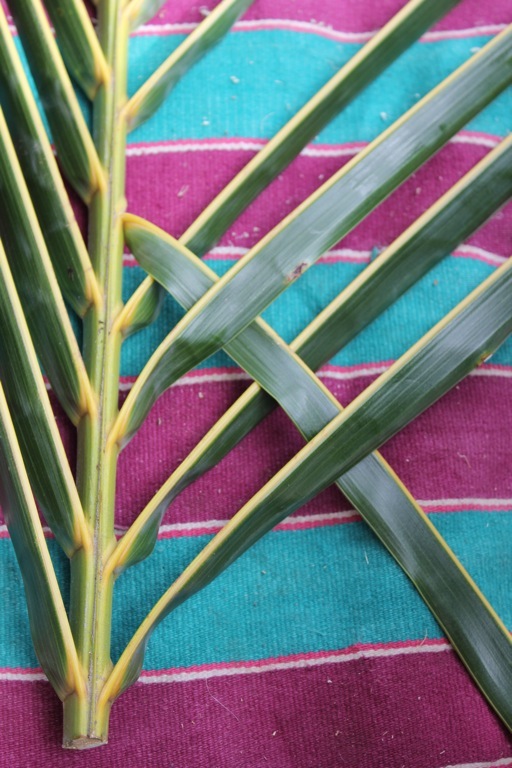


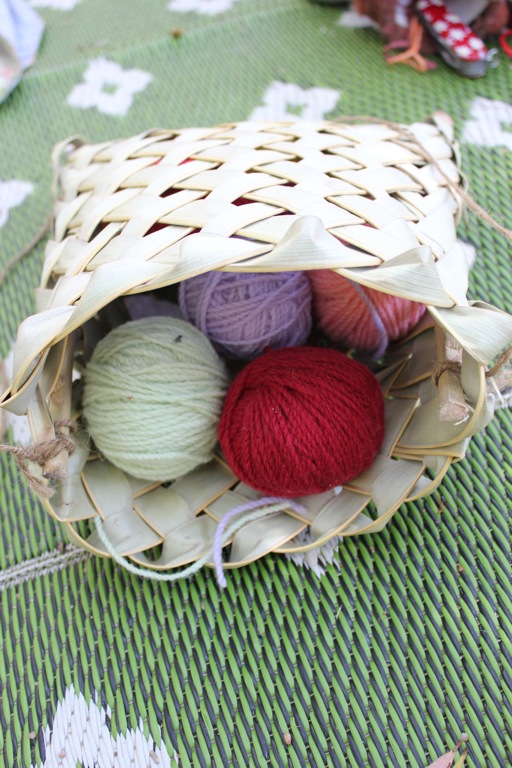
and next The Fruit Bowl or Calabash


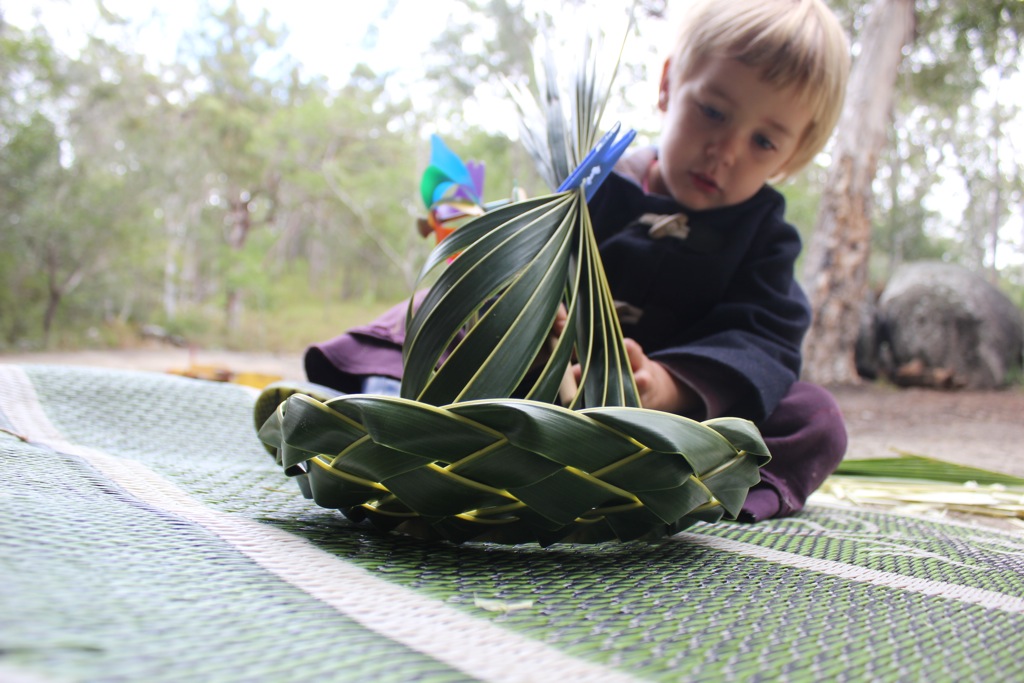
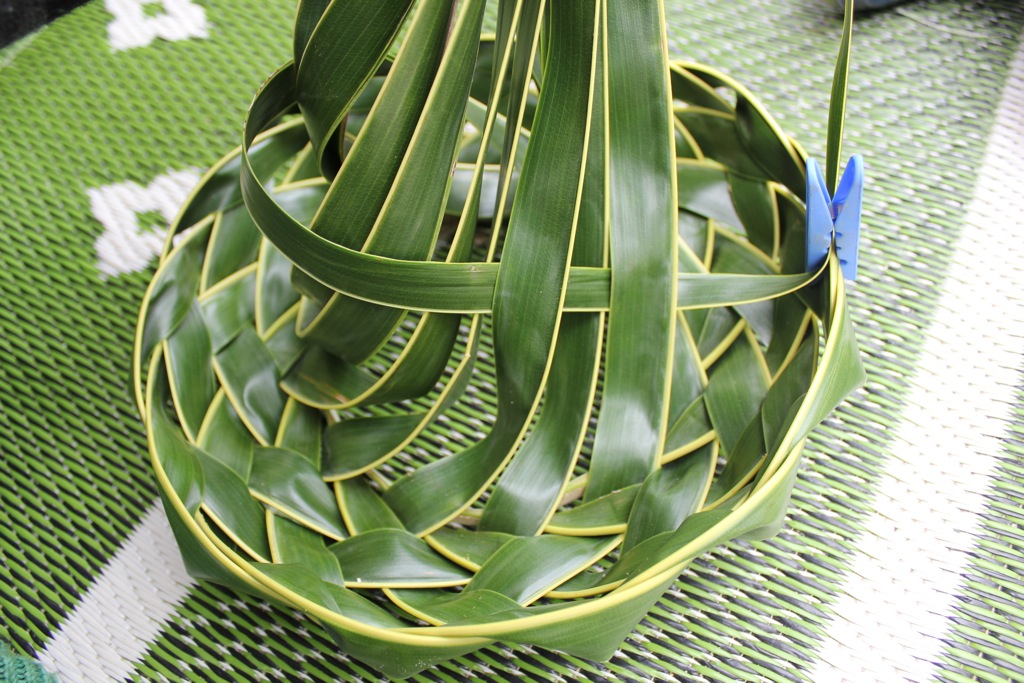


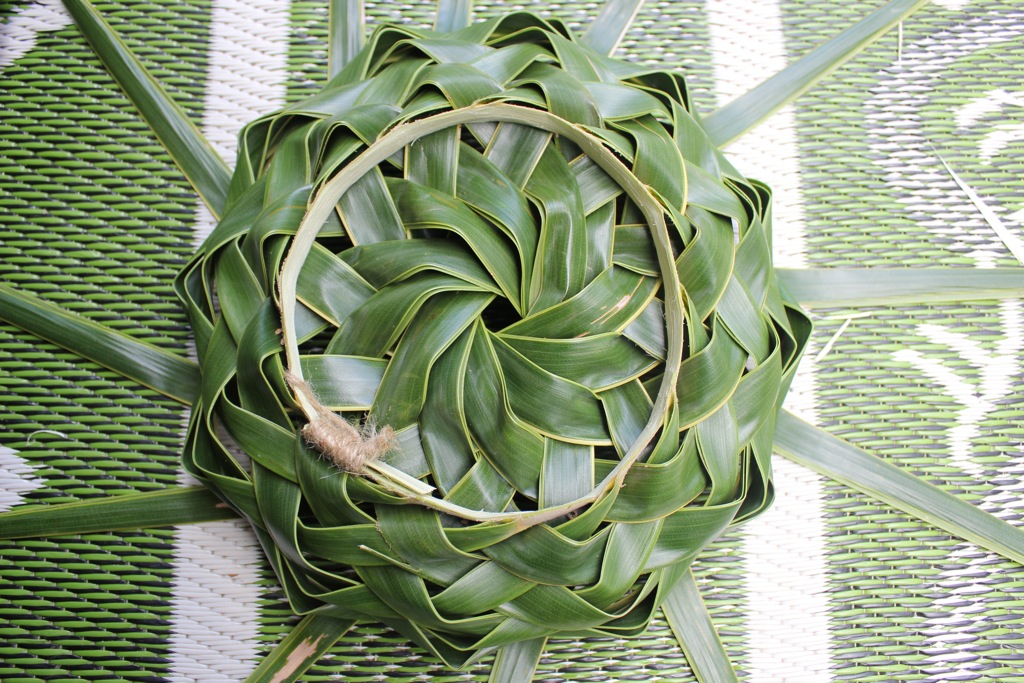


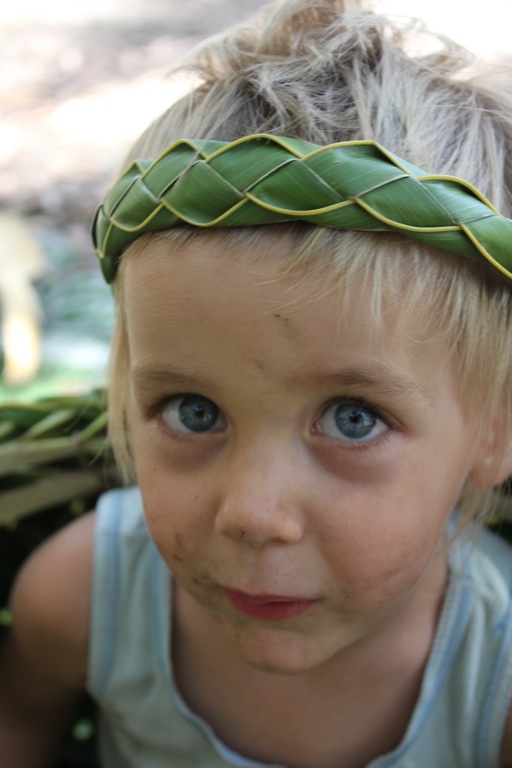
the beautiful serpent like weave on the headband was taught after my teacher had been with some weavers from Vanuatu. The ladies wear them for dancing and ceremony and he also said they make the flowers below and stitch them around the band. how beautiful and if you chance to see the vibrant green against some unruly dark curls you will see the island regality! Lily made plenty of these to sell in Port Douglas market and to give to friends. we all ended up using them to keep our hair back.
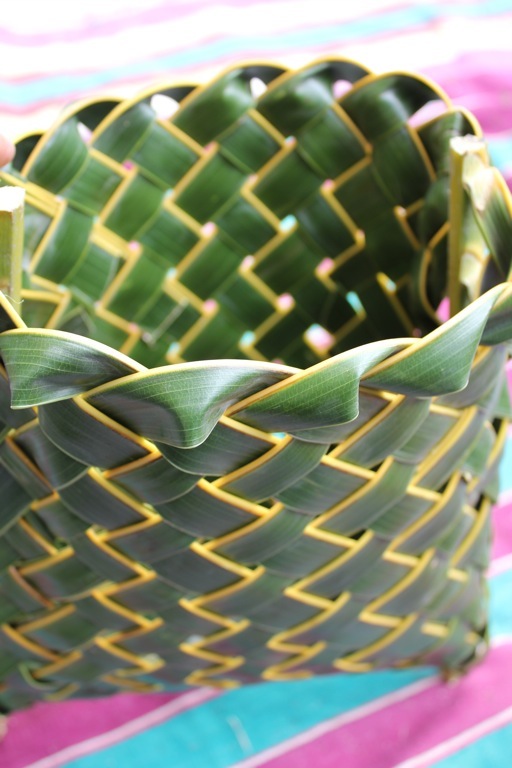
and for the advanced lesson, The Taro basket/backpack in New Guinea style as far as I know.
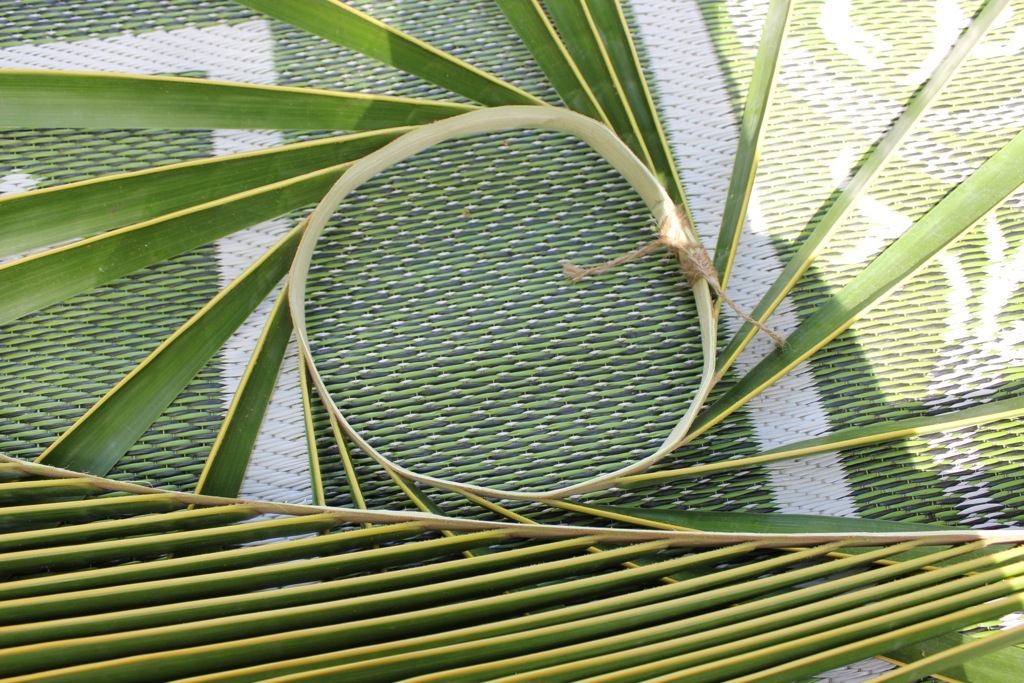
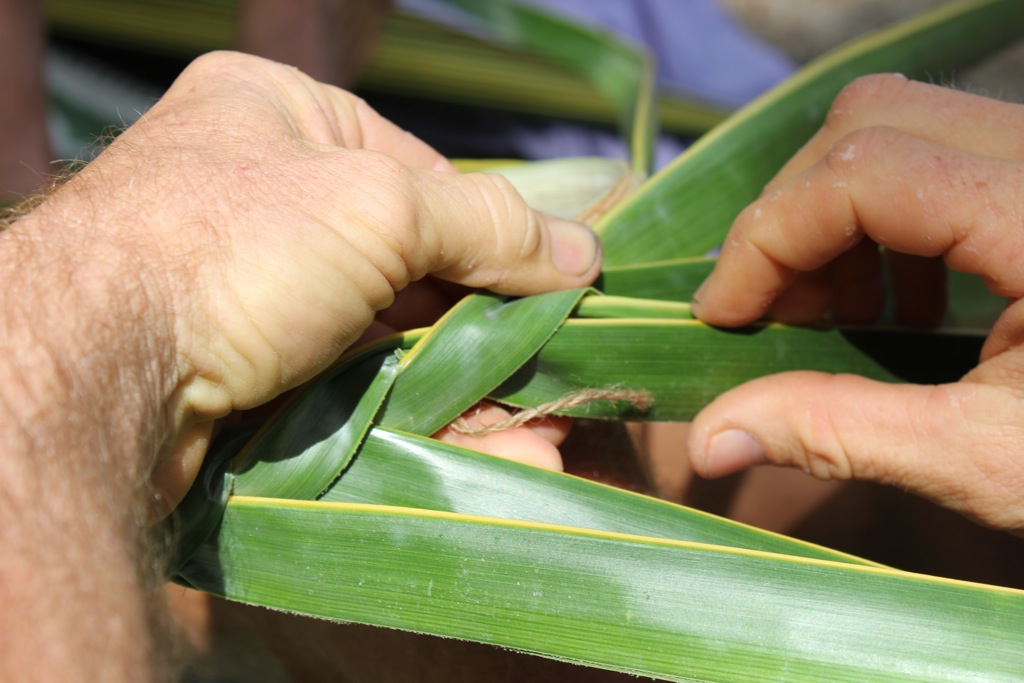

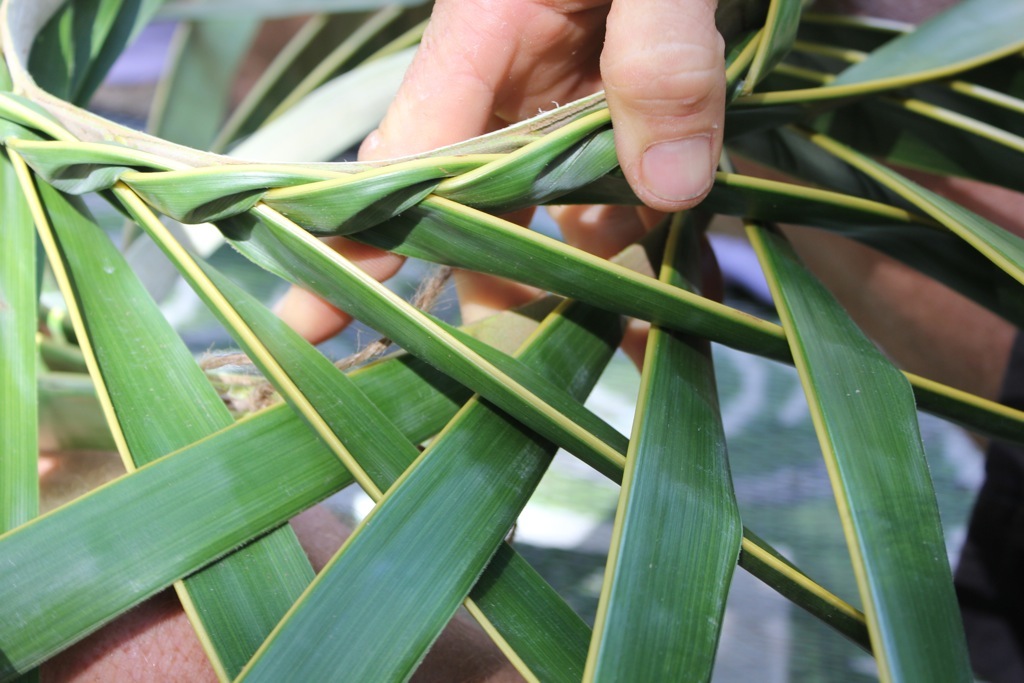
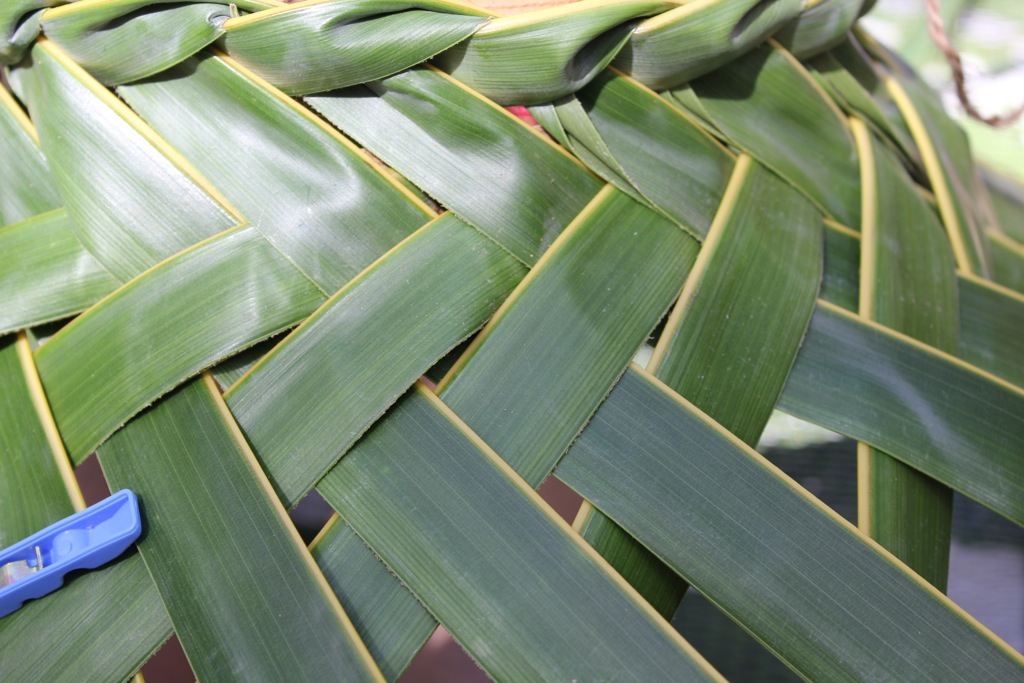


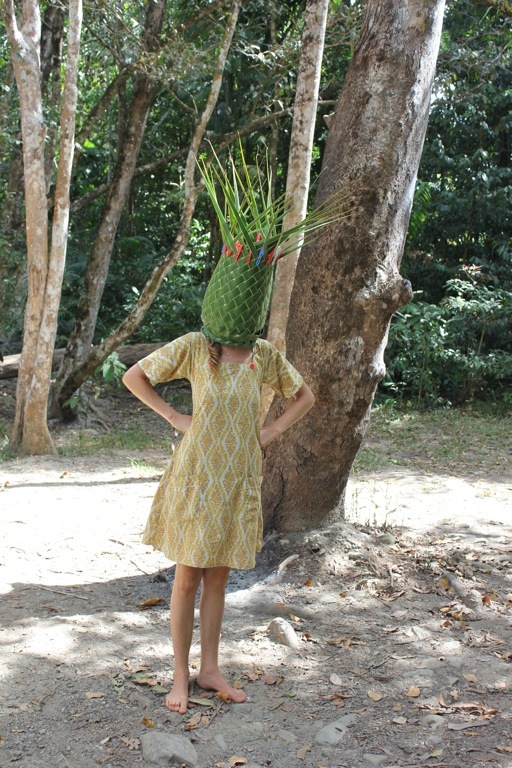
ok that was fun! now i will scramble my brain and make a double size Taro Basket! {it took hours upon hours} but the result is magnificent and brings a lot of amusement! What an achievement. thankyou to my teacher Aaron. i hope we have many more days weaving at the beautiful Davies Creek! Aaron related to me the islanders can whip one of these up so quickly make straps, sling it on for taro harvesting and when done, toss it into the forest once more! I would love to go there one day for weaving…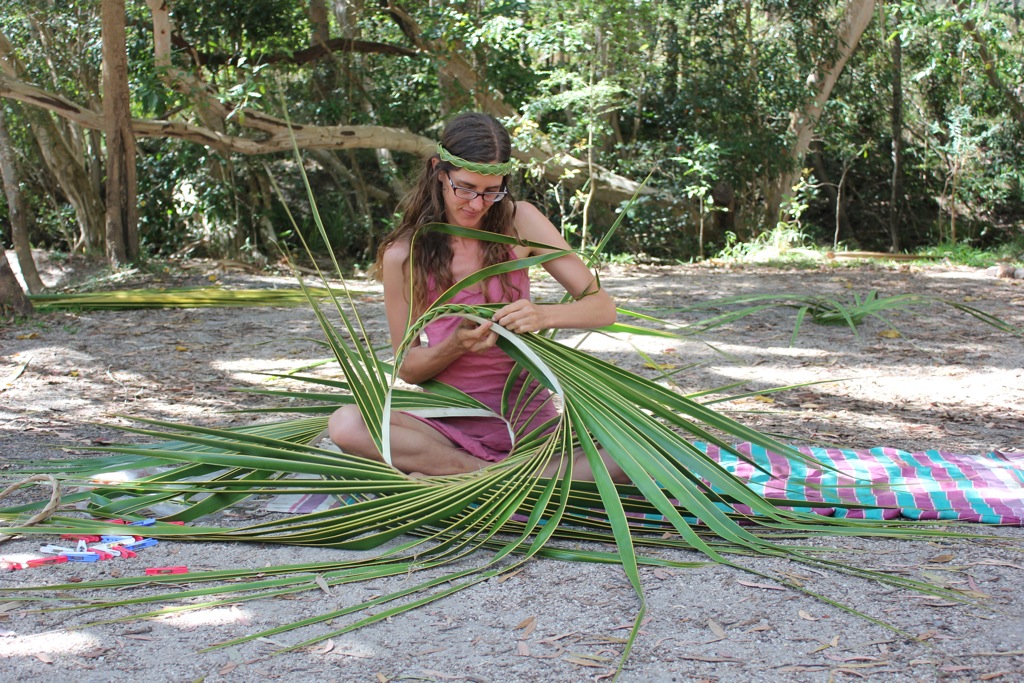
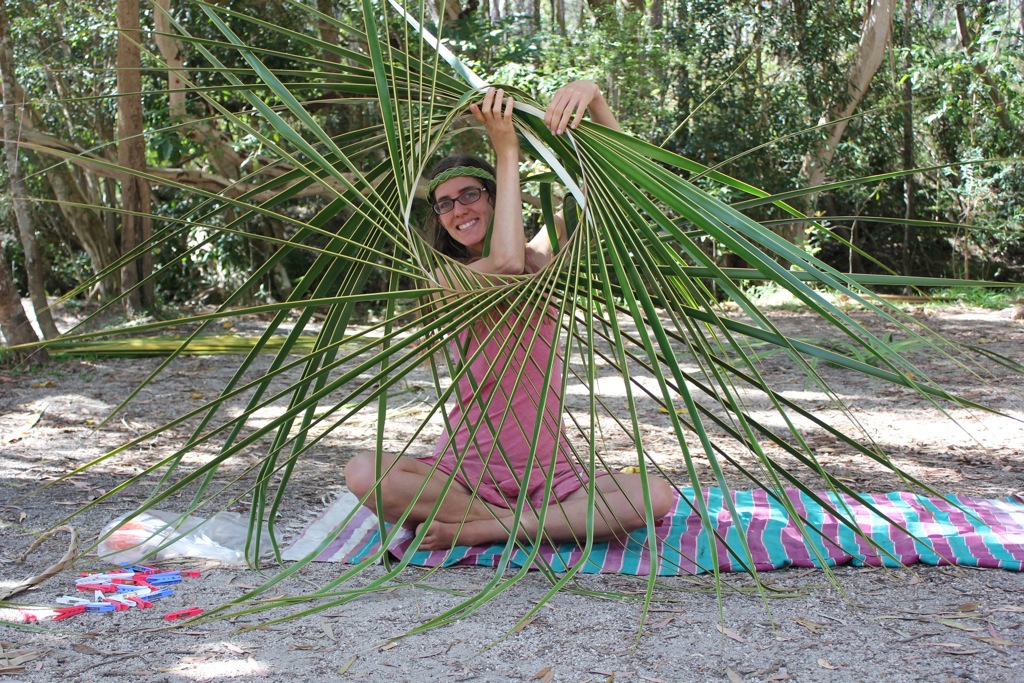


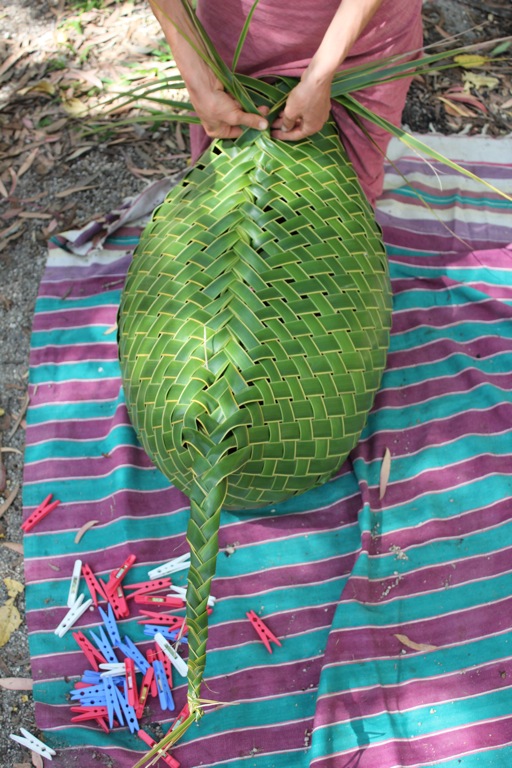


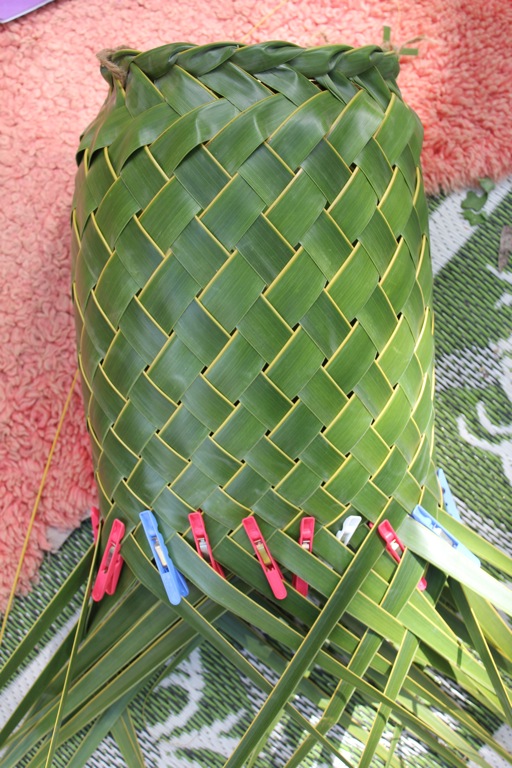
 here you can see the creation of a few days. Note the coconut palm mat which it’s all modelled on… not my work. something to aspire to next year! on the front right is a square bottomed basket. see if you can work that one out!!
  Weaving coconut palm brings me a lot of splendid happiness!
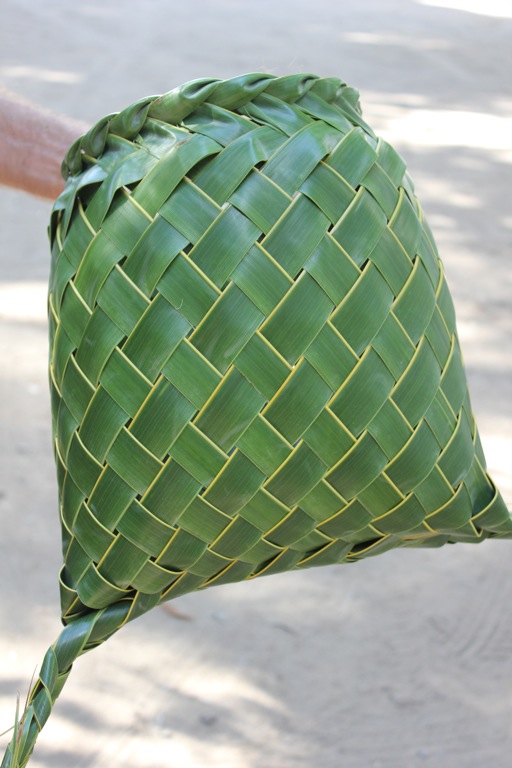
and now the large Taro basket looks golden and strong in it’s dry form some months later.

what are you weaving into your life at the moment? would you like to do a Coconut Palm Weaving Workshop with me next year in Queensland?
Riva Del Mare {a mama knit}
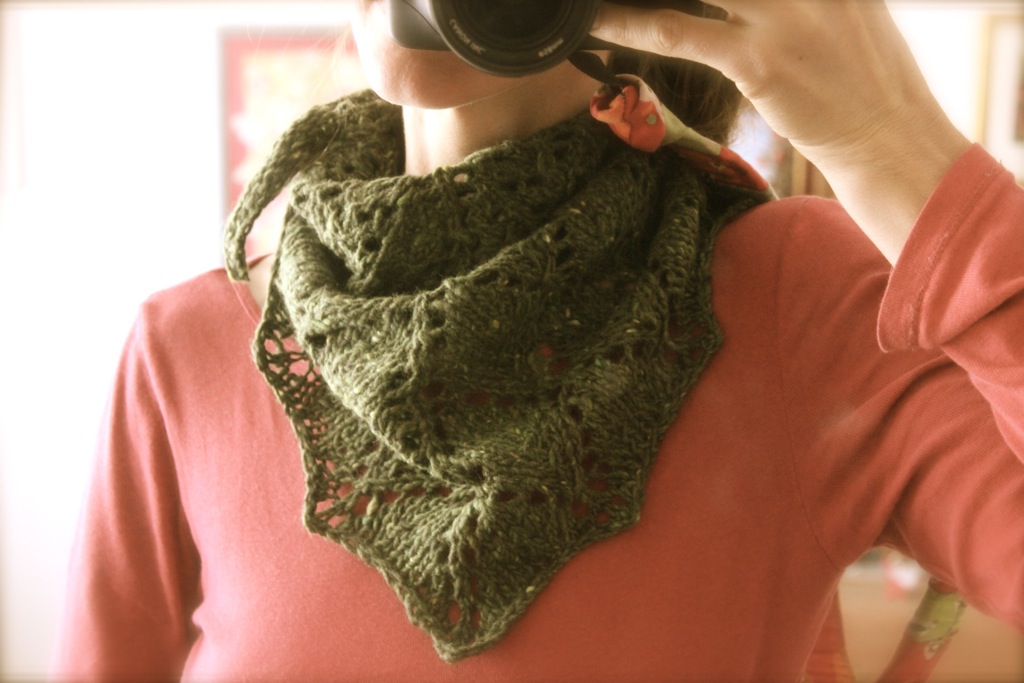
I recently completed this beautiful Riva Del Mare shawl.
finally knitting something for myself and lady it’s had a lot of wear and a lot of admiration.
the delicate lacy knit has a leaflike pattern along the outer edge which appealed to me. i haven’t done masses of lace projects, but i enjoy the concentration needed and turning lines of gobbledeegook code into something oh so gorgeous!
i may make those socks one day mama…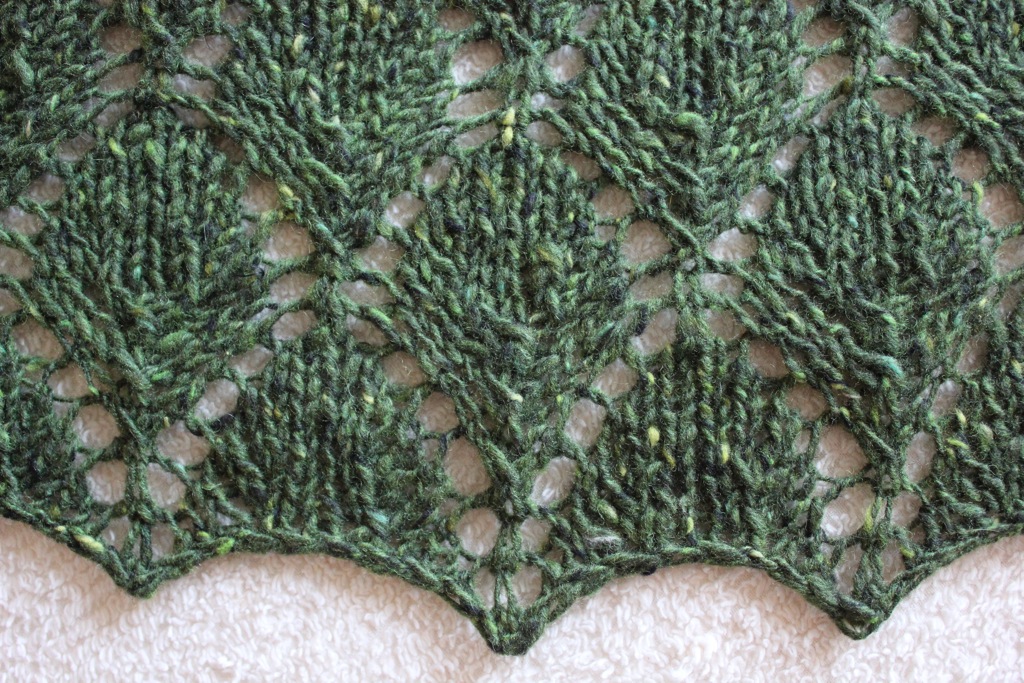
i ended up test knitting the pattern for Joan and enjoyed it so much I will use it as one of the patterns in my Introduction to lace knitting workshop {for adventurous beginners} at Weave in Bellingen in November. don’t be scared. adventure beyond knit and purl into the holey land of lacery…

can you even guess the piece begins at the top centre and you knit in a ever increasing arc? so clever!!!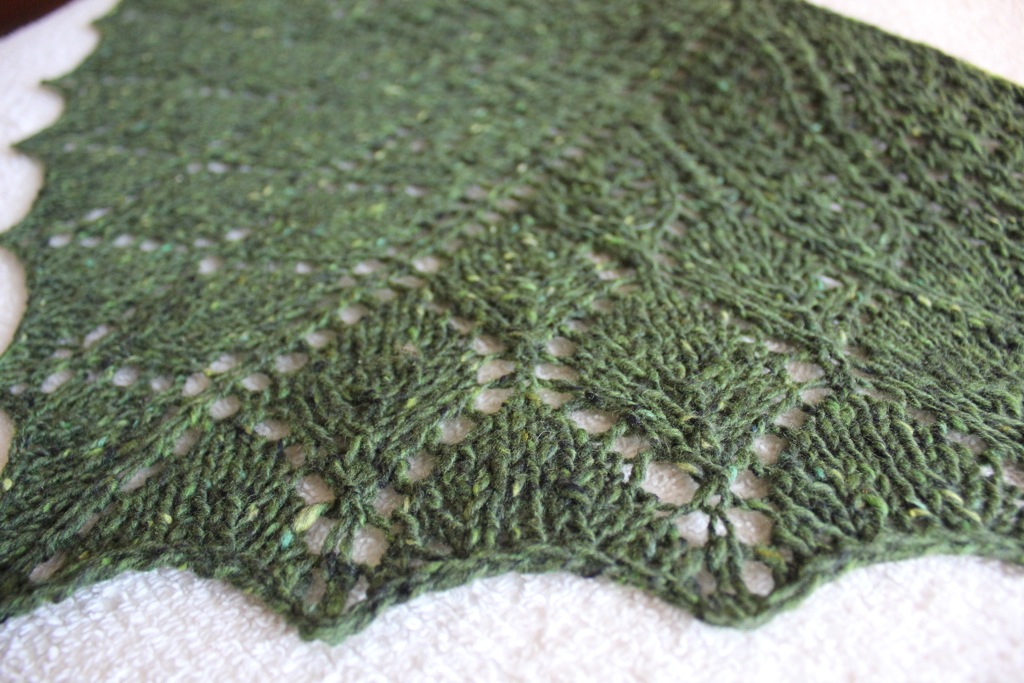
Joan appreciated my photographs so much she has featured them on her pattern! That was exciting for me! you can see them here.
fun fun fun

i have found the small kerchief a very satisfying size project! i;m looking for another…
might be the thing for that ball of Canadian handspun…
thanks to my beautiful model, you know who you are x
ps i even blocked it! i’ve never done that before….. proper good one knitter now!
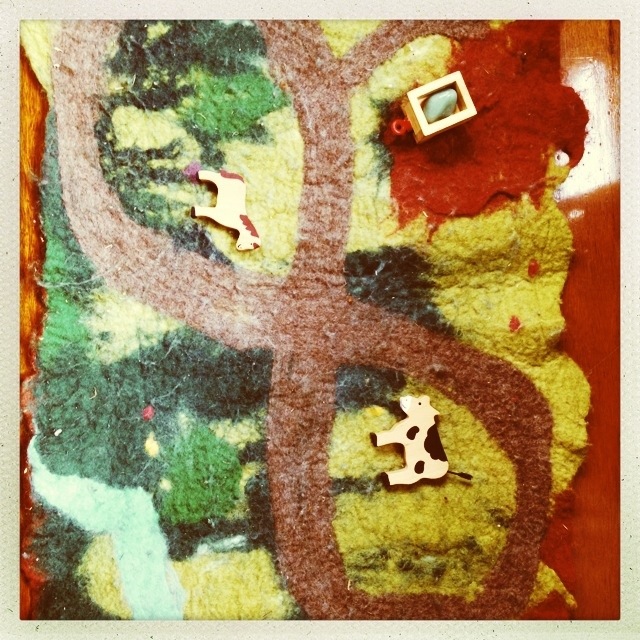
Wet Felt a play mat/cushion piece/anything rectangle
This one is dedicated to my dear friend M
who has patiently waited a year for me to complete this request on how to felt a playmat!
you may already have just You Tubed a wet felt tutorial or taken a lesson elsewhere
but dear one, as this unfolded i thought of you and so
enjoy
xx
Lily felted this piece as a backing for a giant granny square cushion for her chair at school.
Tutorial to Wet Felt a Play mat
materials
a pile of roving (fluffy wool)
warm water in a bowl or bottle
detergent/soap
curtain netting
if it’s large a bamboo roll blind to roll the piece in
work in a water safe zone and have a towel on hand to mop up excess water
begin by making three even layers of roving, alternating the direction of each layer.
to do this, grasp lightly a section of roving with your hands about 20cm apart, pull and you will release an even section of wool. too close and the wool fibres will not seperate easily
fluff up and lay these sections working one side to another in rows
once you’ve done the three layers {backing, filling, top layer} pat all over and patch any thin places
then
place your fluffed out decorations on the top layer {Lily put her name}
these decorations can shift during the process so dont begin with anything complex
for a playmat place on appropriate colours for fields, water and maybe a road…

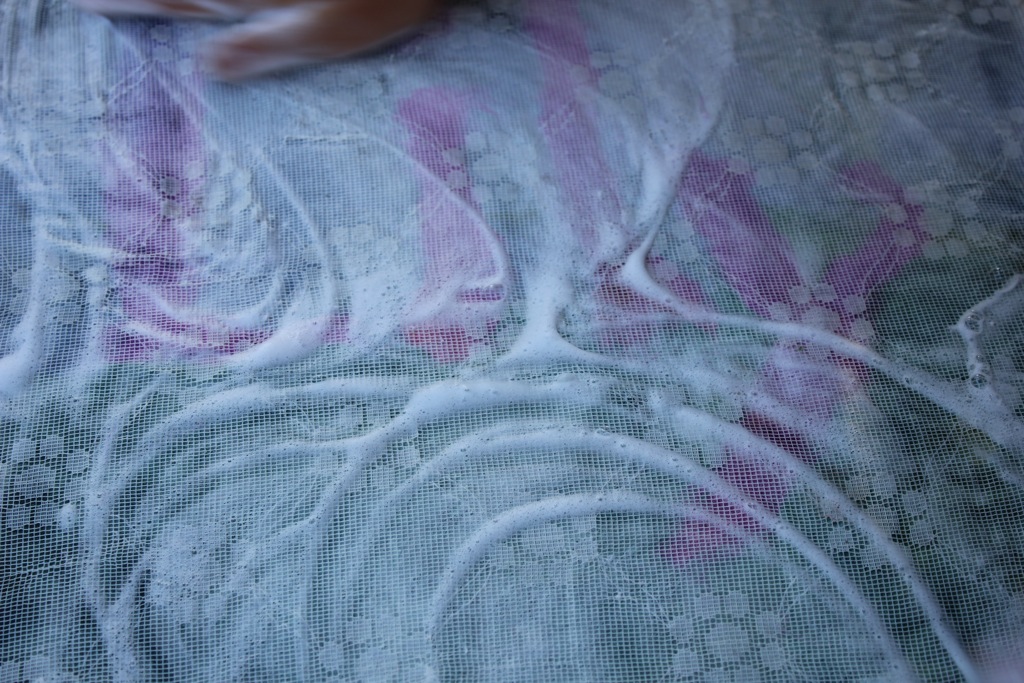
place your netting over the top and sprinkle with water until all is evenly wet and then squirt with soap
initially you are simply patting lightly to get the water through and the soap to begin penetrating
soon you can gently rub, light hands make beautiful feltwork at this stage,
the aim is to get the wool fibres to begin binding together and all the layers in cohesion, including your decorations
lift off you net carefully and check it’s all laying in place, adjust as neccessary
you can begin more vigorous rubbing, it should be wet all through and bubbly at this point
three keys to good felt
soap, heat, friction
keep rubbing until you reach pre felt stage, tested by pinching and lifting a small section. if it lifts together it’s pre felt if the fibres lift off or seperate keep on rubbing {see photo below}
at pre felt i like to flip the work and make sure the back is pre felted. at this point no unbound fibres will join in.
to create neat edges, rub your hand in a wave motion along the edge of the piece, gathering in the edges tidily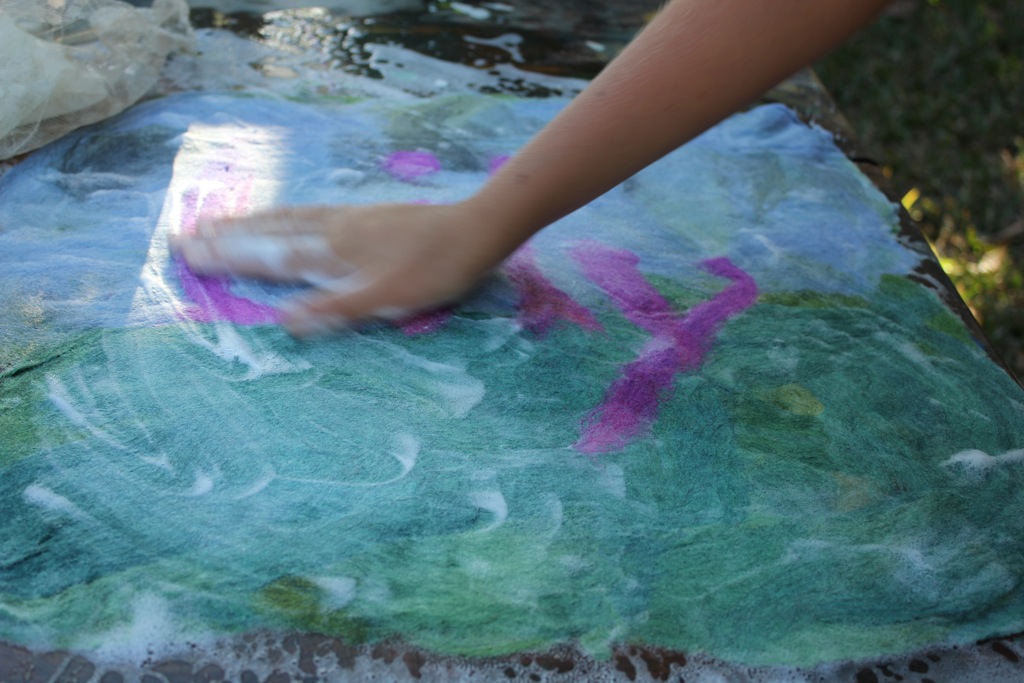

after pre felt you can handle it more vigorously as everything is in place. rub rub away and then if you want to shrink and final felt it in a fun way, squeeze out excess water, thrash the piece around and scrunch it and toss it down on the table. {therapeutic also}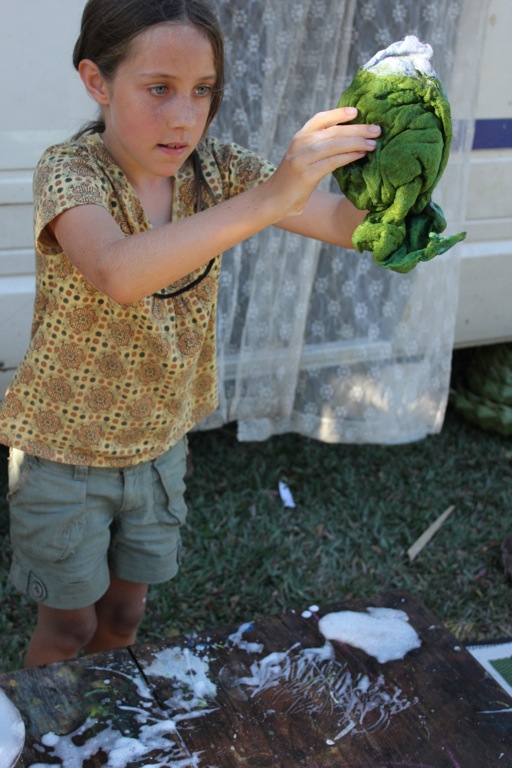

Lily did’nt care for an even edge as you can see below, but do notice there are no stringy bits hanging off the border.
when the wool has reached a good thickness, sturdiness and strength, you will notice small ridges/wrinkles forming, i usually stop at this point but some like to continue pounding it until this is really formed and the piece will become a bit thicker and smaller. as you feel
stretch it slightly to create flatness and a good shape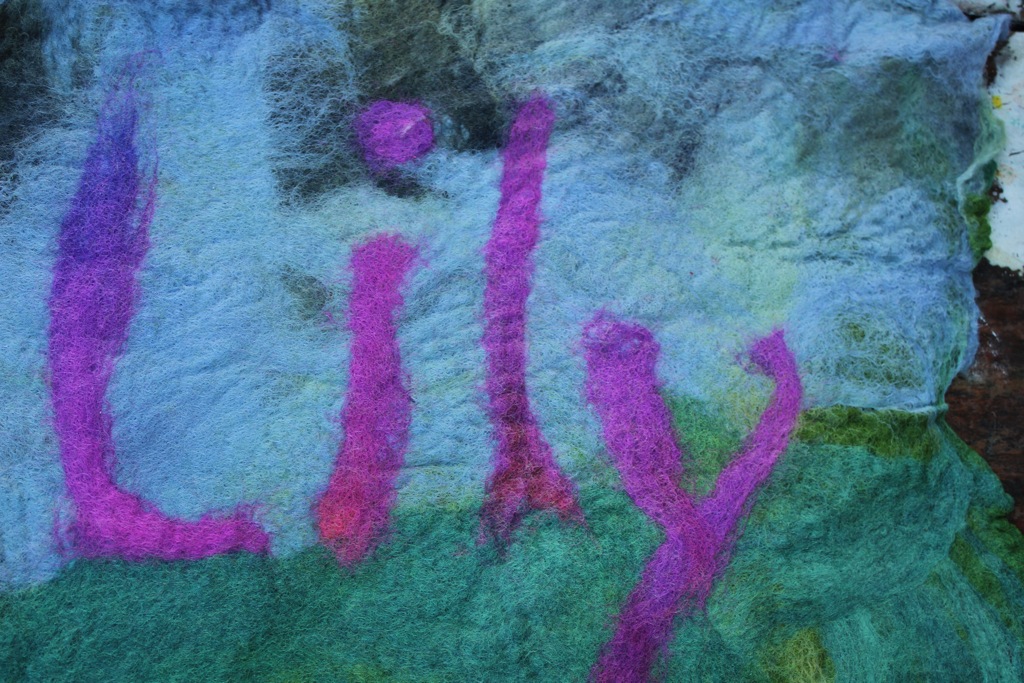 Lily’s complete piece ready to lay flat and dry.
you may see glimpses of the production of two other playmats of mine here

Cedar’s mat ready to begin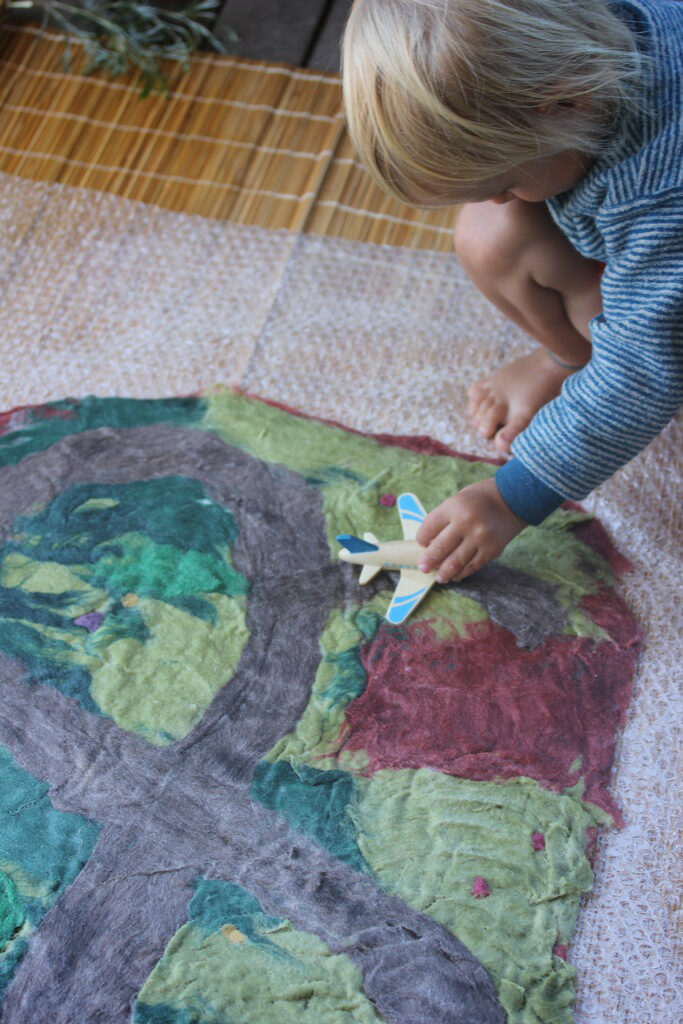
nearly complete, Cedar is impatient to play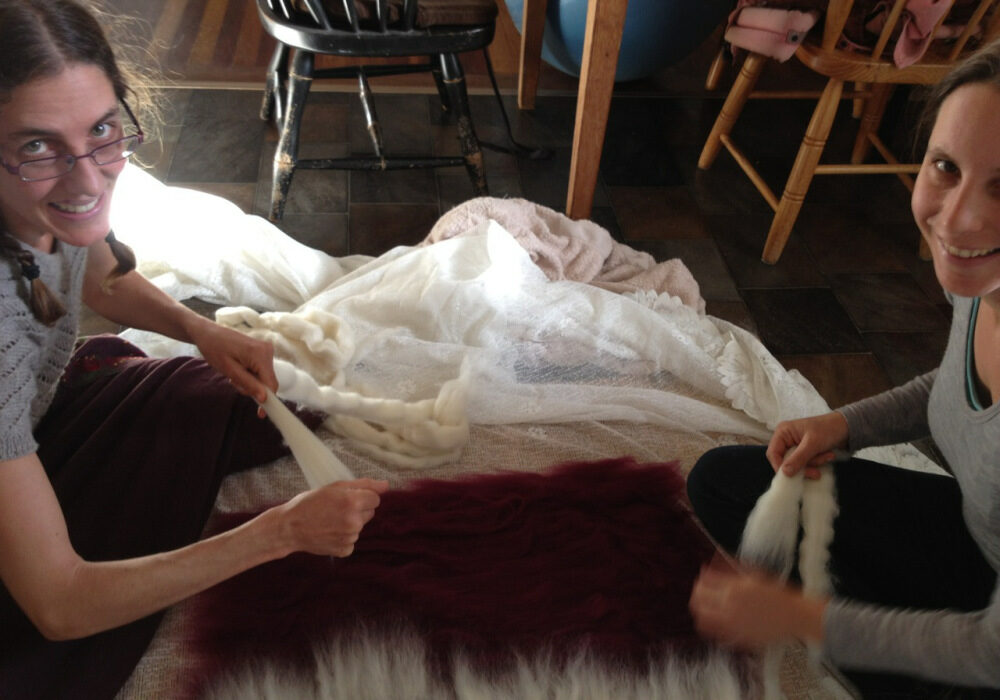 working on my niece’s playmat with my sister
