13 years

Beloved daughter mine
Like wildfire your first breath ignited my mama ness
Like wildflowers you blossom without shy boundaries or pruning
Like sunrise you bravely wake to each new day
Like joy unbound I cherish you and pray you keep growing strong and kind
Beloved daughter mine

20170717-204343.jpg

A Berry Good Birthday 


   This berry good birthday for me included **
Being in Tasmania !!!!!

With Beloved family

A wildflower and moss wreath around my table place

Sweet gifts, something from nature something to read something to wear something to eat something to enjoy

Savoury colourful breakfast

Tasmanian cheese platter for lunch ( lots of Tongola goat milk cheeses) mmm

Berry berry delicious berries and cream with an almond meal sponge cake ( thankyou mama and Lily)

Games

Walks in the bush

Swims in the icy southern sea

Fossicking amongst sea rocks for urchins and shells

Kisses and hugs 

Berries

Lucky me

Xx

Roselinde

PS welcome to the New Year everybody! 

 As my writing is sporadic here, I do wonder who’s out there reading my posts (aside from my family and friends) and what your life looks like. Do blogs still get read and cherished, when they are so much longer than other social contacts?

Having this blog has been so important to me and aside from a nostalgic look book for myself and family it has been a place of creative expression, expansion, glimpses of life’s gold and sharing with a bigger world than my home life. It’s been wonderful to have something all my own amidst family life and  It’s incredible to feel connected to  folk near and far!

I’m dreaming up spending more time here this year, and to do more of this thing I love to do yet seem to be struggling with. Words are being clunky in me, the songs of expression hushed and I can only overcome that with writing more, and anticipate the joy that brings me.

If you are still out there reading along  I’d love to hear about what you enjoy seeing here on my blog!

if I don’t know you personally I’d love to know where you are from and how your days are shaped. Tell me if you have a blog and I will come and have a visit!

Blessings upon the coming year.

May peace reign within and without 

***

Makings in Advent/Cinnamon star recipe

Makings in advent. 

Air dried clay ornaments,( in between arguing over who had more clay)the children had a great time making me guess what implements had made what impressions.  We used cookie cutters to cut them out and they took 2 days to dry thoroughly.   
    
  So many stars…  
 
Sweet Swiss wood cut decorations from our time in the Interlaken region this year.

 lily made her own cosy house transparency one morning.   
As we love our Swiss Christmas biscuit tradition so much, I will share 

I have a new favourite Zimpt Sterne Rezept / cinnamon star recipe this year

This one is gluten free also. 

 (sorry S for giving you the sticky old one…)

I can’t remember if it’s a copy from somewhere or if I adapted something else. It’s written on a scrap of torn paper with a swimming lesson note on the back….

Zimpt Sterne/Cinnamon Stars

250g almond meal for the biscuits

150g almond meal Extra for sticky dough or dusting while you roll out

1 cup rapadura sugar

2tsp ground cinnamon or more to taste

A small pinch of clove powder

2 egg whites beaten stiff

Mix 250g almond meal, sugar, spices and egg white to a pliable dough. Add more almond meal if it’s too sticky. You will know! It really shouldn’t be a painful messy experience! I knead the dough quite vigorously in the bowl. 

Dust with almond meal and roll out on/or between baking paper to about 5 mm thick.

 Refrigerate overnight or at least three hours.

Cut out your stars, rinse your cutters if they’re getting too sticky, dust everything with almond meal as you go if needed. 

Bake at 180’c for about 8 minutes. Pull them out of the oven when the bottoms are going slightly brown as I like them when they’re more chewy than dry and crisp! Oops many a black star has come outta my kitchen. 

Cool them on a rack and invite me around for a cuppa and a biscuit. 

I mean share them with your friends and family…. 

As an option you can mix beaten egg white with icing sugar and decorate them pre baking. More sticky messy fun! I bought a piping bag especially. Then you have snow capped biscuits. So appropriate for Advent in summer Australia, don’t you agree? 

Inspired by The Children Of Noisy Village(Astrid Lindgren) Cedar suggested we have a bean guessing game and make a prize cookie from all the scraps of dough. They got a jar of chickpeas and a notebook to record all the guesses from our home and neighbours. The children ran around giving biscuit samples and collecting guesses, displaying the prize cookie!
Well done J for guessing 1004, hard to believe this little jar held 1163 chickpeas! mm enjoy that cookie! I was sure there where only 381…..

  
Peace

X Roselinde 

celebrating the first week of advent (2013)

And so.. There I found this writing from years gone by and though a little incomplete I will just hit POST right now and share with you.
And so… Advent begins and great transformation takes place within and without…

Jesse has encouraged me to share some of my stories of this time.

I will focus on the first week of Advent and share some of the rituals and traditions we have collected over the years and are making afresh.

i have gathered inspiration from so many places and enjoy creating my own ideas. i want to create a flow of events to celebrate this coming season, bringing more depth and richness to the anticipation of Christmas and the summer festivals. it’s all evolving, it’s abit mixed up but i trully love it and enjoy what we are creating as a family and community. The hope and positive reminders for my inner journey are wonderfully reflected in these adornments and activities.

last weekend {1st Advent} we began folding stars from kite paper to adorn our windows. some good tutorials here on my pinterest page. This along with unpacking the candle windmill and making advent biscuits began our Advent period.

IMG_0024

on the table sits our candle windmill. My German parents sent this over a few years ago and it’s appearance awakens the Christmas season in the household. The heat from the candles makes the windmill turn and the angels below circle the tree. we admire the carefully shaved wood curls spinning and the light glinting from the angels cheeks. Each Advent sunday we add objects connected with the four kingdoms. Reflecting the earths preparations for the Christ arrival, or the process of evolution, or the blossoming of the earth into mid summer  and so on. finding my own depth of meaning which i can trully celebrate inwardly has been my goal these last few Christmas/Solstice seasons, that each activity i unfold has authenticity for me in some way.


Treasures which may appear through Advent

1st Mineral kingdom; crystals, shells, bones, stones

2nd Plant Kingdom, leaves, flowers, lichen and moss

3rd Animal Kingdom; feathers, wool, felted animals, miniature animals

4th Humankind; little wooden dolls, something made by our hands, perhaps Mary Joseph and their donkey who are travelling through the house throughout advent will come by the table at this time, nearly at the stable.
IMG_0065a
t the closing of each advent week, the treasures from the table will move to the nativity scene and build up the picture over there, while the table is devoted to the coming kingdom.


then we created an advent wreath to hold four candles which we will light one more each advent sunday. I recite this commonly found poem from an unknown author

or i have taken this song into my heart which a friend recently shared with me. it is delightful to have joyful seasonal songs to sing which dont fall under cheesy carol category!

, we rolled our own beeswax candles this year for the wreath and the windmill. the wax was gifted to us from a bee keeper. they where dirty and a little tattered but brushed up well and smelt divine with honey

IMG_0025 IMG_0027 the wreath frame was from some garden vine, wisteria i think. i twisted four wire spikes onto the frame. really twist the wire tightly against the wreath so your candles don’t wobble. wrap your wreath with greenery and stick your candles on firmly. i would use thicker wire next time it’s proving to be wobbly. i hear if you coat your wick in wax before rolling you will get a better burn…IMG_0028
IMG_0030 IMG_0032cedar liked snipping up the scrap pieces of wax sheet.IMG_0034 we harvested the evergreen fronds from the old section of the Bellingen market site. i have been eyeing of this particular tree for months in anticipation…IMG_0036 IMG_0037 IMG_0043 Lily was telling me “in the olden days a young child would wear the wreath like this mama”
IMG_0046 our advent table has an indigo silk as the backdrop. each night we put gold stars upon it. Lily hung up her two felt angels to watch over the scene. Cedar rolled the central little candle. we will light it on Christmas day; with the four larger advent candles being lit over the coming weeks.
IMG_0054the beauty of hydrangea and wattle blossoms. I can smell this Wattle tree from 50 paces away in the warm wind and it sends my heart into longing for my childhood places in Western Australia…
IMG_0060t
he stable is made from bark and the manger is from a didgeridoo off cut filled with moss. awaiting the growing scene over December and the arrival of baby Jesus.
IMG_0062
 I have stuck the advent calenders onto the cupboard below. Lily has a beautifully illustrated scene from her German Oma a few years ago to reuse. Lily made Cedar a calendar this year with little illustrations or messages behind each door.
IMG_0063

IMG_0067 i don’t recall ever having a front door wreath before, but Lily made this one and well, i have to admit it looks totally festive on that red door with our door bell hanging so centrally just by luck! IMG_0068 the stones i painted last Sunday on mineral kingdom advent. we ventured out to The Promised Land and sat by the Never Never river inbetween downpours and painted and picnicked. Cedar initiated a little fire action so we burnt sticks until the rain returned and we ran for the car. my stones slightly smudged. water color paints where the gift of the day made from mineral colours. {once upon a time..}

simply advent


Advent unfolding

Slowly simply 

Plant colours dried and dyed

Gold and silver, mint and rust

Dusty green and watered silk

Scented with eaucalypt 

Light a candle under the wreath

Light a candle in my dark night

Pray for grace

Play for space

Gently unfurl

What is genuine in this moment

Admire and melt into summer colours and 

Breath of wind and starlight kisses

Unadorned and humble 

Feet on the ground

Candlelight in the window

Calls me into myself

Xx

Blessings

Roselinde


Mary’s little Donkey

  
I have been reading Mary’s Little Donkey again this advent to the children. I am living into the characters and their gifts in a new way this time around. It’s very beautiful to have a deeper experience while reading a children’s story.

Today Cedar was adamant we made some window pictures (I had planned tomorrow) however, this very quiet space together, without Lily or Jesse here blossomed into beautiful creating and connecting, and this little donkey transparency was born from my hands. Cedar worked alongside me on his own window picture and proclaimed it finished until he saw mine had a ‘main character’ and then he needed a main character also. His hare  will be wonderful for Easter next year too! 

  
I just LOVE it when I make something I really love.

Xx

Roselinde 

PS materials

Black card

Tissue paper

Scissors

Stanley knife to cut out the window neatly

Glue stick

Patience

Fiddly fingers, the larger you cut the window the easier it is to manage

Tip# 1

Have a layer of white or softest cream tissue paper as your frontest layer and glue your picture layers onto the inside of this. Then a fix the whole lot as one piece into your card.

Natural Dyeing of Eggs

IMG_0038

Friends in town invited us for a natural egg dyeing date today. It was a new method to me and the results are beautiful! In years past we have water colour painted, drawn upon, dyed in stockings with onion skin and parsley, wax crayoned and dyed and more. something in the natural plant and berry dyes pleased me so much today. the shades are unpredictable and all the colors are well, edible.  it brings to mind my natural dyeing of silk joy which has been put aside for many months. i keep opening the carton to caress these wonders. thankyou hens.

it was a pleasure to share one of our/their Easter rituals as often I hold festivals for my family alone. we spoke about festival traditions in the family and I realised with the weekend approaching fast i am ill prepared! {apart from having lots of eggs}. I look forward once again to seeing what authentically comes for the festival this year. it’s an interesting time to marry Easter to Autumn and i have found a few stories and inner images which sit peacefully for me. our Autumn table evolves slowly and soon the Egg tree will appear.

this book Easter in Autumn is helpful for southern hemisphere dwellers. i am seeing how contributions can become tradition in a few short years and the grounding this gives my children and myself. if you want to bring more depth or tradition to festivals, i recommend beginning simply, or adding just one or two things you can easily uphold and add to over the years.  i enjoy Lily’s anticipation of events, Cedars current enjoyment, worry expectations {my own mostly} may not be met, {can i really make sourdough hot cross buns this year?} witness her recounting past festival highlights to others and propel myself to find my Zopf recipe!

IMG_0049IMG_0043 IMG_0048 IMG_0055 IMG_0054

Natural Egg Dyeing/Eco printing method

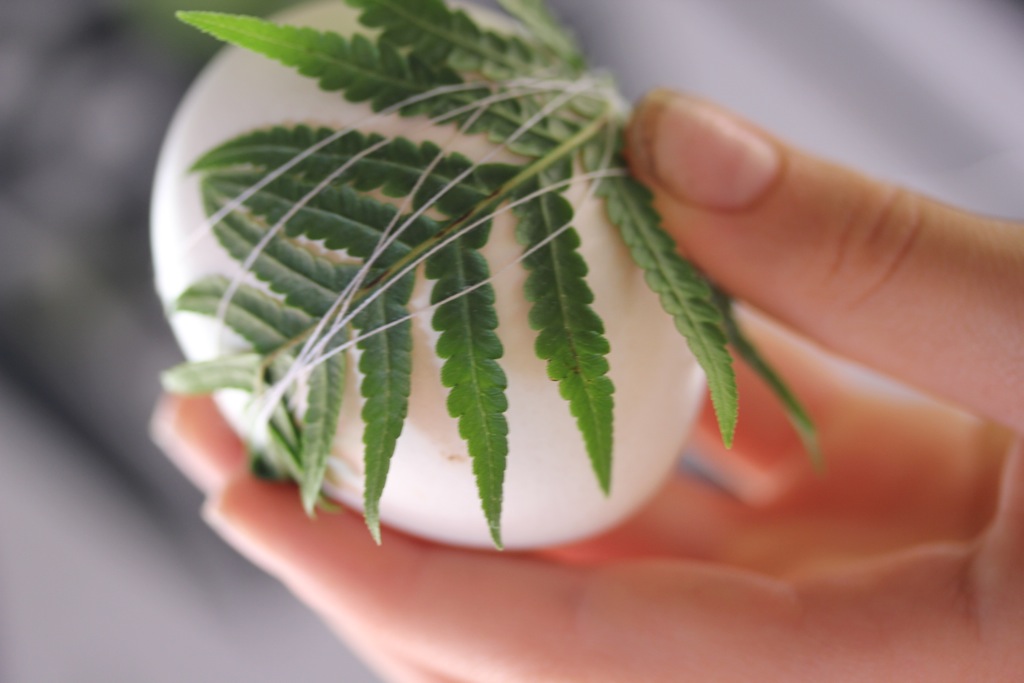
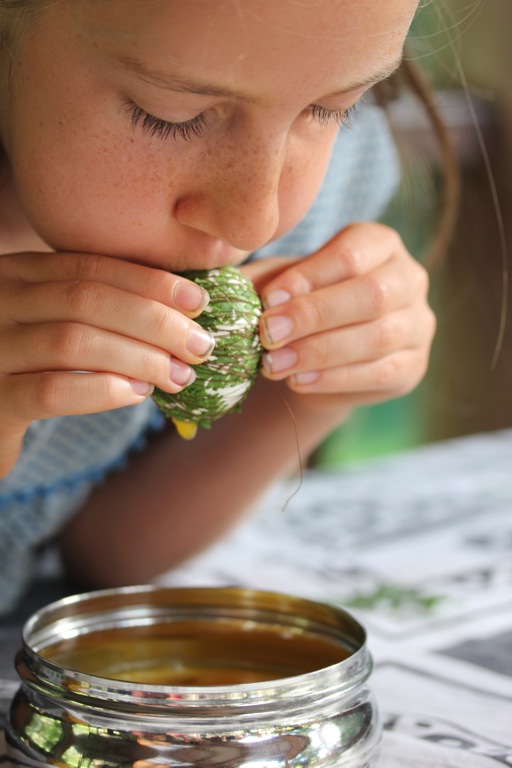
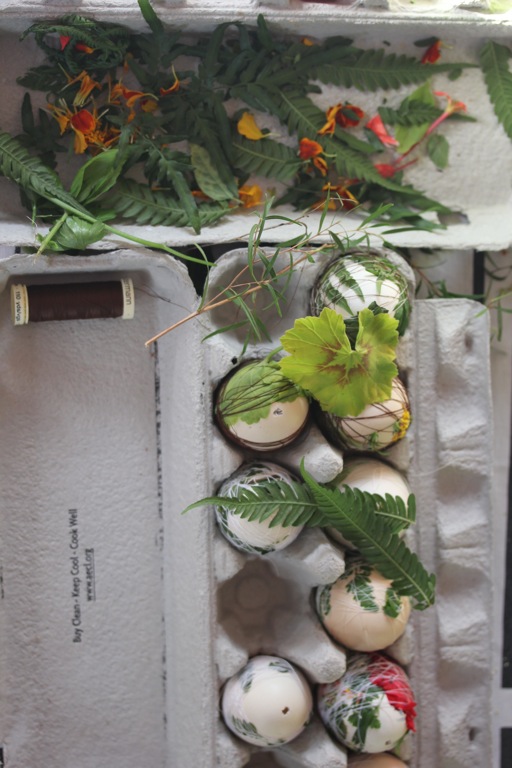
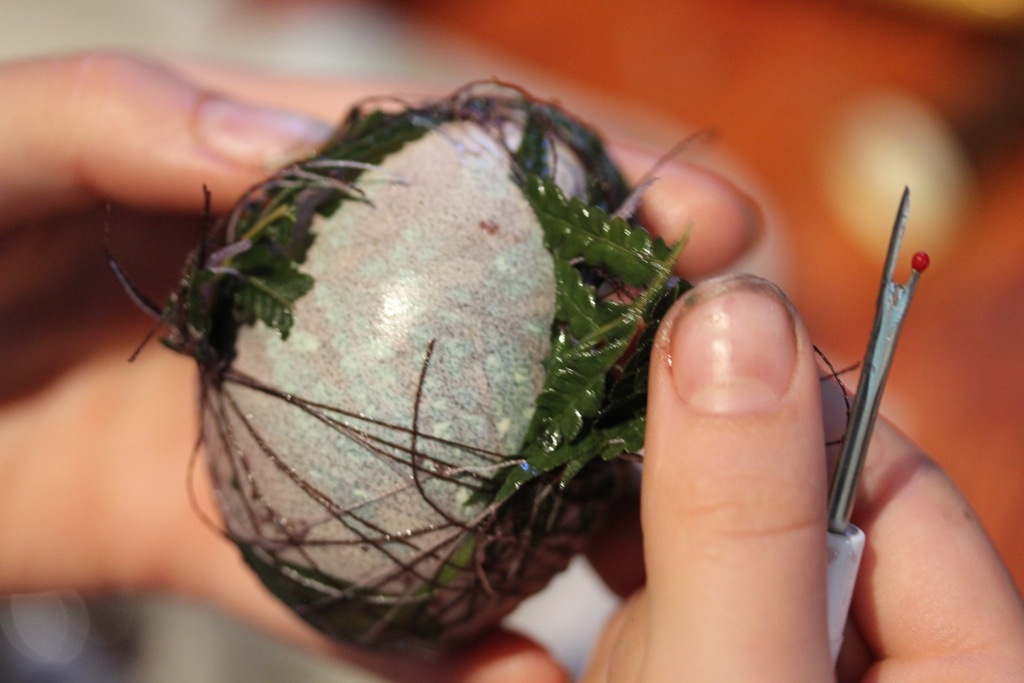
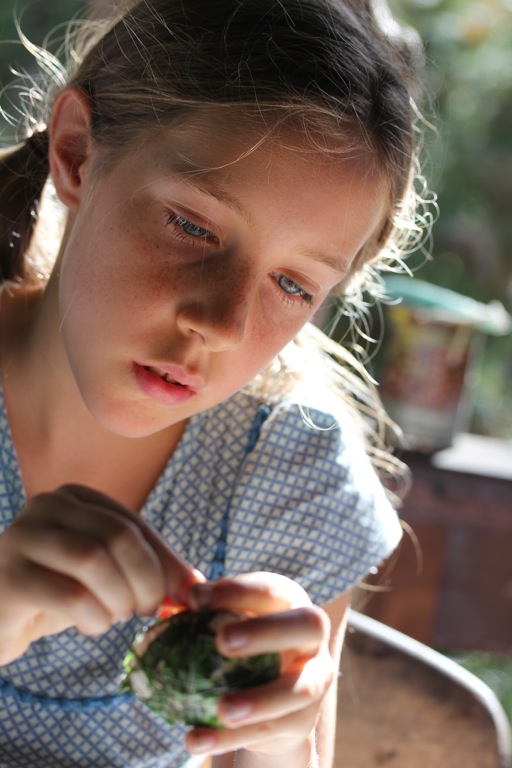
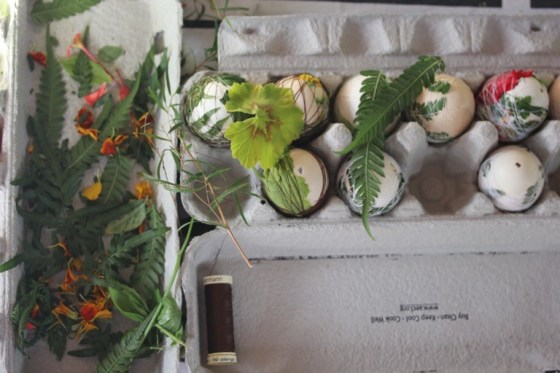
Using just herbs, ferns, flowers and weeds from the garden; press the leaves and petals over the egg (white shells for best color results, this year i found them in the library, raised by the High School kids garden chooks) and carefully wrap with sewing thread. this is tricky with a T at first. so be patient and help the little ones. leave a tail of thread hanging at the beginning so you can use it to tie up at the end. the more you wrap and press the leaves onto the egg the better your chance of a print. leave the north and south pole of the egg bare so you can blow your egg out afterwards. {thankyou for your wise counsel today E}

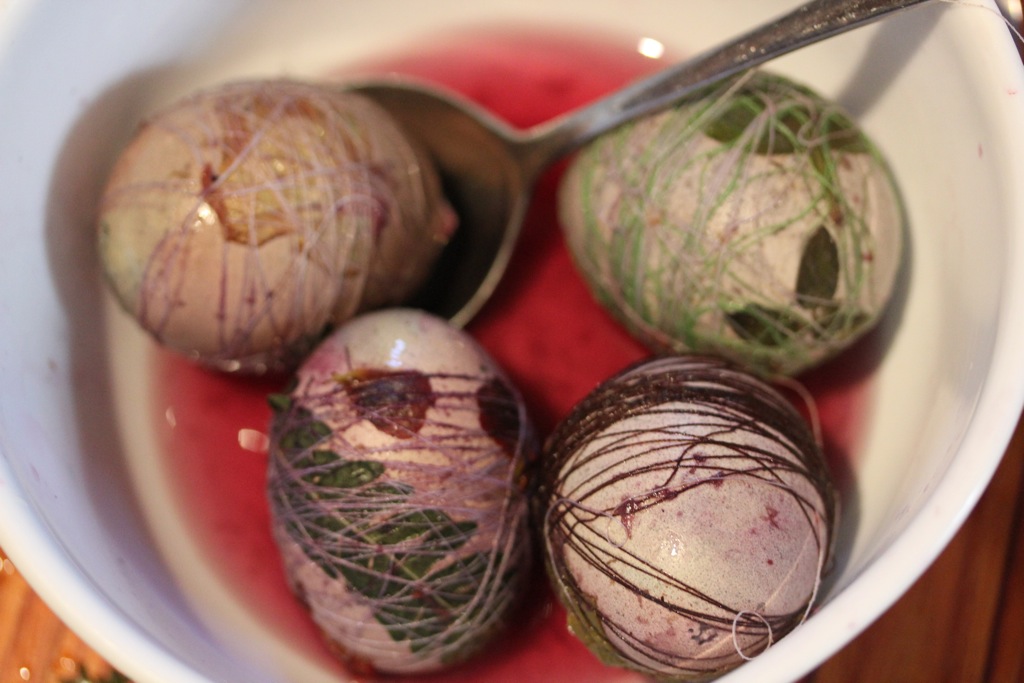
carefully blow your eggs and then pop into boiling water/dye bath for up to 10 minutes. for the dye bath use any plant/food matter which has a great colour content such as berries, onion skins, coffee, tumeric, red cabbage, etc only 500 mls or so is needed to do batches of 4 eggs.

IMG_0066 IMG_0052 IMG_0068

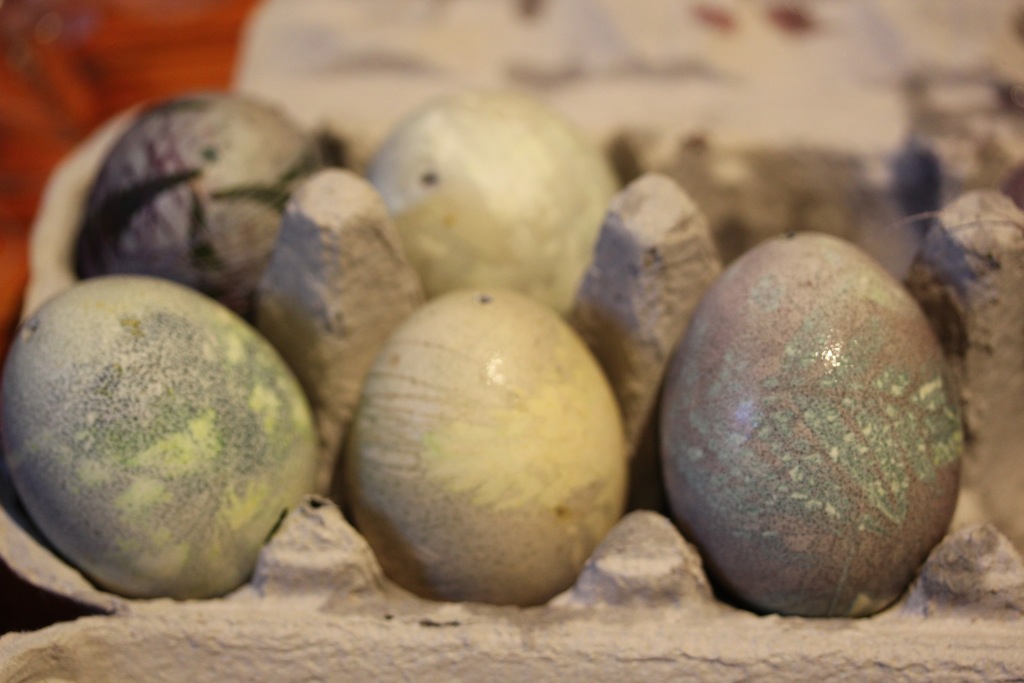
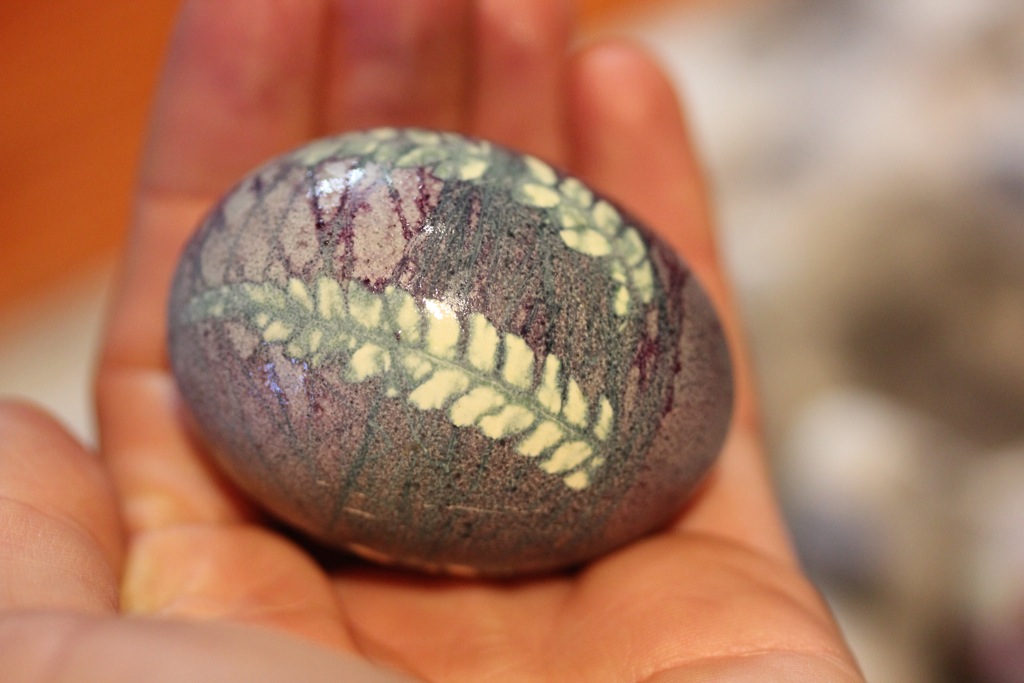
a brew of red hibiscus flowers in water dyed the shells a subtle blue, the pot of mixed squished up berries had more success with mauve to rich purple. keep turning the shells in the boiling dye brew to get an even colour as they will float on top of the liquid. remove and once cooled remove the thread and plant matter with a thread cutter, unpicker, seam ripper??. (technical name eludes me right now) useful sewing tool. everyone needs one!

IMG_0076 IMG_0077 IMG_0078

so for our Easter tree we have these beauties. we will break up matches and tie string on them to slip inside the eggs tomorrow.

IMG_0079 IMG_0080 IMG_0086

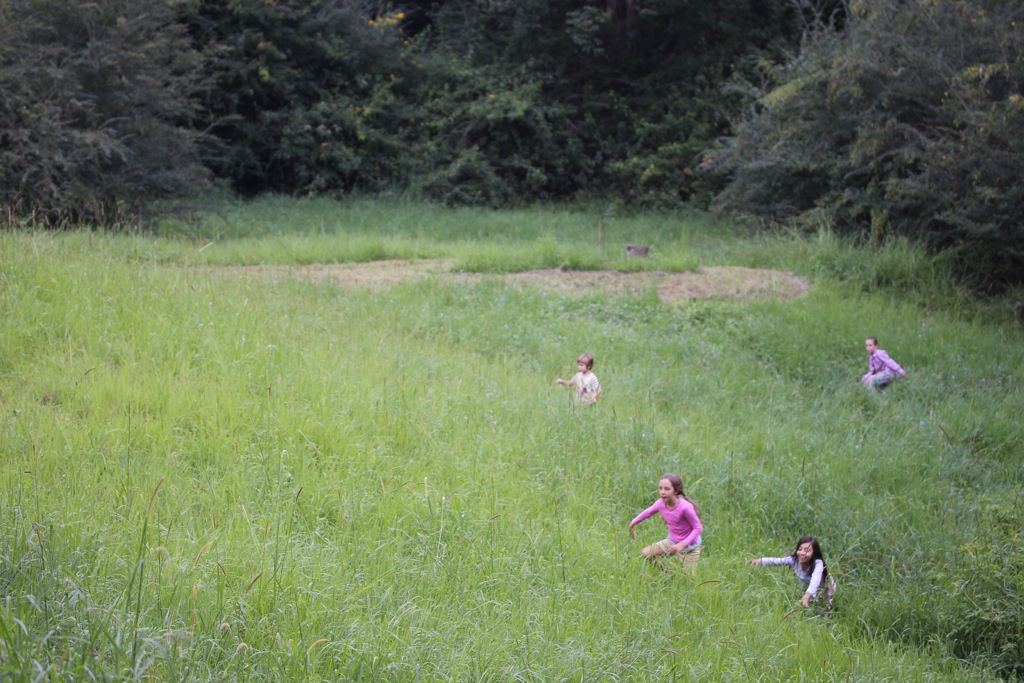
after all that fine work the children gallop exuberantly around the field. picking up ticks no doubt….

IMG_0089

a natural dye note to myself for next year.

marigiold petals dyed a wonderful gold.

waxy ferns made a resist to the dye

basil made a resist

chocolate mint left a lovely green

hibiscus left blue

parsley left green

and there where many surprises.

try a tumeric bath

*let each child have a different colored thread so you can easily identify them and wrap wrap wrap them very well.

*have a dog handy to lap up any dropped eggs

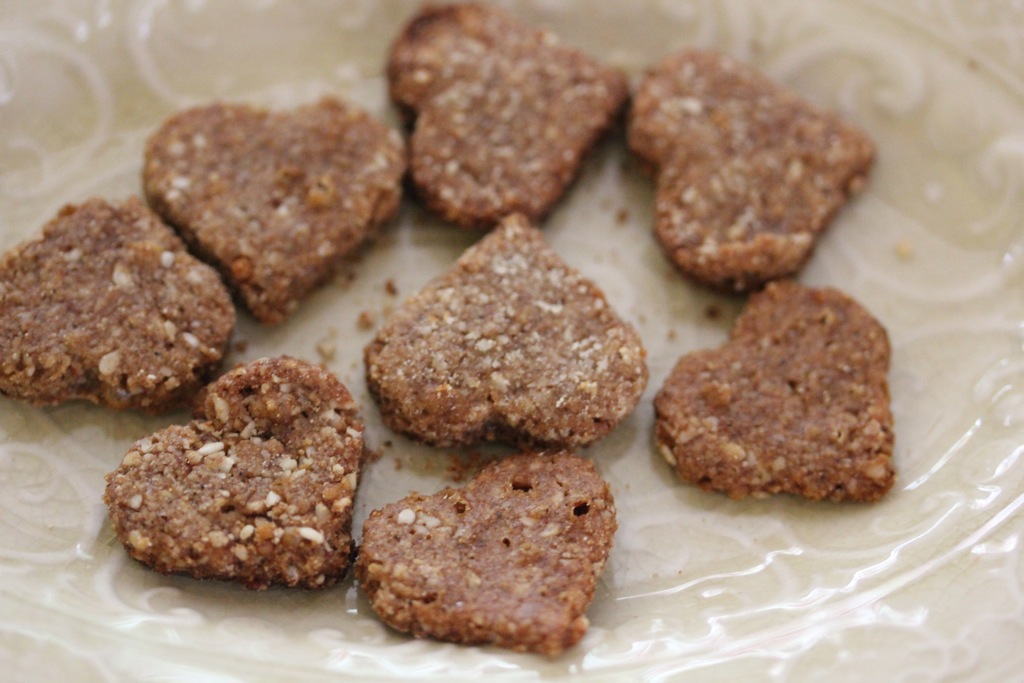
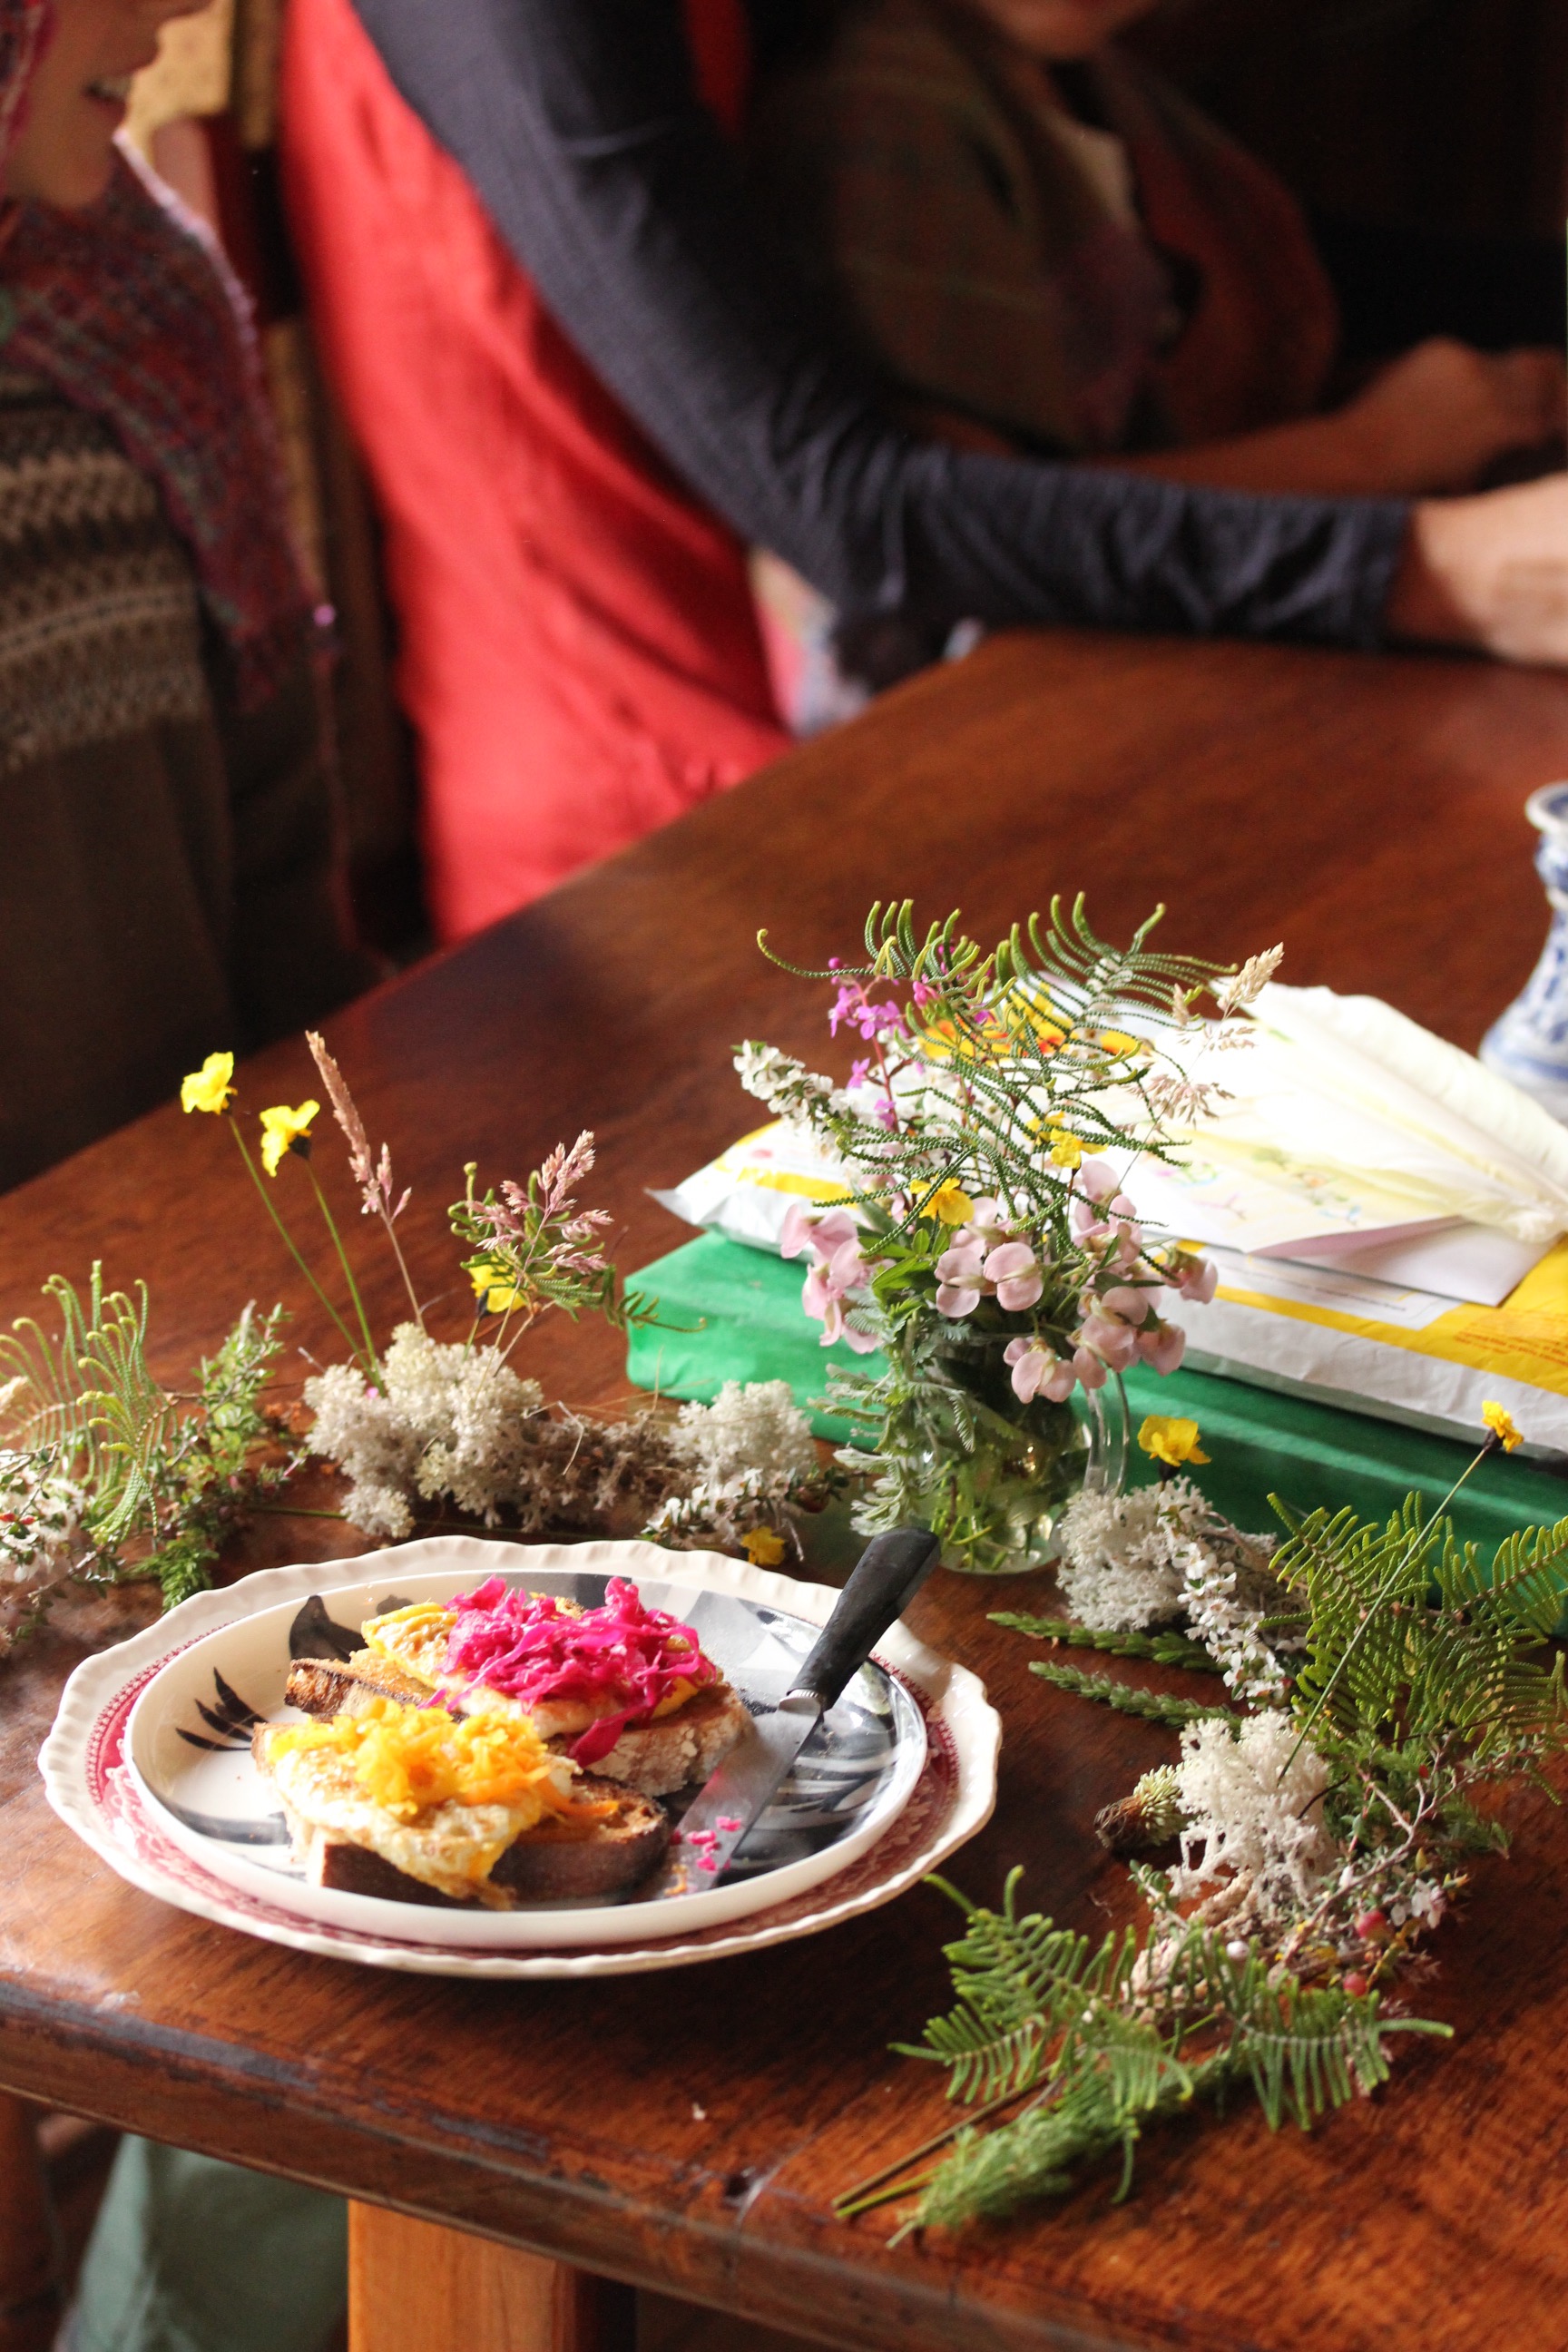
*make a potato and goats cheese frittata with the eggs….

*if you only use edible plants you could hard boil the eggs to eat them. though who gets hungry at a blue egg….

i have this post on my Easter and blowing eggs from last year.


so, what are your Easter traditions?

have you natural dyed eggs or anything before?

x

ps is it as odd for you as it is for me to be here writing and sharing once more? many reasons behind my blog holiday and i have written eggsplicitly about it all. it just isn’t where im at today. call it writers block.

Swiss Advent Biscuit Recipe

Each year for as long as I remember, my mama has made her traditional Swiss Christmas biscuits. a number of biscuit parcels have followed me across Australia! Lucky me! when I was seventeen and heading off into the sunset in my new yellow kombi, my mama tucked a parcel in my van to open for Christmas a month later. they store very well… Thankyou mama for these parcels of love and cinnamon. I inevitably cry and miss your hugs, and then i share them out to those lucky ones nearby xx

now i have taken up my own ritual Advent baking of biscuits. We bake on Advent Sundays these cinnamon stars and hearts. It’s the only time of the year i use this recipe and one other {after lots of experimenting}. the house smells of spices and sweets and we nibble them for morning tea through the week. We parcel them up in little paper bags we make, and leave them on our friends and neighbors door steps. this year we are using teeny tiny cutters and i cleverly saved a batch of rolled out dough and froze it last week so today i simply cut and baked…

last week i took some to my knitting class. one of my students said they looked like dog biscuits but tasted like the real thing!! ha ha!!

1st advent

My Adapted Traditional Swiss Advent biscuit recipe

Basler brunsli/Zimpt Sterne

{gluten free}

500 gm almond meal {450 gm for recipe and 50 gm for sprinkling paper when rolling out}

2 c rapadura sugar or less

31/2 tspn cinnamon powder

1 tspn clove powder

4 egg whites beaten stiff

baking paper

rolling pin

baking sheets

  1. blend almond meal and sugar
  2. add spices and beaten egg whites
  3. sprinkle a 1m stretch of baking paper with almond meal and squish your dough out in the middle length of it, press quite flat then sprinkle with almond meal and another sheet of paper
  4. roll out to about 5mm thickness
  5. let dry for 3 hours
  6. cut into stars and hearts
  7. bake at 150’c for 10-15 minutes til slightly puffed {mine took less than ten as very small, and i burnt the second batch! waahhh} really, bake them lightly. don’t get distracted vacumning…

share with friends and neighbours. leave goodwill packets on doorsteps… happy advent! i love all this memory making family activity amidst the deeper pathway of living through my own personal darkness and seeking the renewal of my inner light.IMG_0012